

Woo hoo! The FINAL BIG KITCHEN MAKEOVER POST!
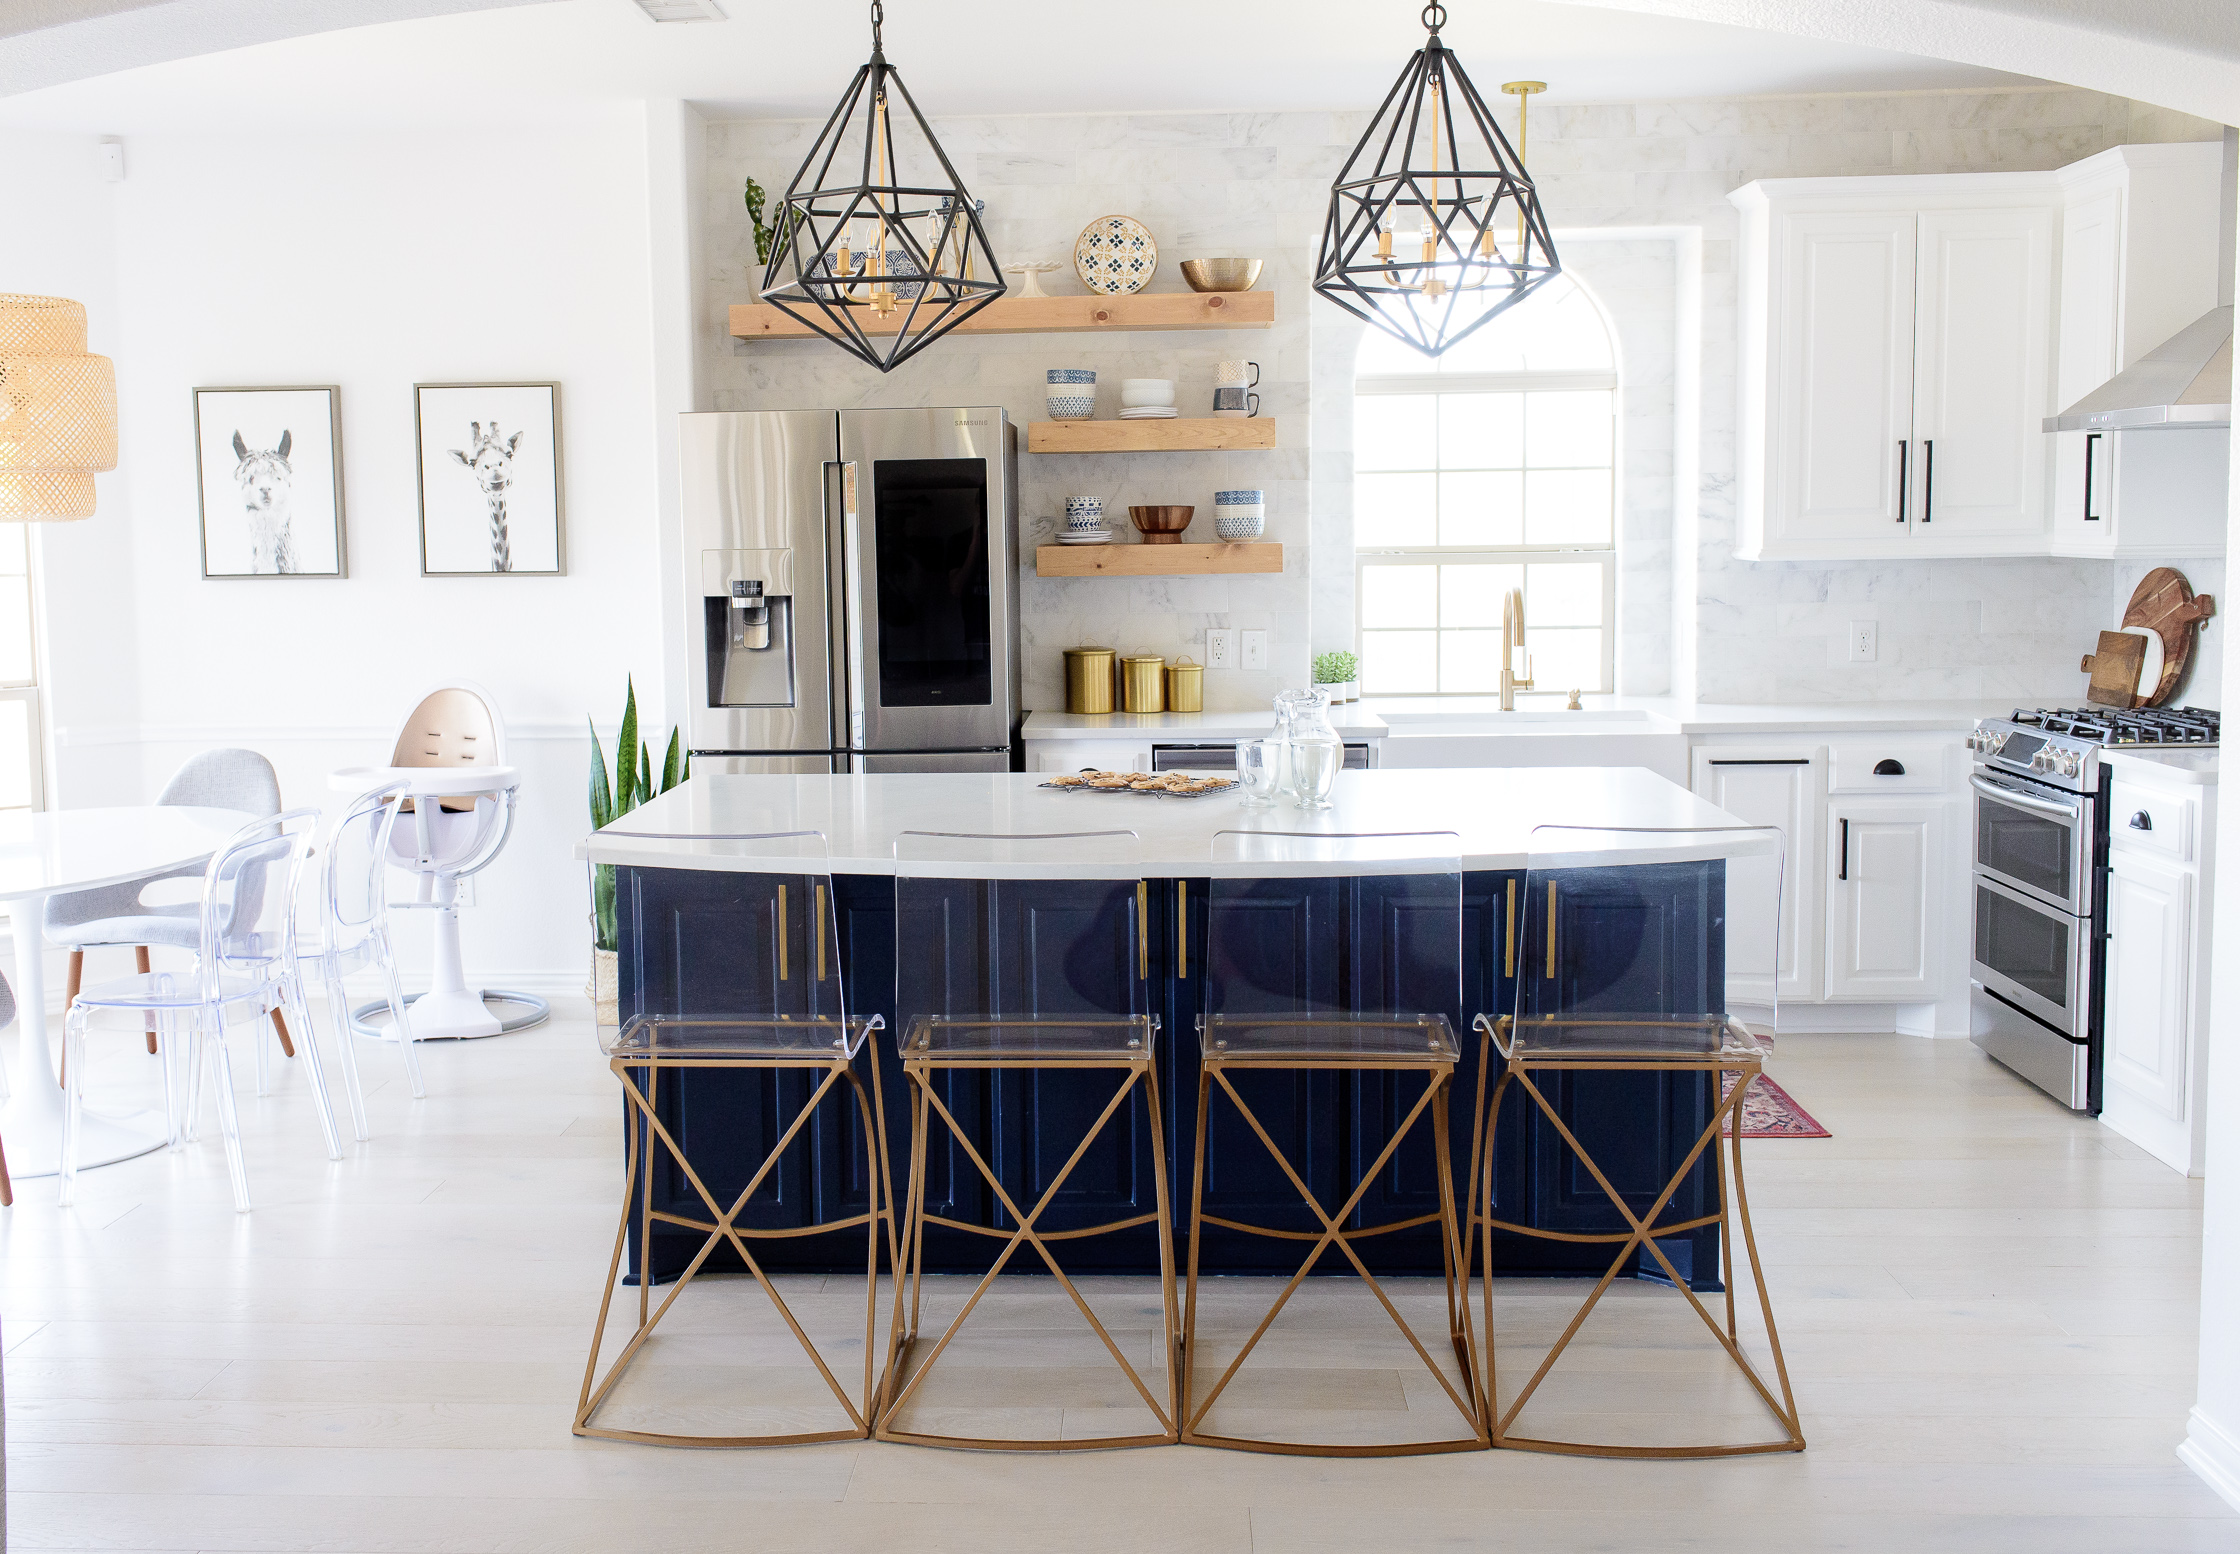
Get ready for photos chalked full of white marble, gold, natural woods, and a few animals to keep things lively. I’d love to start this off with telling you that I’m a dreamer. I’ve got huge visions for what I like to create and then I simply make it happen without apology. But I had NO IDEA WHAT I WAS DOING since I have zero design experience and have not read an inch of the latest trends in homes. I simply want a functional home while also being a die-hard-fan of every piece I bring inside with me. I wanted more than anything to feel inspired and moved when I walk into this space. And I tease my husband who second-guessed every decision I made (for good reason! My fantastic plans for the entire house were pretty wild.) We absolutely love each part of this kitchen and I would do it all over again!
ps. I linked every item at the end of this post. scroll on down 🙂
If you’ve been following along in reading my past blog posts (Umm, THANK YOU SO MUCH FOR THAT!) you may have seen my previous Before & Afters featuring the replacement of all flooring HERE and the huge paint job covering walls, ceilings, and cabinets HERE.
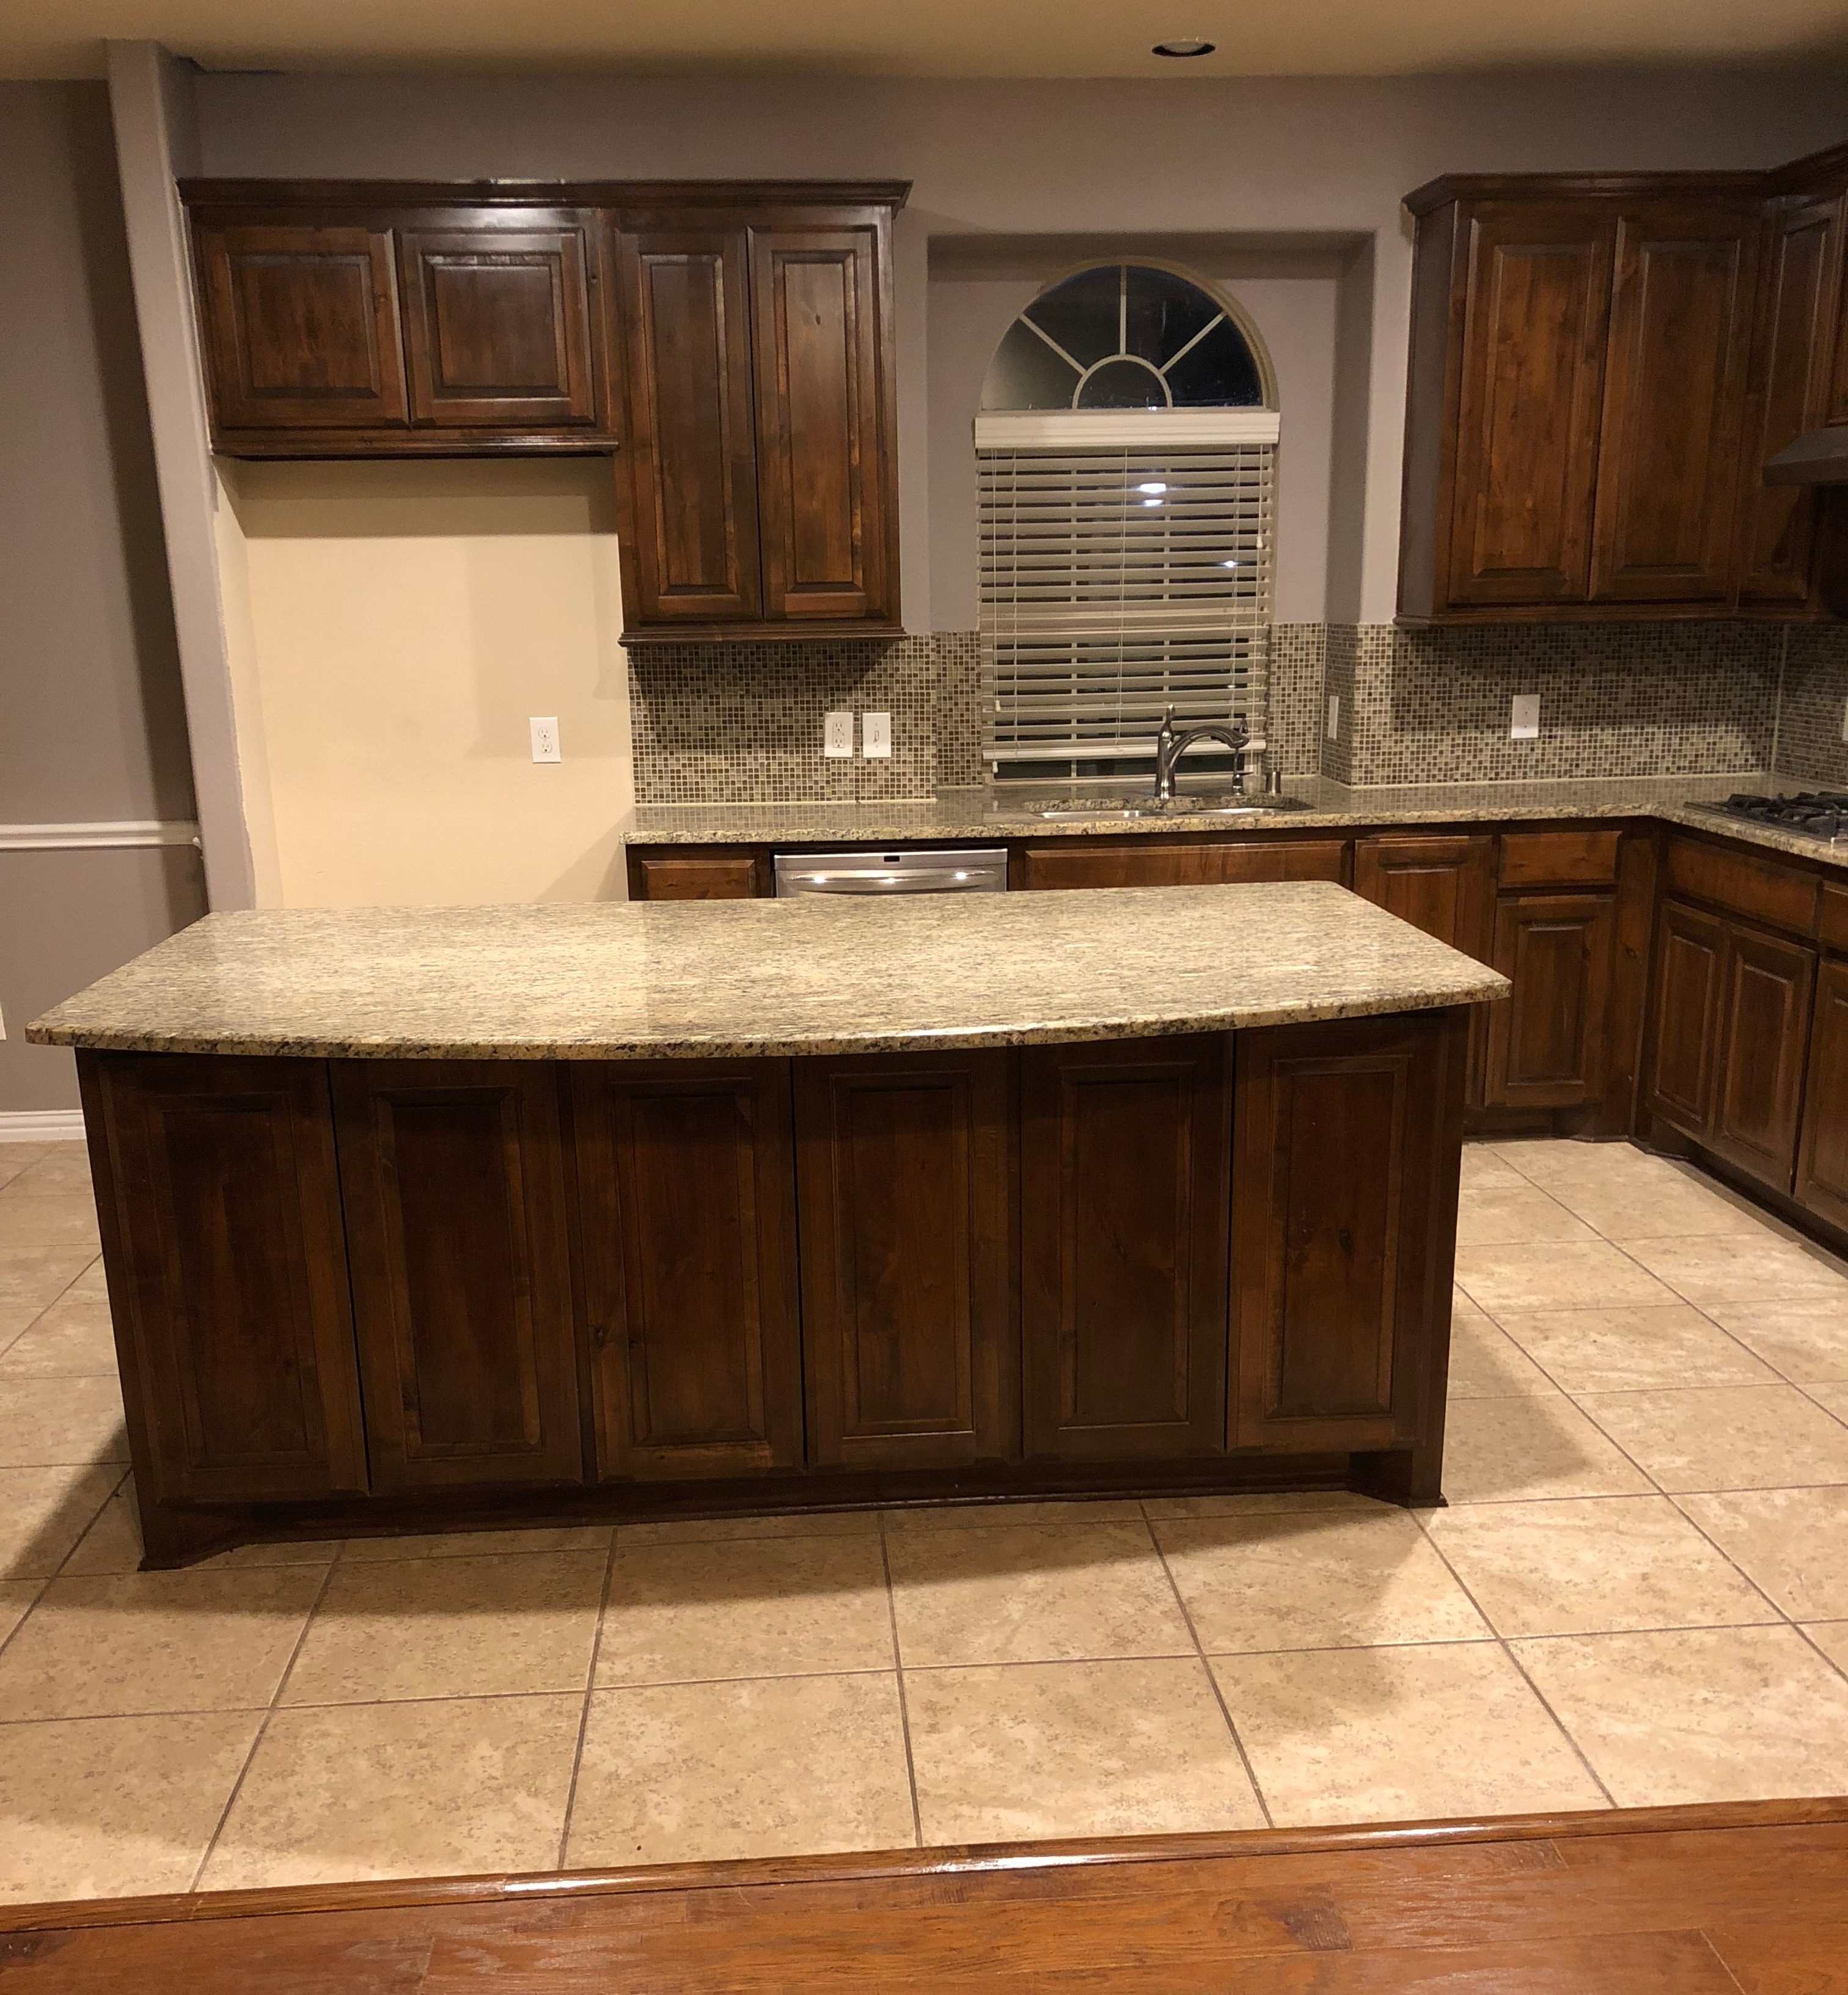
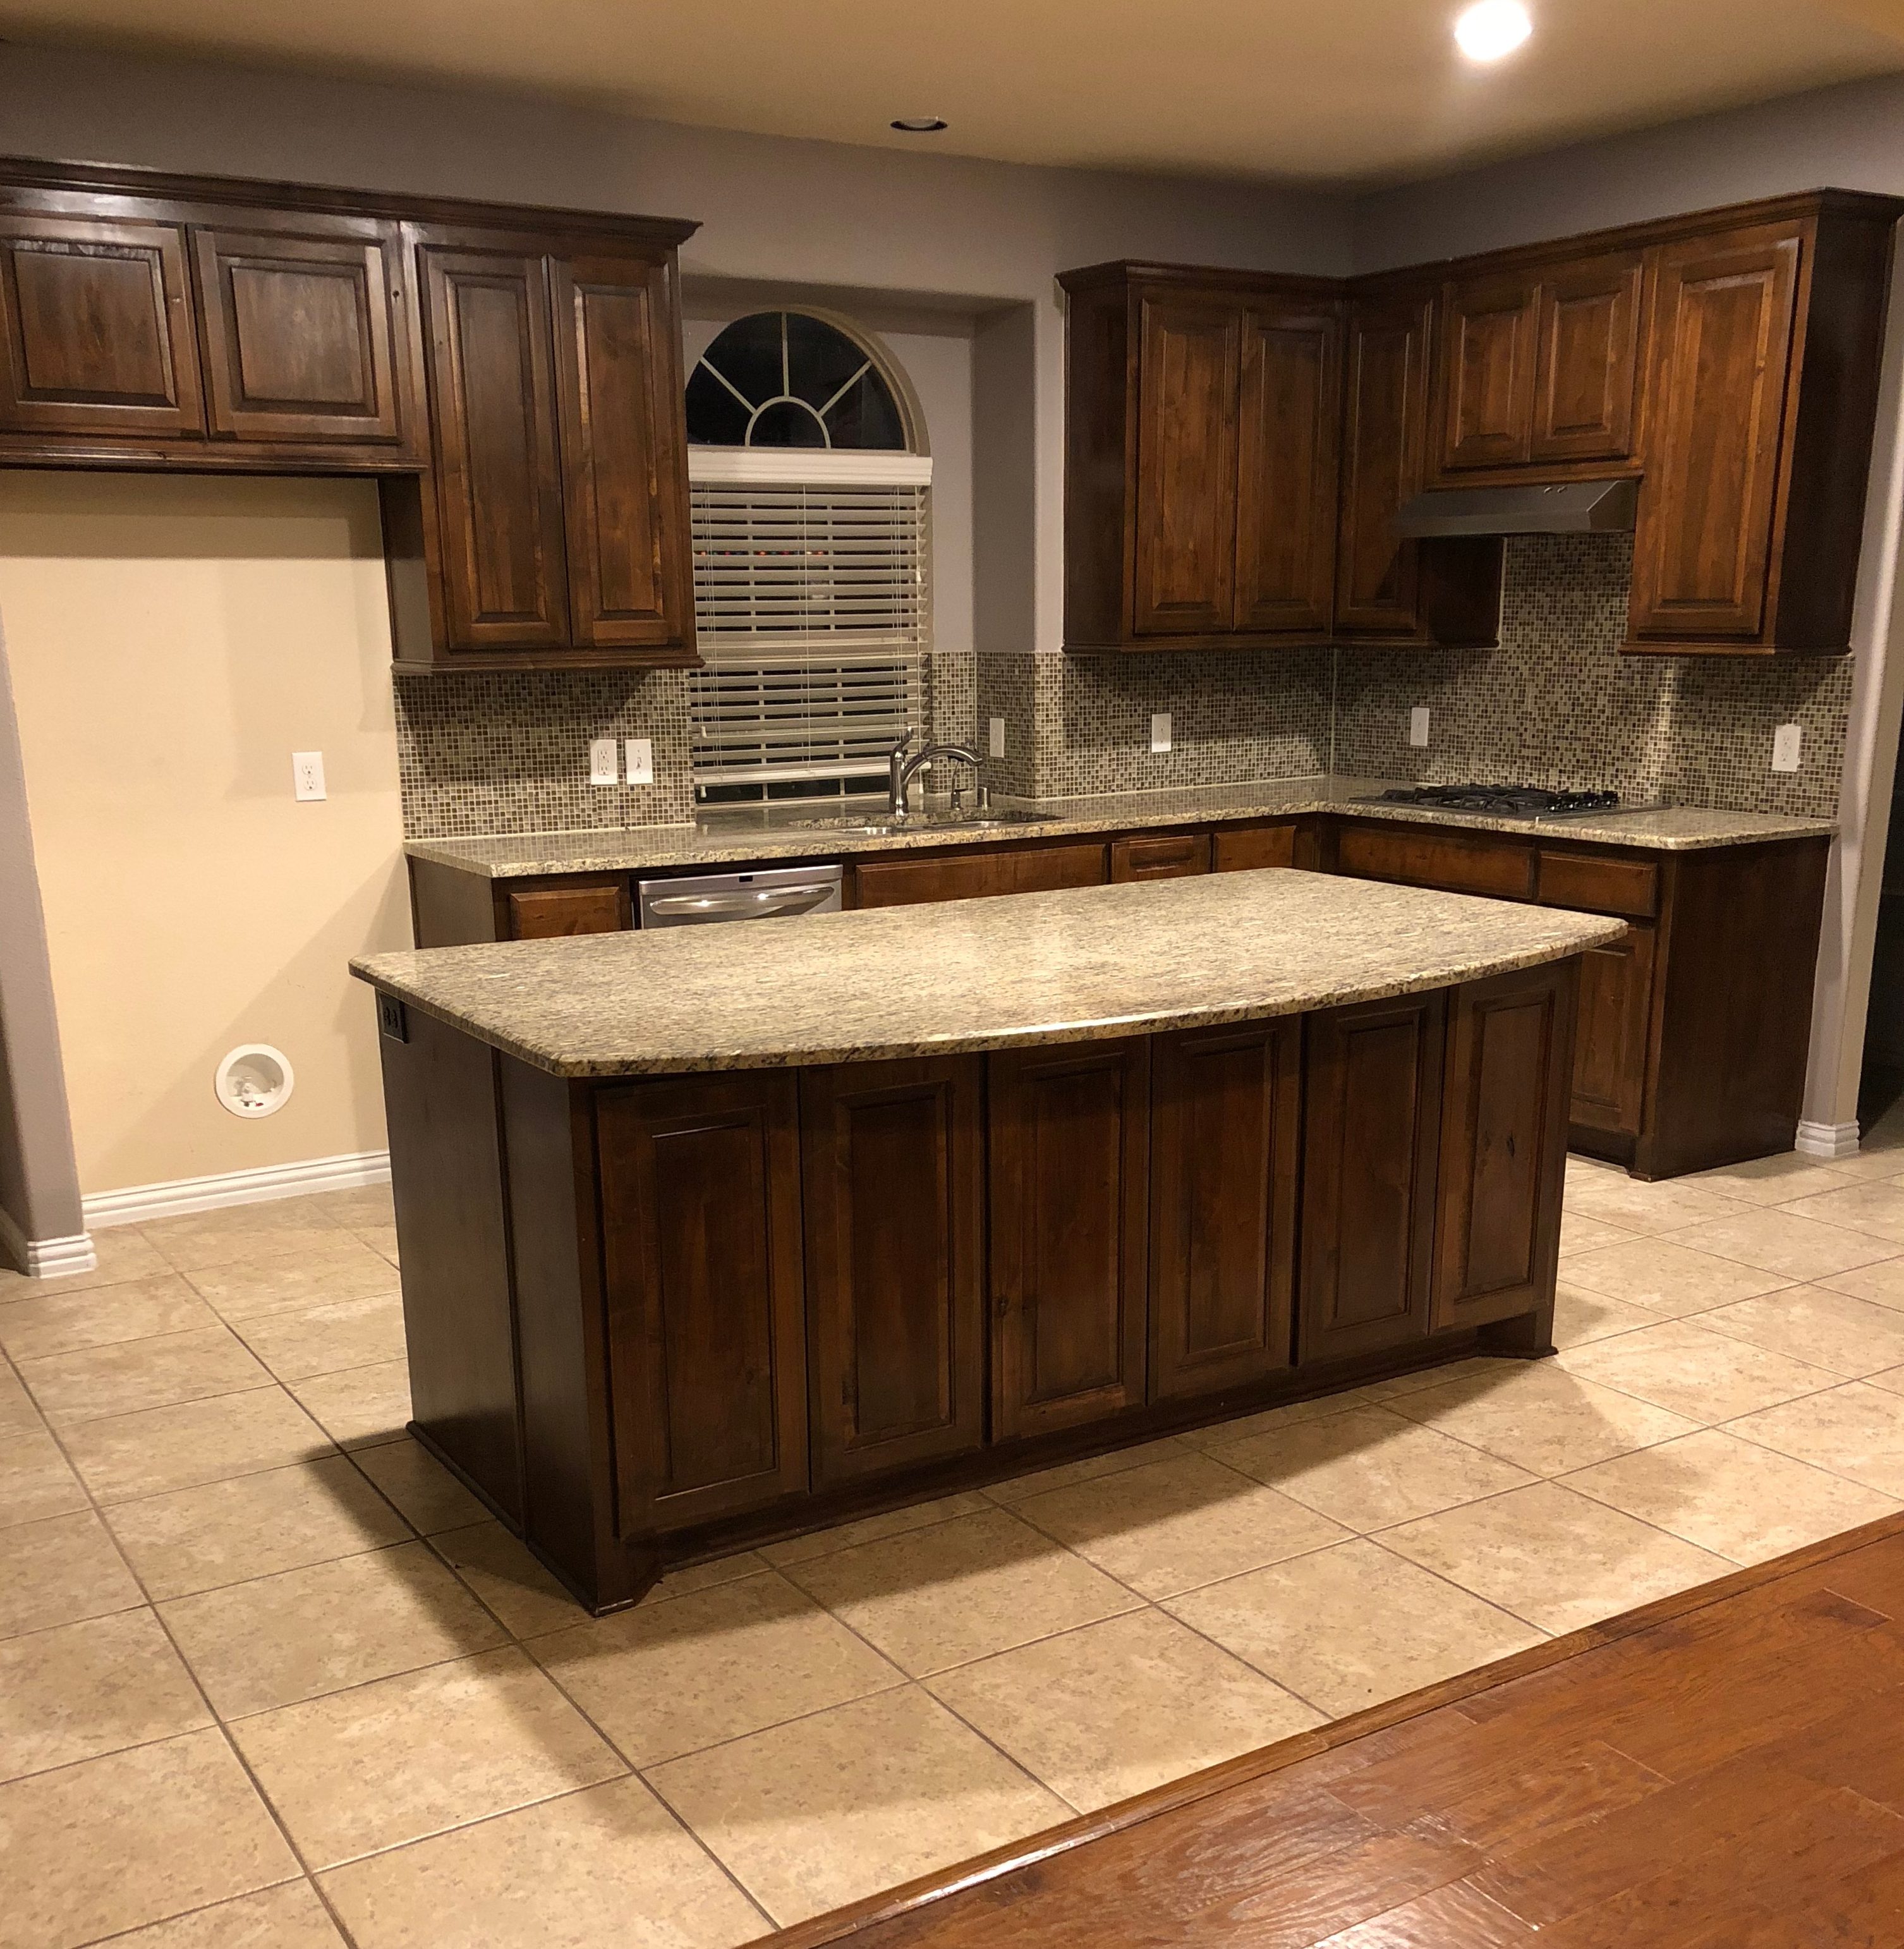
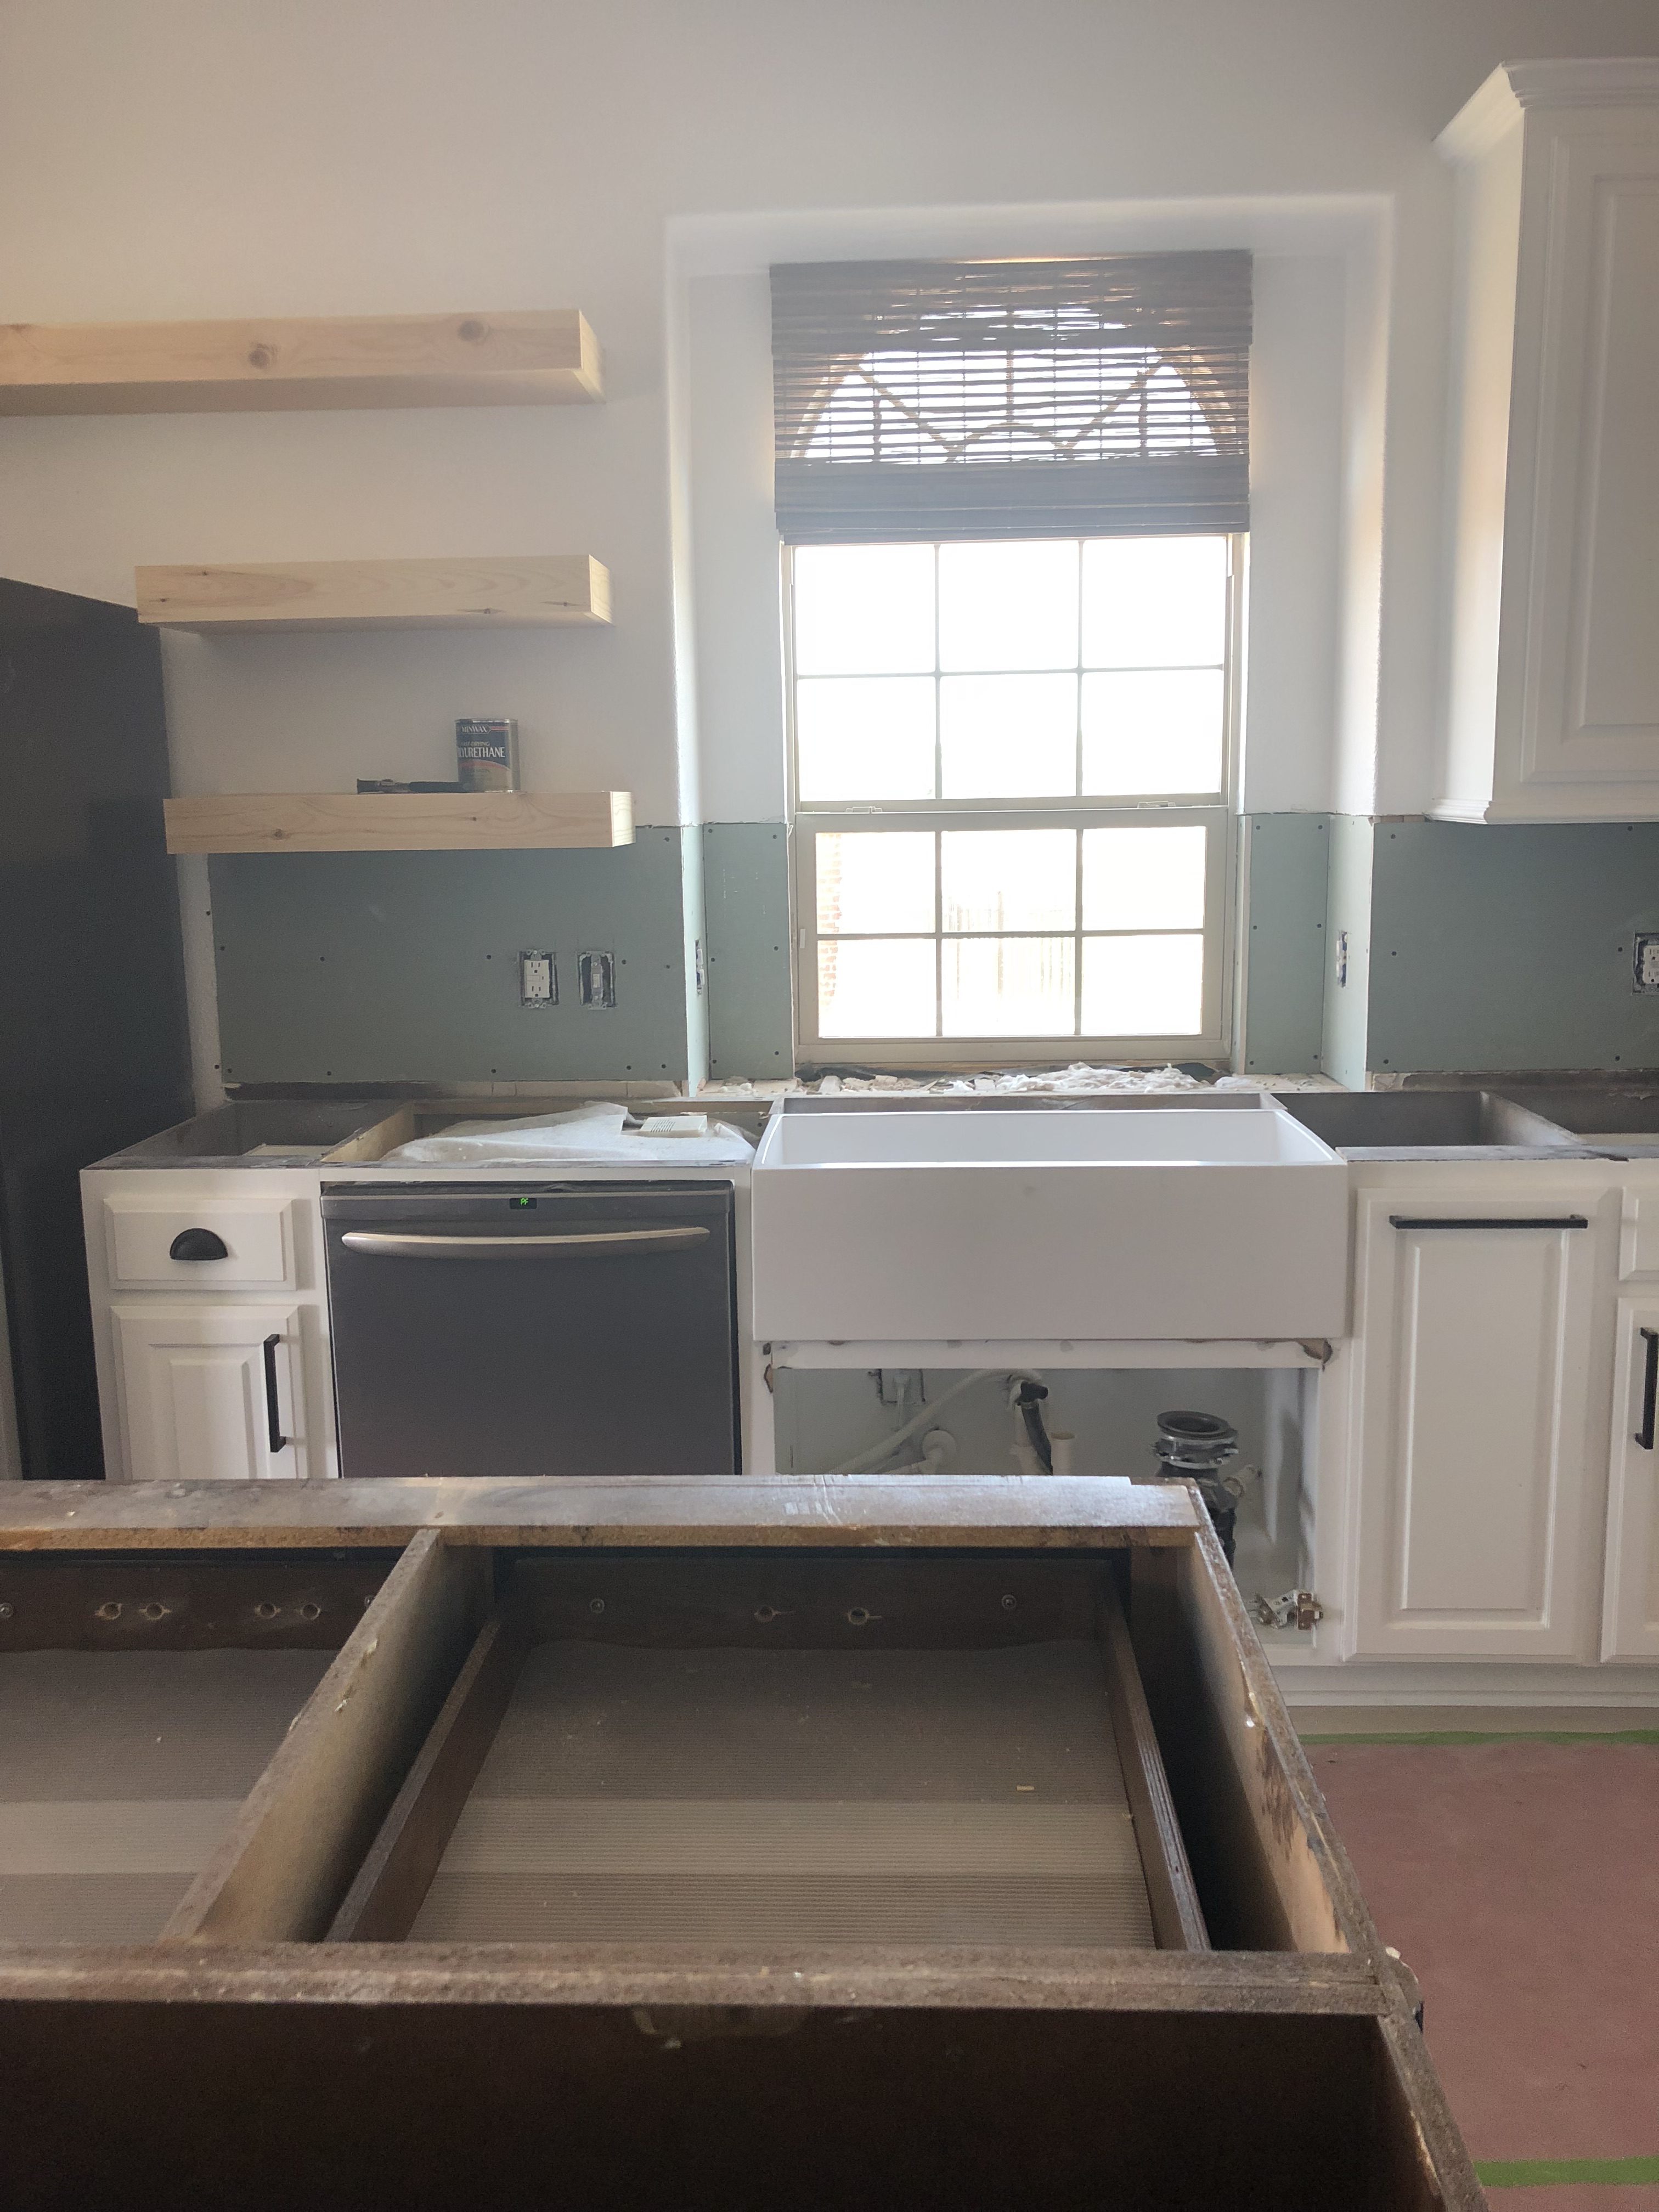
Less than 5 months ago, we bought this home and I loved the size and basic layout of this kitchen. But other than that, I knew I wanted to swap out nearly everything. I snapped this picture of the kitchen the night we closed on the house. It was SO exciting and my brain was running a million miles an hour dreaming details of how to completely renovate it with my favorite kind of beauty. I do feel like I should clarify, there’s absolutely nothing wrong with this functioning kitchen. I 100% believe in being happy where you are while being able to want more. It’s in my nature to evolve and desire more of myself. And the enormous challenge it is to design and execute making this kitchen into a completely new space has stretched myself to new levels. It was such a thrill to watch this personal vision come to life so perfectly. It literally rocks my socks.
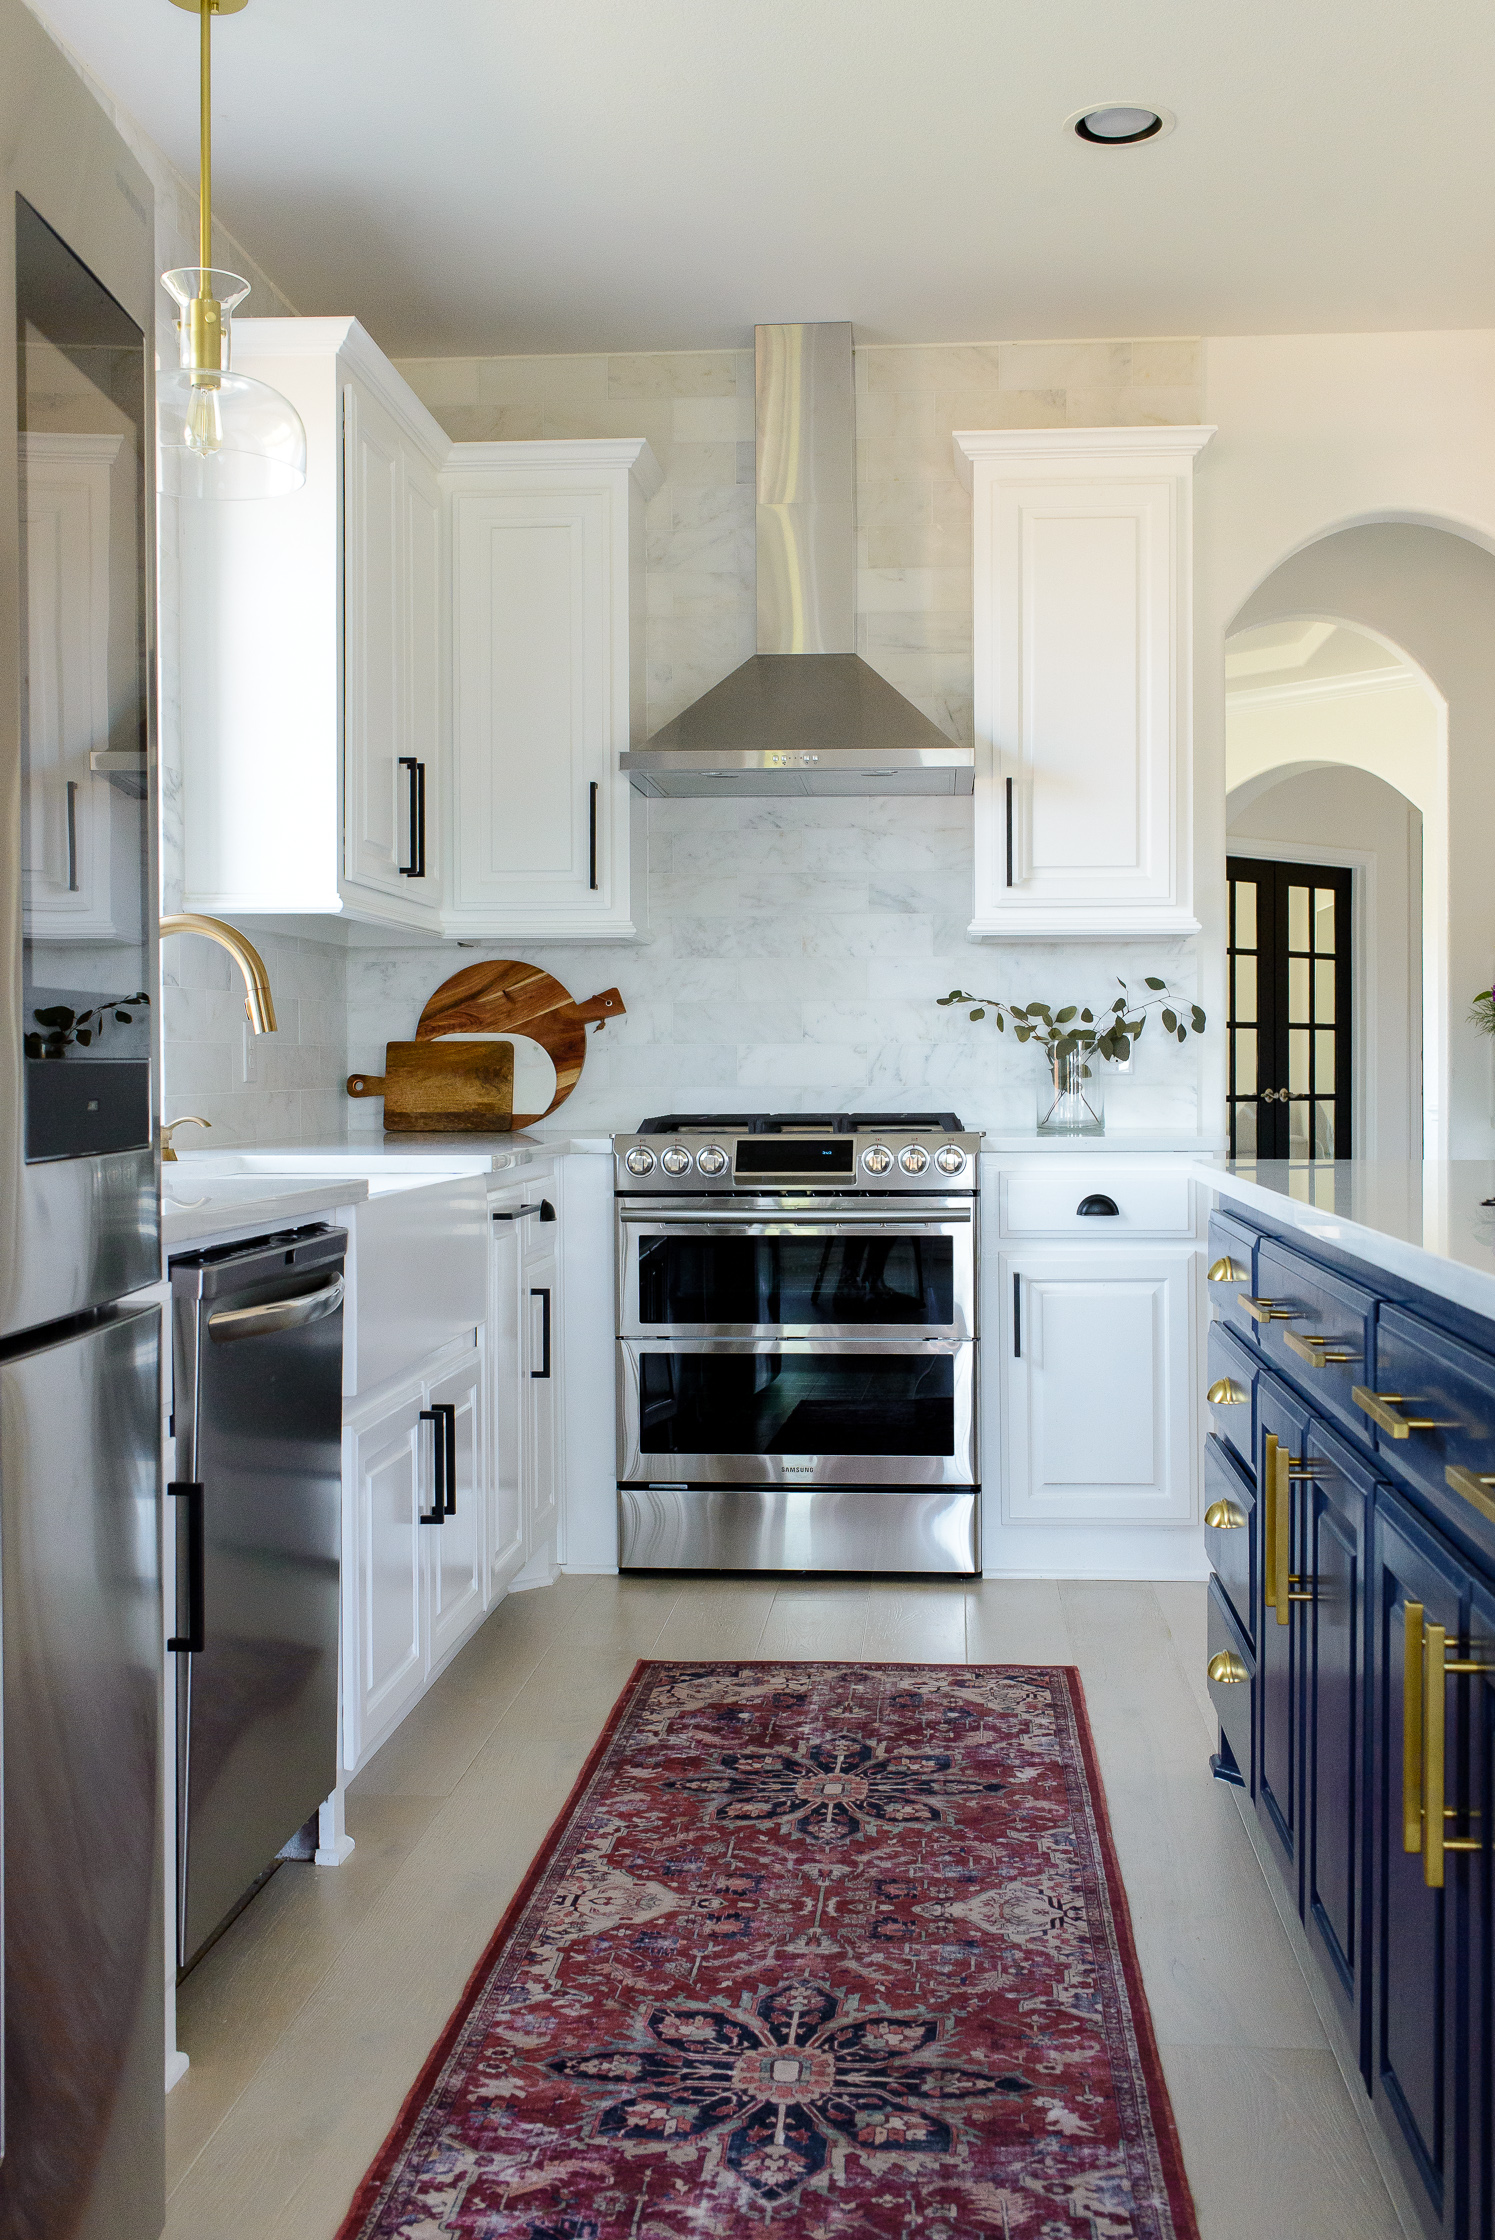
LONG STORY SHORT: We changed the paint, floors, counters, backsplash, sink, facet, stove, refrigerator, blinds, tore out cabinets, installed floating shelves, installed hardware, tore out more cabinets, replaced vent hood, built smaller doors for under the sink, designed a bigger island counter top, wired in 3 new lights to drop pendants, and I think that’s it. Let’s jump right in!

PAINT
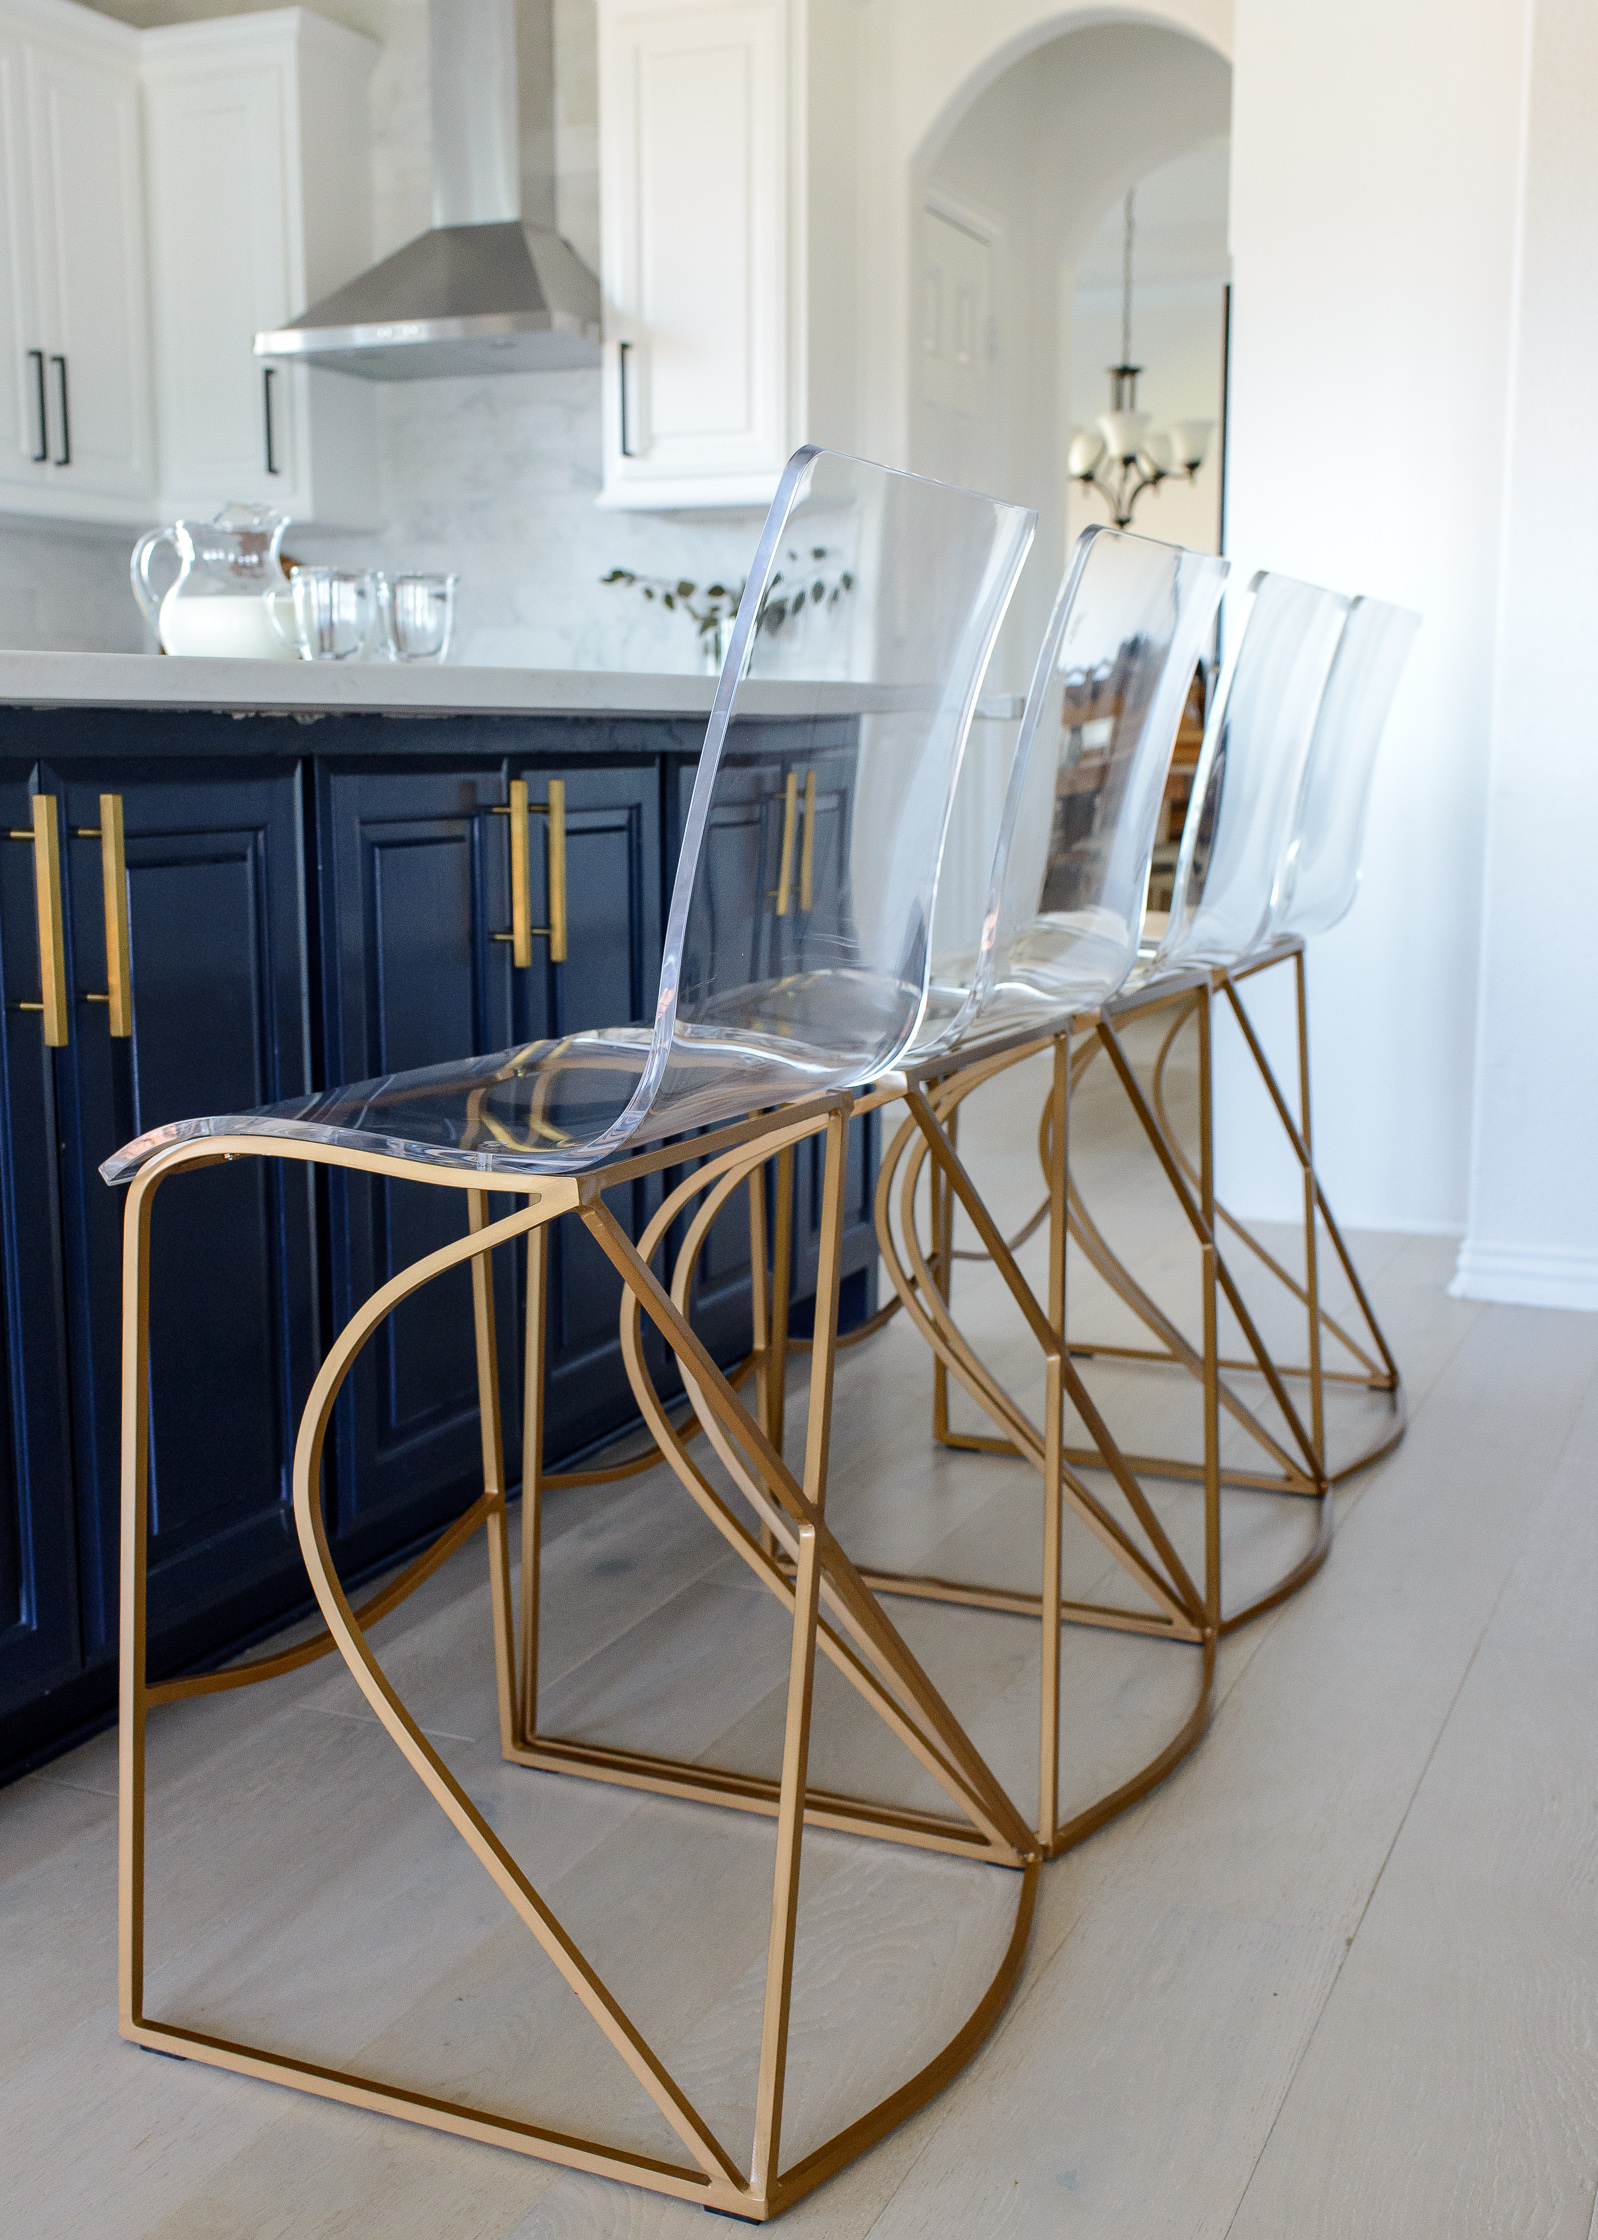
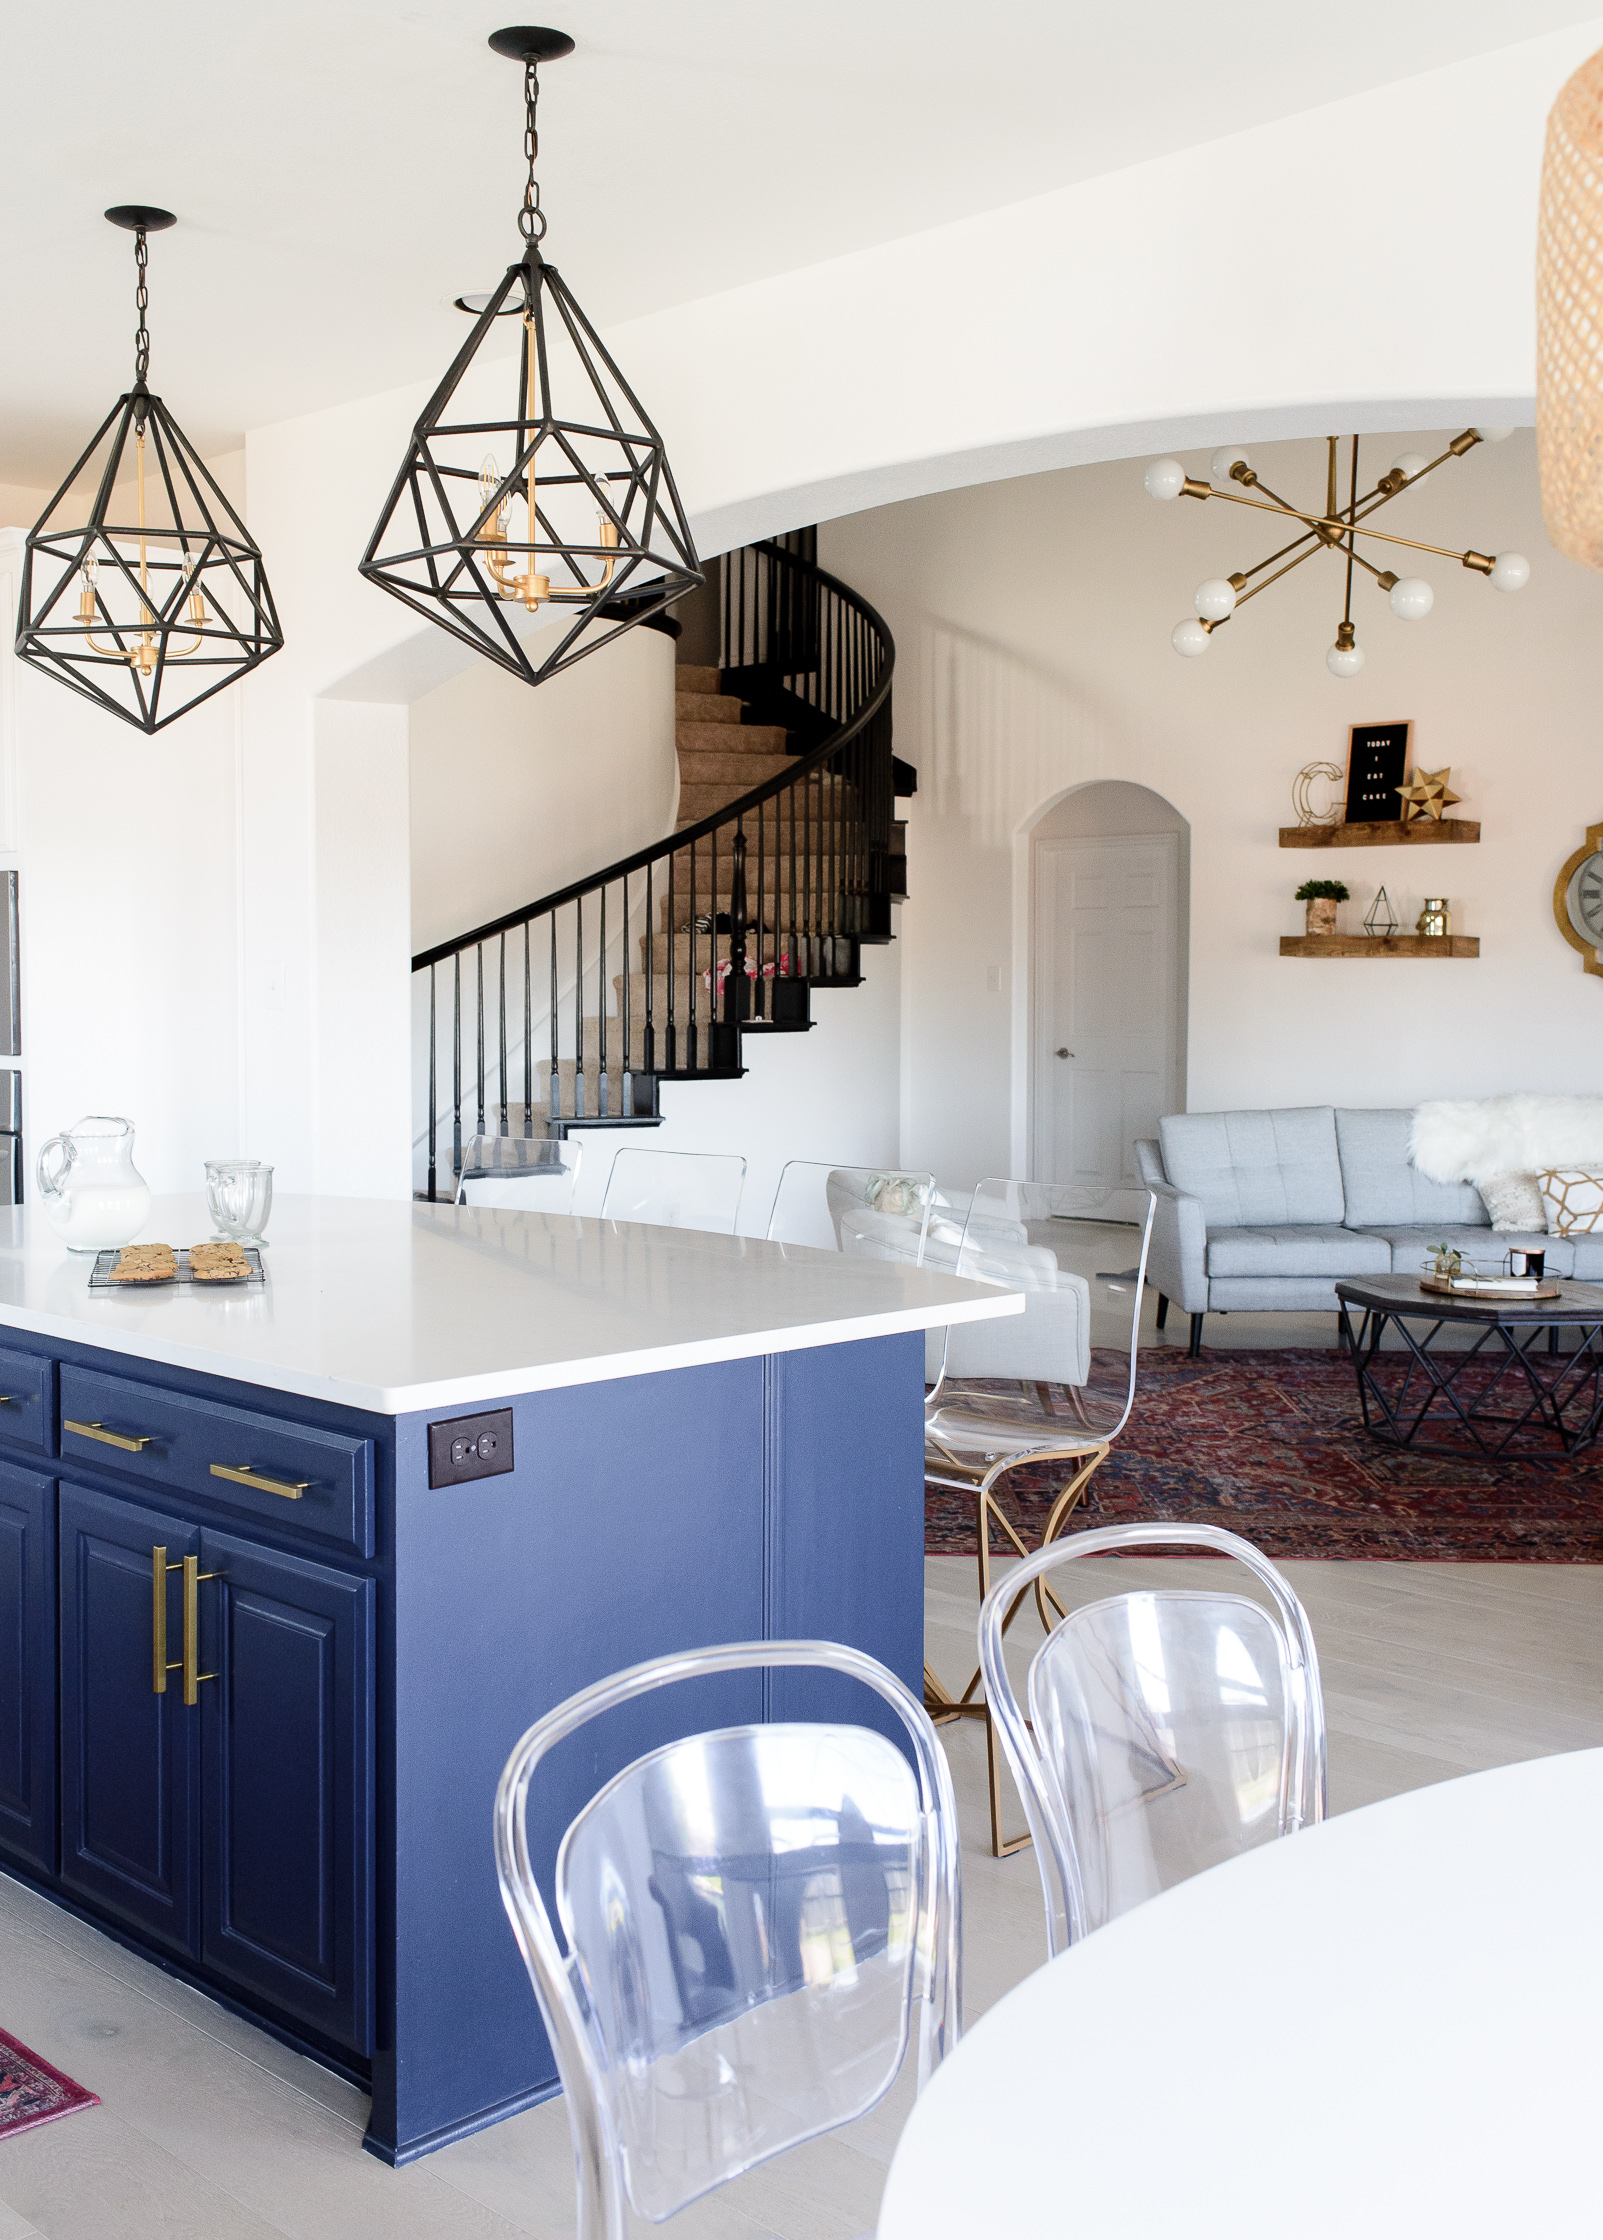
I pride myself with honest feedback because I know how frustrating it can be to have sub-par or botched jobs done. Don’t get me started on our tile job in the laundry + bathroom. Which is why I love raving about my experience in working with Five Star Painting services. They were the creme de la creme of hiring a painting service. The manager met with us at the home and we walked through the house as he pointed out each and every surface in detail to record which paint color needs to be painted throughout. He offered lots of insight on sheens of paint. We received a steady stream of daily pictures to update us on the painting progress. I appreciated the attention to detail that was done. I used a white-on-white palate with “Nano White” by Behr (Satin) for all of the walls and ceilings while using “Ultra Pure White” by Behr (Semi-gloss) for the baseboards, trim and kitchen cabinets. And we bleed blue in this family! Go Cougs! My heart has been pulled to a deep, saturated navy paint color for the kitchen island. I chose “Starless Night” by Behr (Semi-gloss). Which just so happens to be a true BYU blue <wink wink>. Aaron and I were college sweethearts and so this is a fun accent to our home.
FLOORS
Our neighbor used Nebraska Furniture Mart to install their floors and had a great experience! We used their company as well and I was incredibly pleased with the entire process of laying new hardwood Armstrong floors. Many of you warned me about the terrible amount of dust that would cover everything! I highly recommend confirming that your installation company’s standard practice in using drop cloths to protect all areas not having floors installed. Their team also covered all of my freshly painted cabinets, fridge, tv, etc.. It was perfect! They took care of everything so that the space could be move-in ready as soon as they finished. They sent daily photo updates. At the end of the week, I did another walk-through with the team leader and we found a few things that needed touch-ups and adjustments. When we got home to move back in, we found the house dusted and vacuumed! So minimal cleaning, which was so appreciated!! After the entire project was complete and signed off, I found a small section that sounded a bit hollow as I turned the hallway to go into my room. I texted the team leader about it and he came right over and repaired the area so that it was perfect! I’m 110% happy with the entire team from Nebraska Furniture Mart! And I am OBsessed with the wood floors!! Armstrong calls it Limed Beach Getaway, and it turned out absolutely gorgeous! Exactly what I had envisioned. We’ve had the floors for 4 months now and I LOVE them. They hide all the dirt and dust, making them incredibly easy to maintain. The perfect floors to handle my messy kiddos.
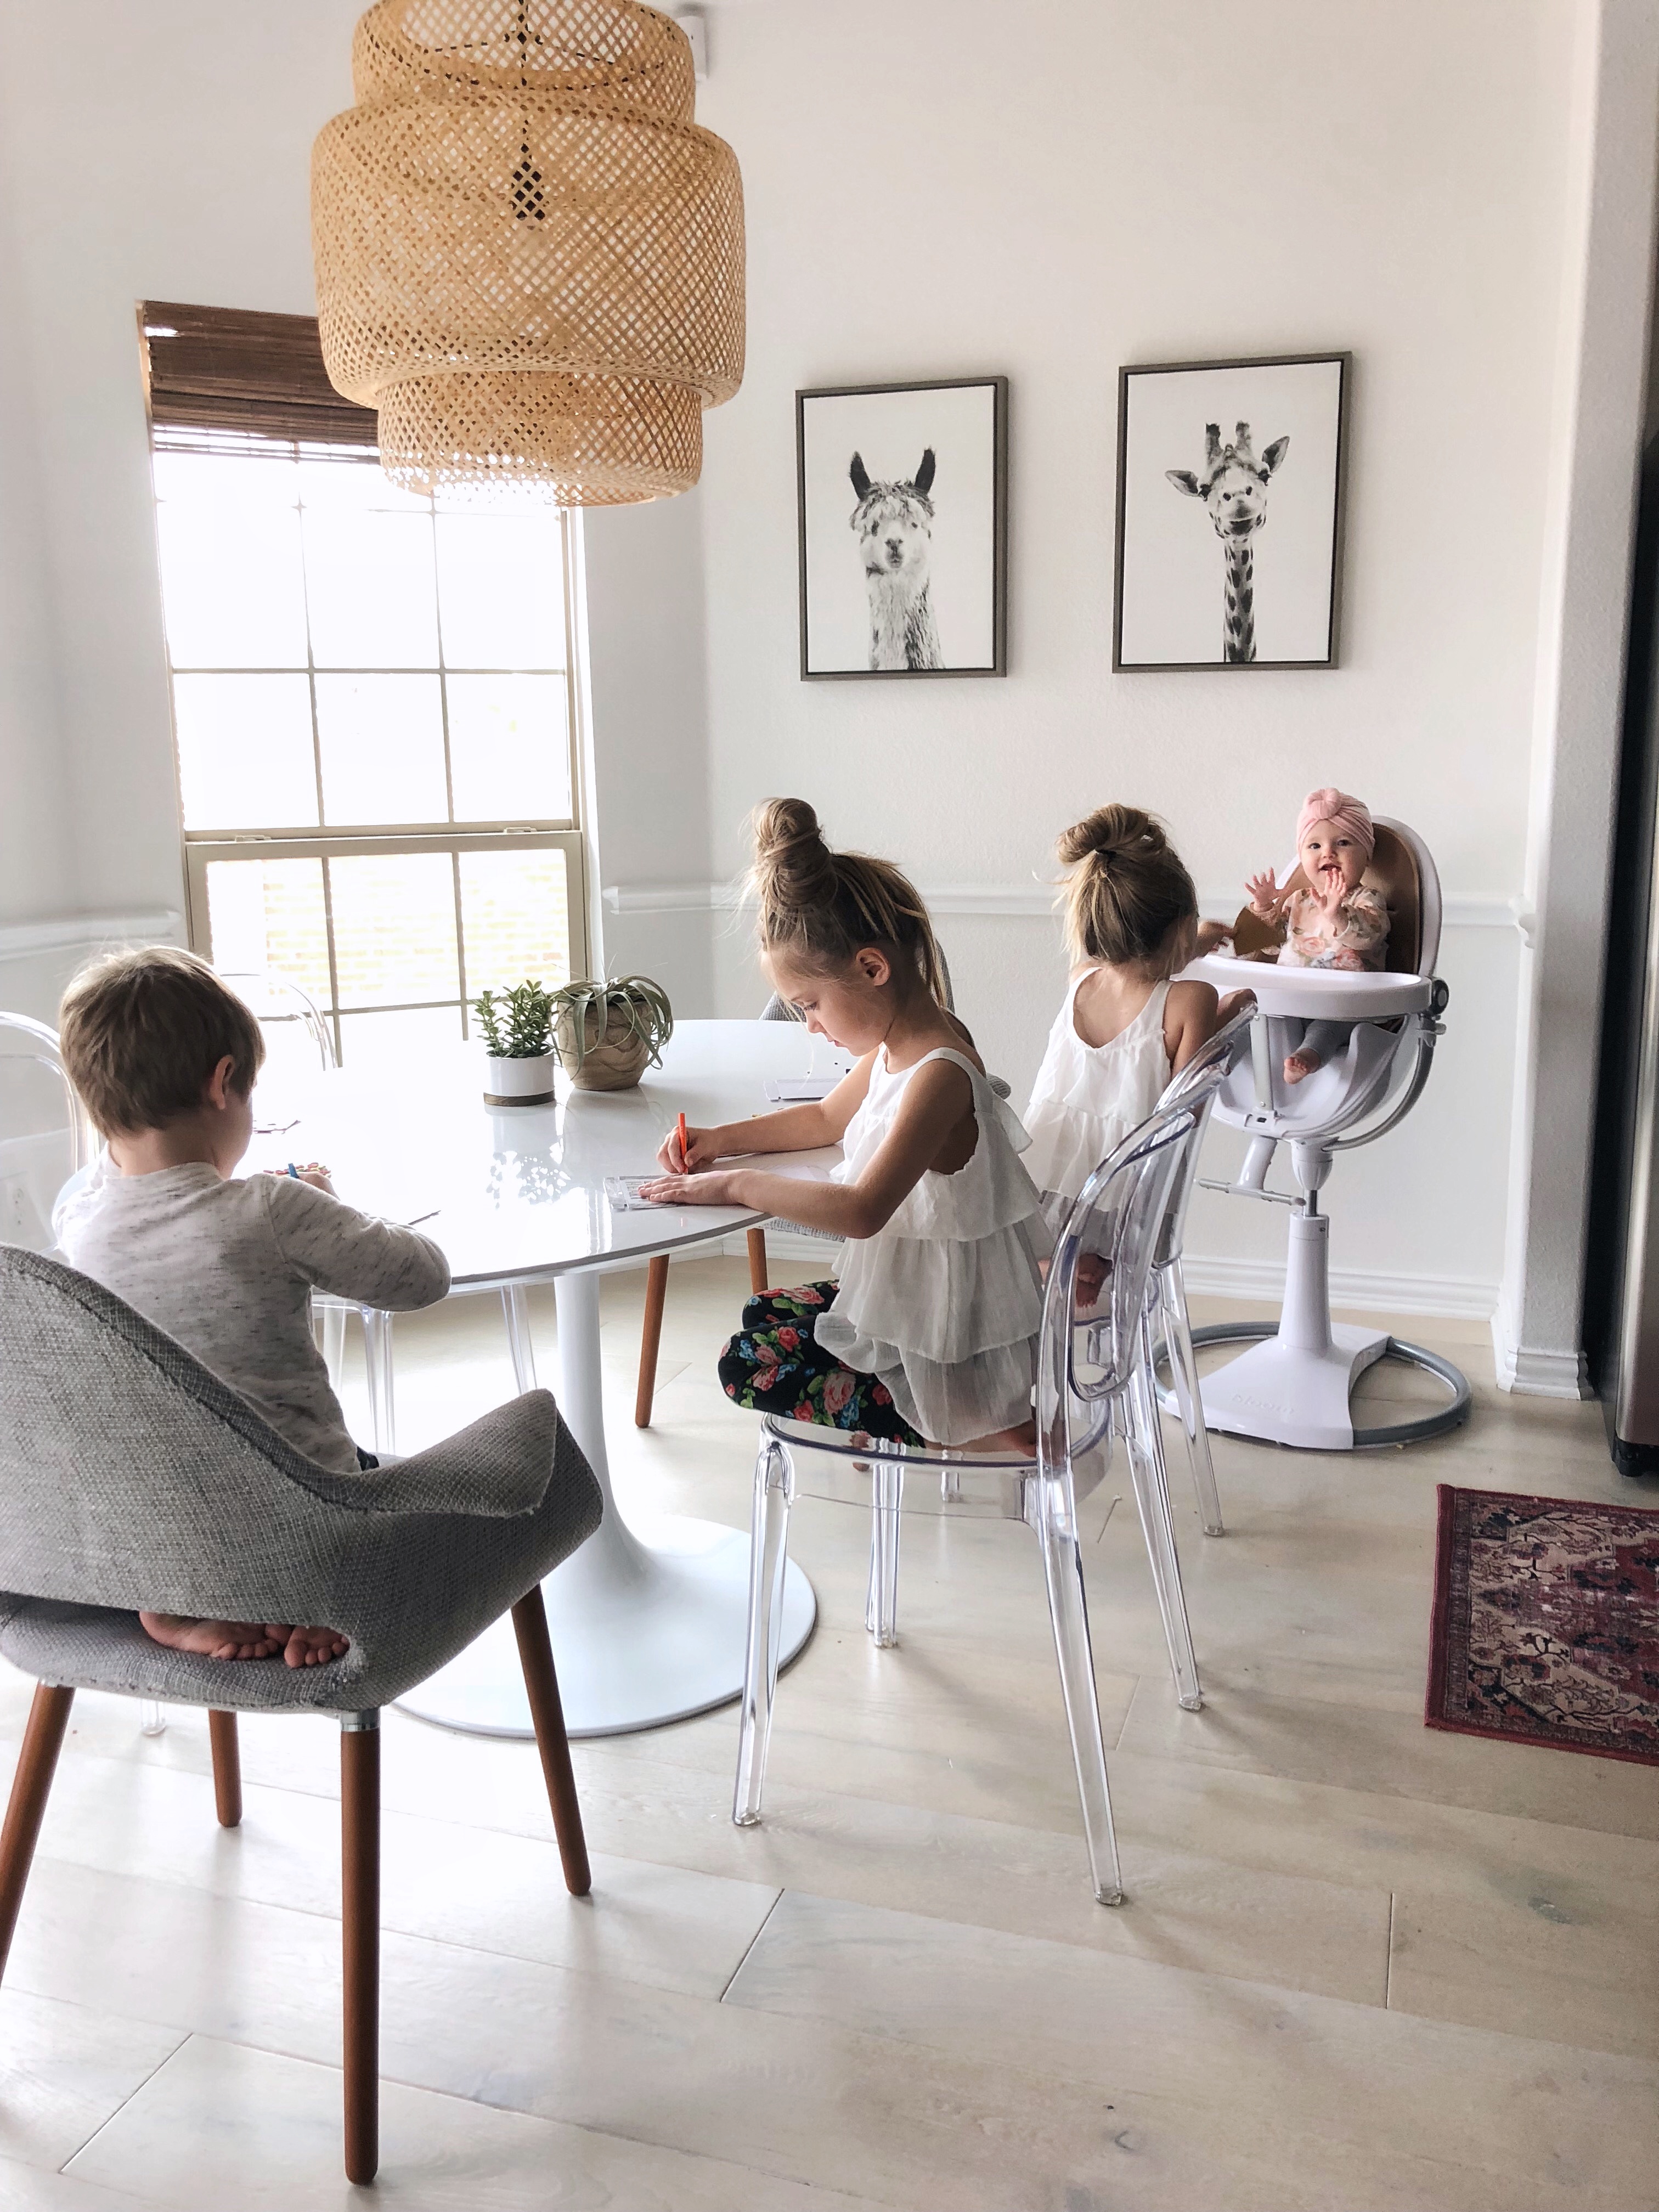
(below is a screenshot of kitchen nook from a video)

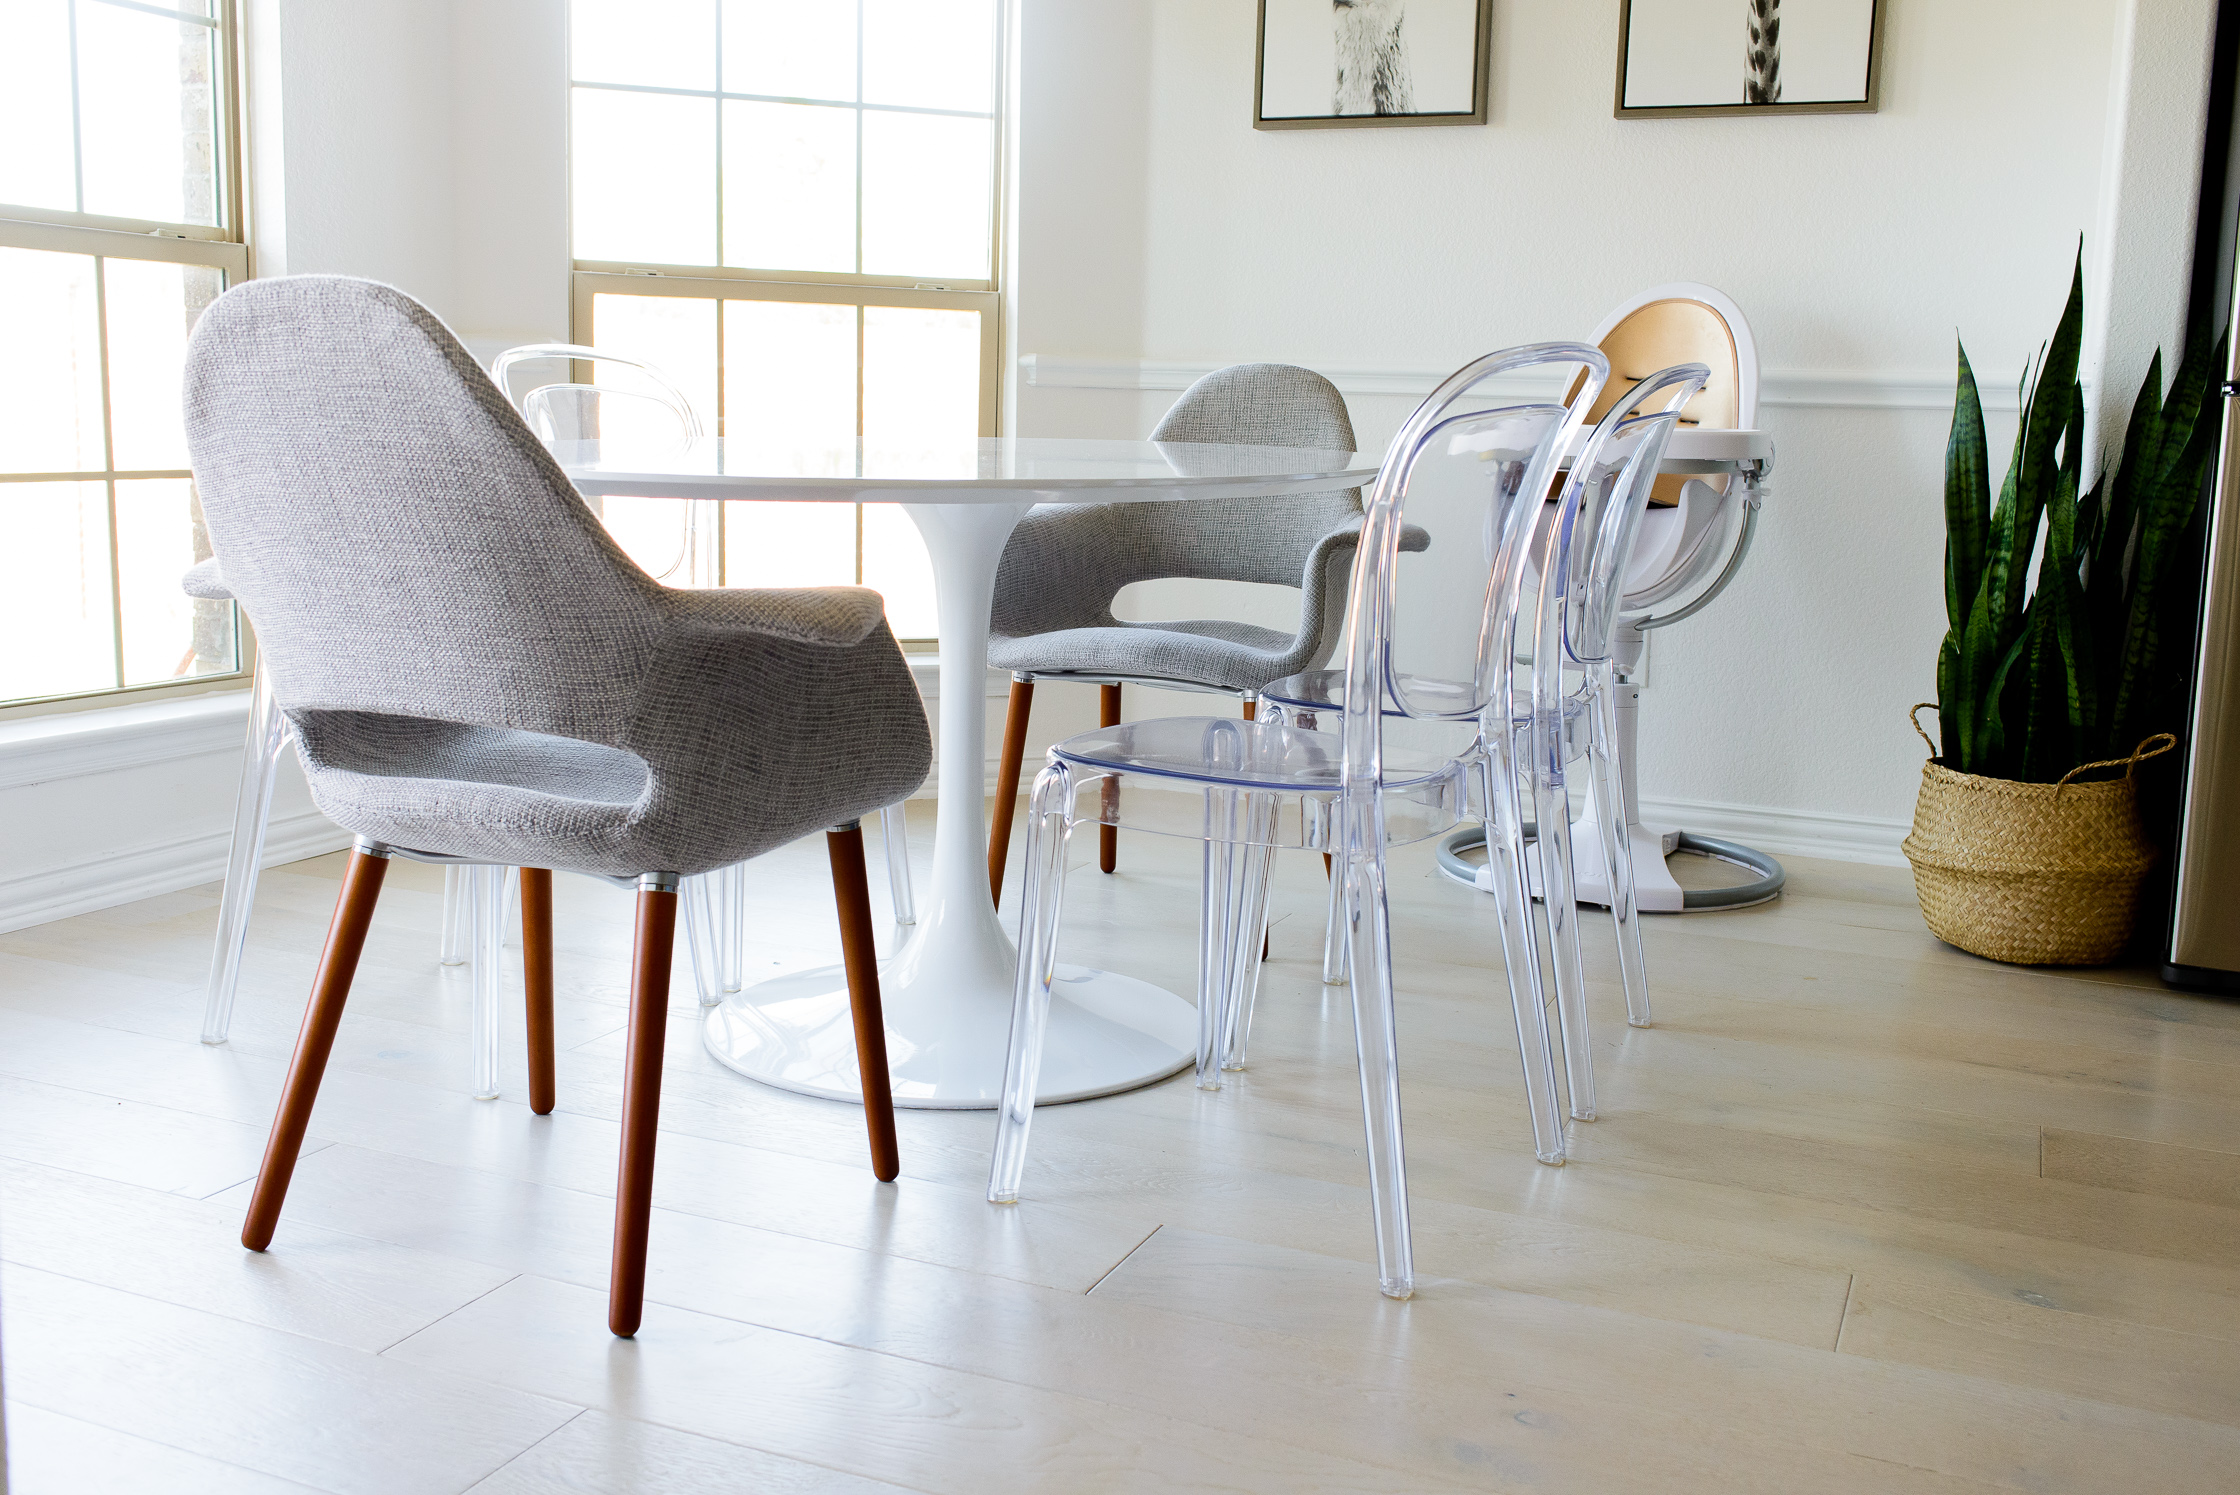
DINING NOOK
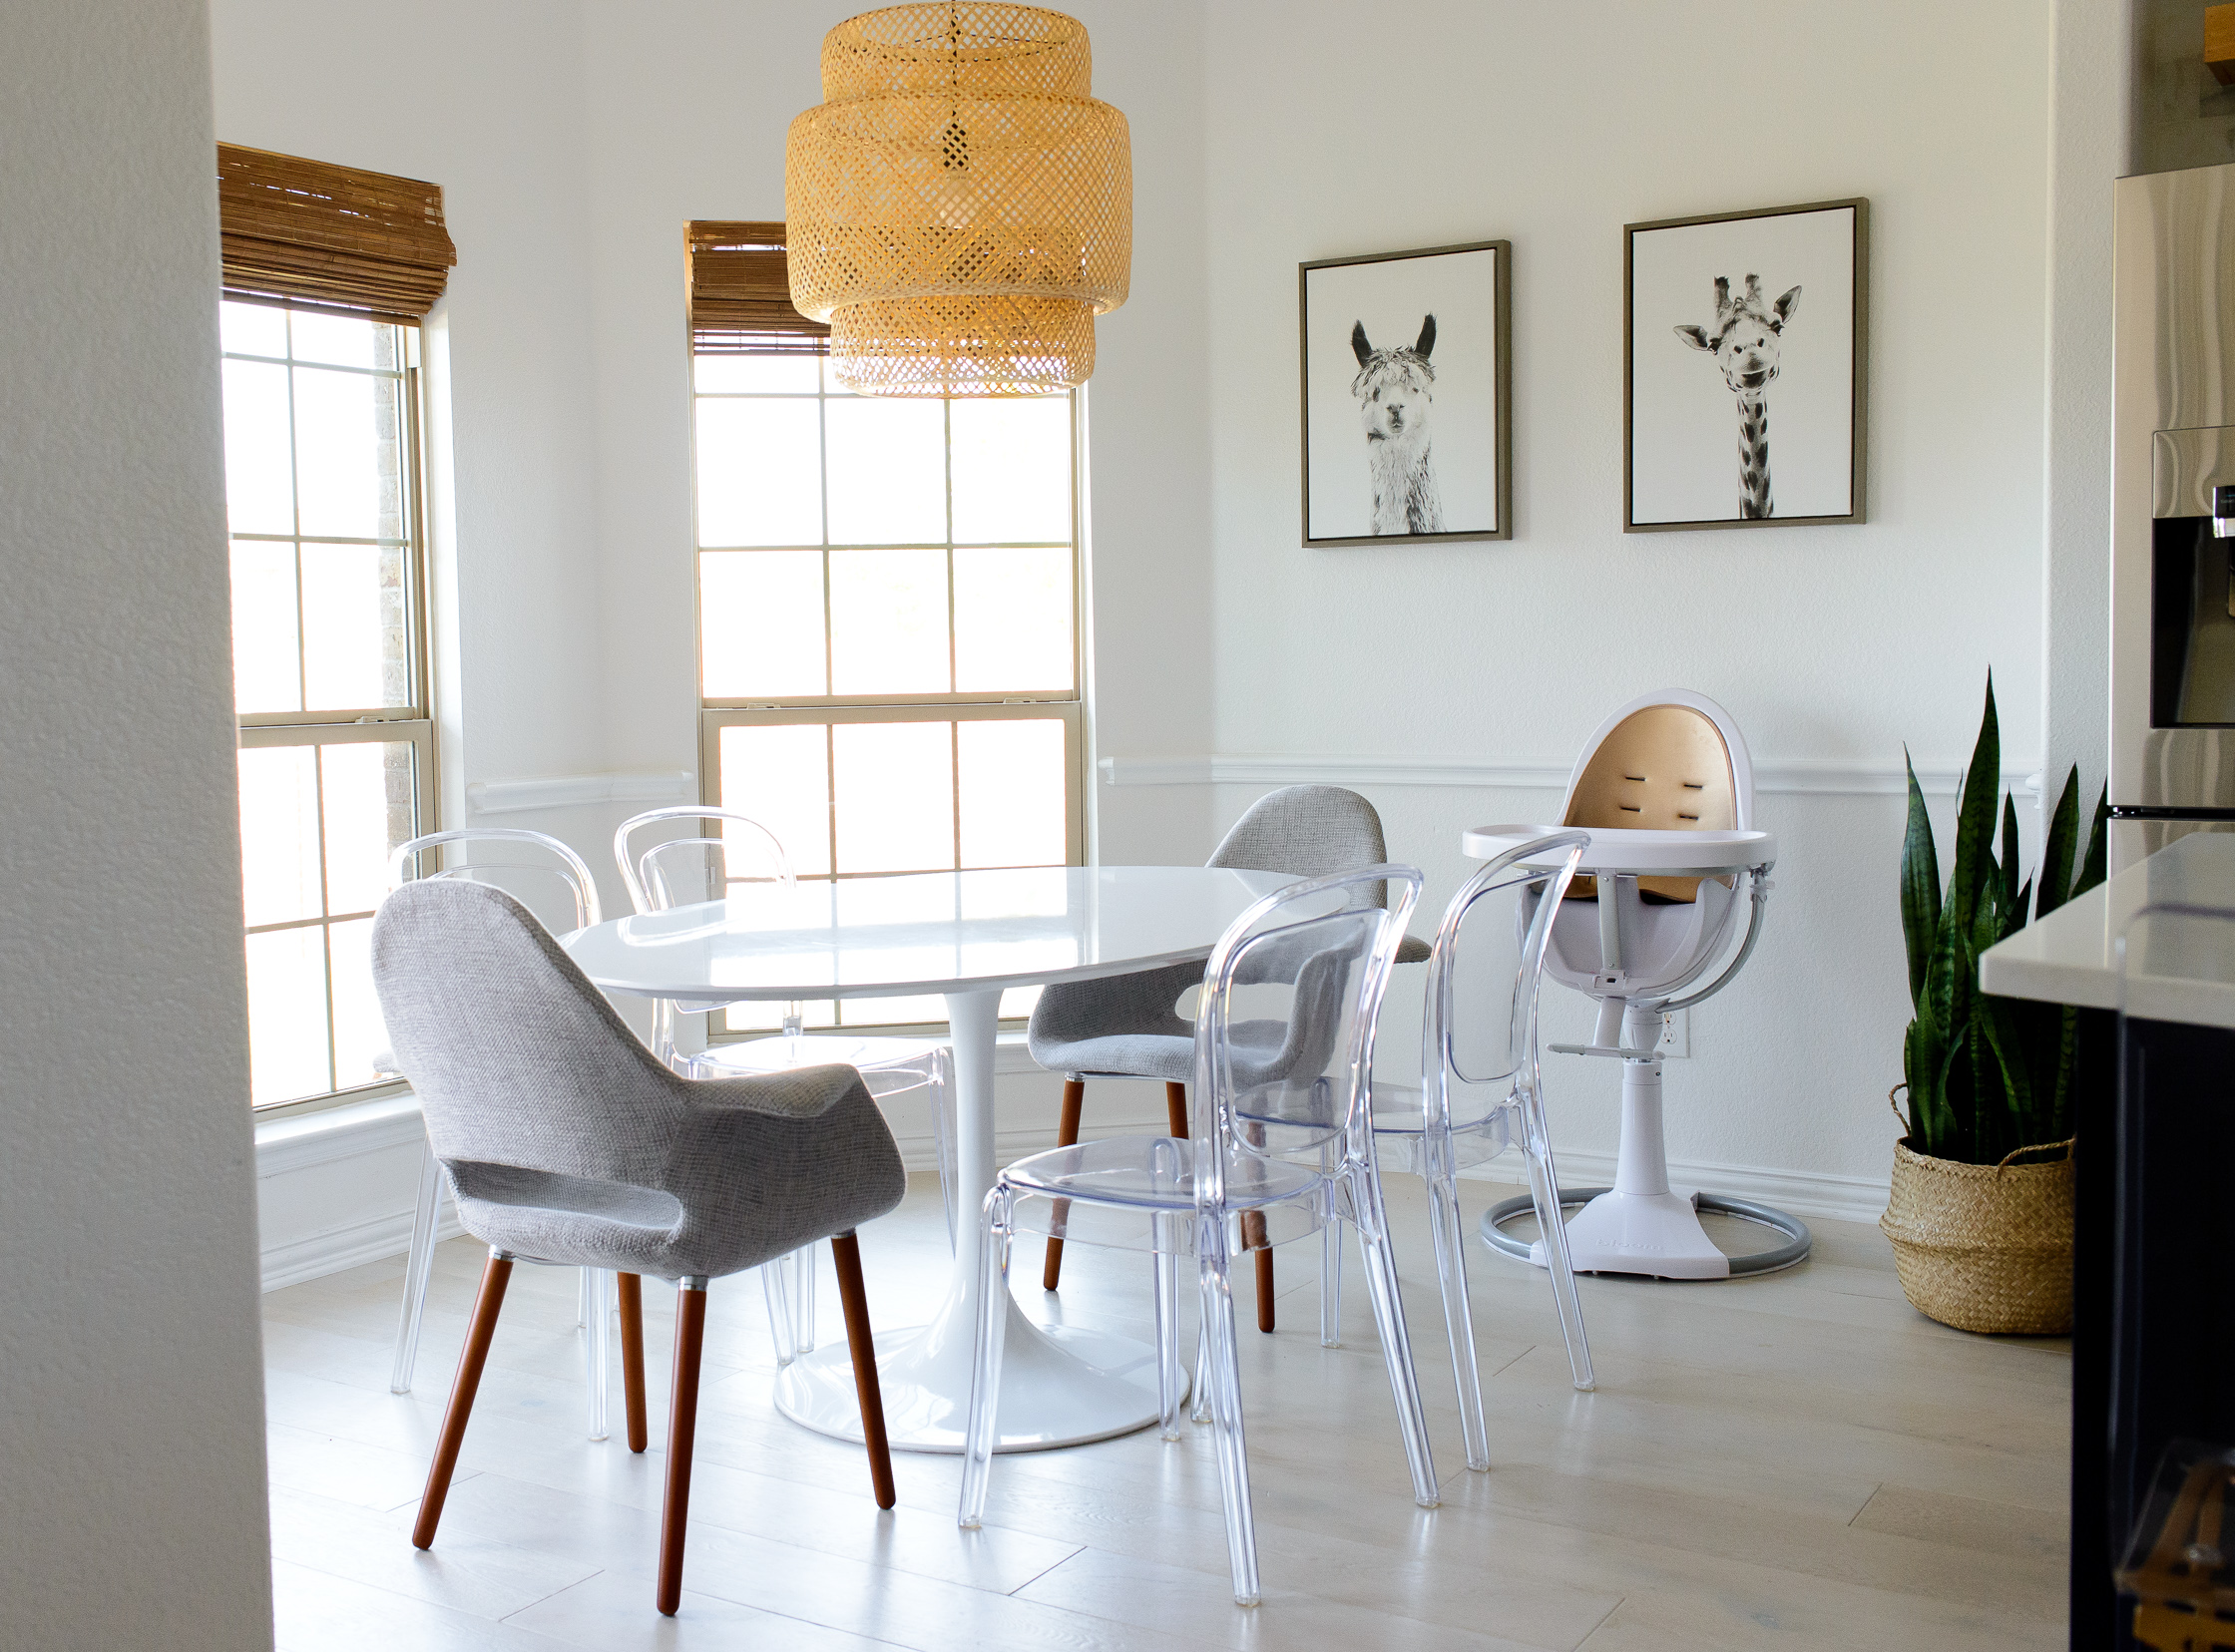
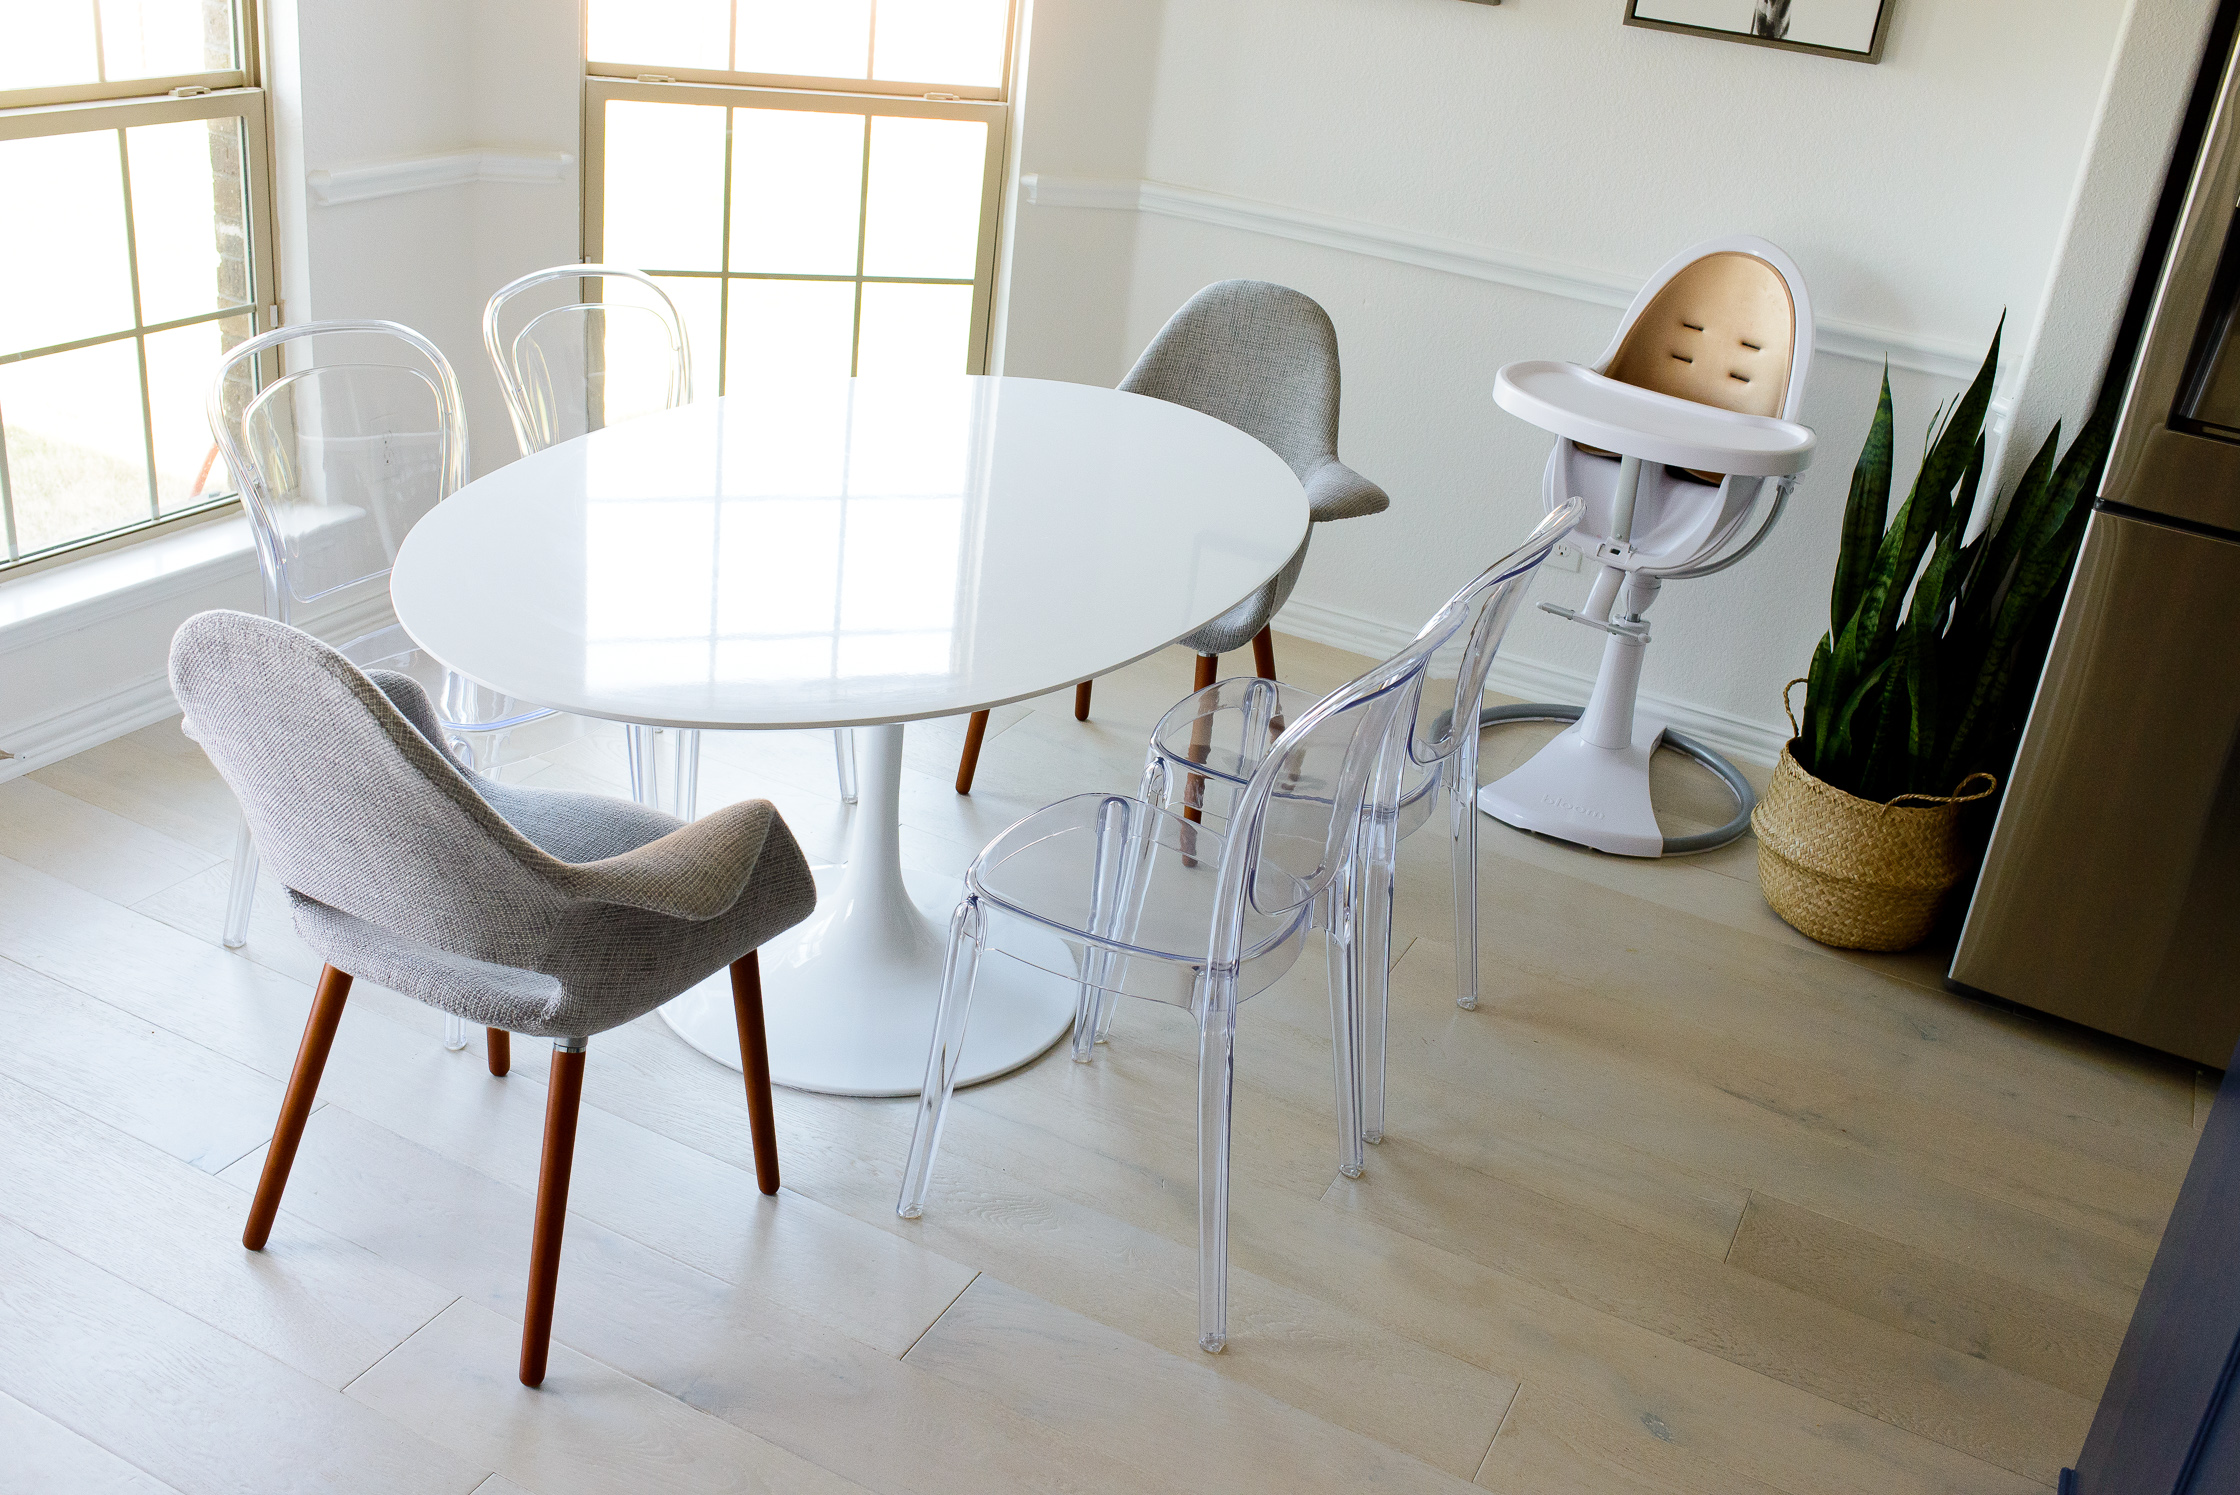
This dining table area is one of my favorite spaces in the house. It’s gorgeous, unique, the perfect size for our family of 6, and added bonus: it’s incredibly easy to clean. Nothing sticks to this lacquered chip-resistant finish! Just a quick wipe and it looks perfect. I ordered this set before we even moved in. This table is inspired by the talented Saarinen who created this pedestal table after the shape of a high viscosity liquid drop. I especially adore this gorgeous table’s clean lines. This dining nook was the building block for the rest of the kitchen’s design. Here are two options, EXPENSIVE and more AFFORDABLE
Since our breakfast nook area is a little smaller than ideal, I steered away from bulky dining chairs that would take up unnecessary space. I opted for 4 side chairs to create the illusion the nook was bigger than it is. And obviously, these cool and ultra modern chairs were too cute to pass up. They fit like a glove with my style and were definitely being styled somewhere in my house. These ghost chairs would be perfect to add to ANY contemporary dining area!
These 2 end chairs are the comfiest and most casual dining chairs I’ve sat in. They’re also the very affordable version of Saarinen’s midcentury design. I believe it’s the high back, padded arm rest and molded seat that seem to always become the perfect sitting spot for me to get boatloads of computer work done or snack away while feeding Avery and lounge for days. Also linked the LIGHT PENDANT HERE
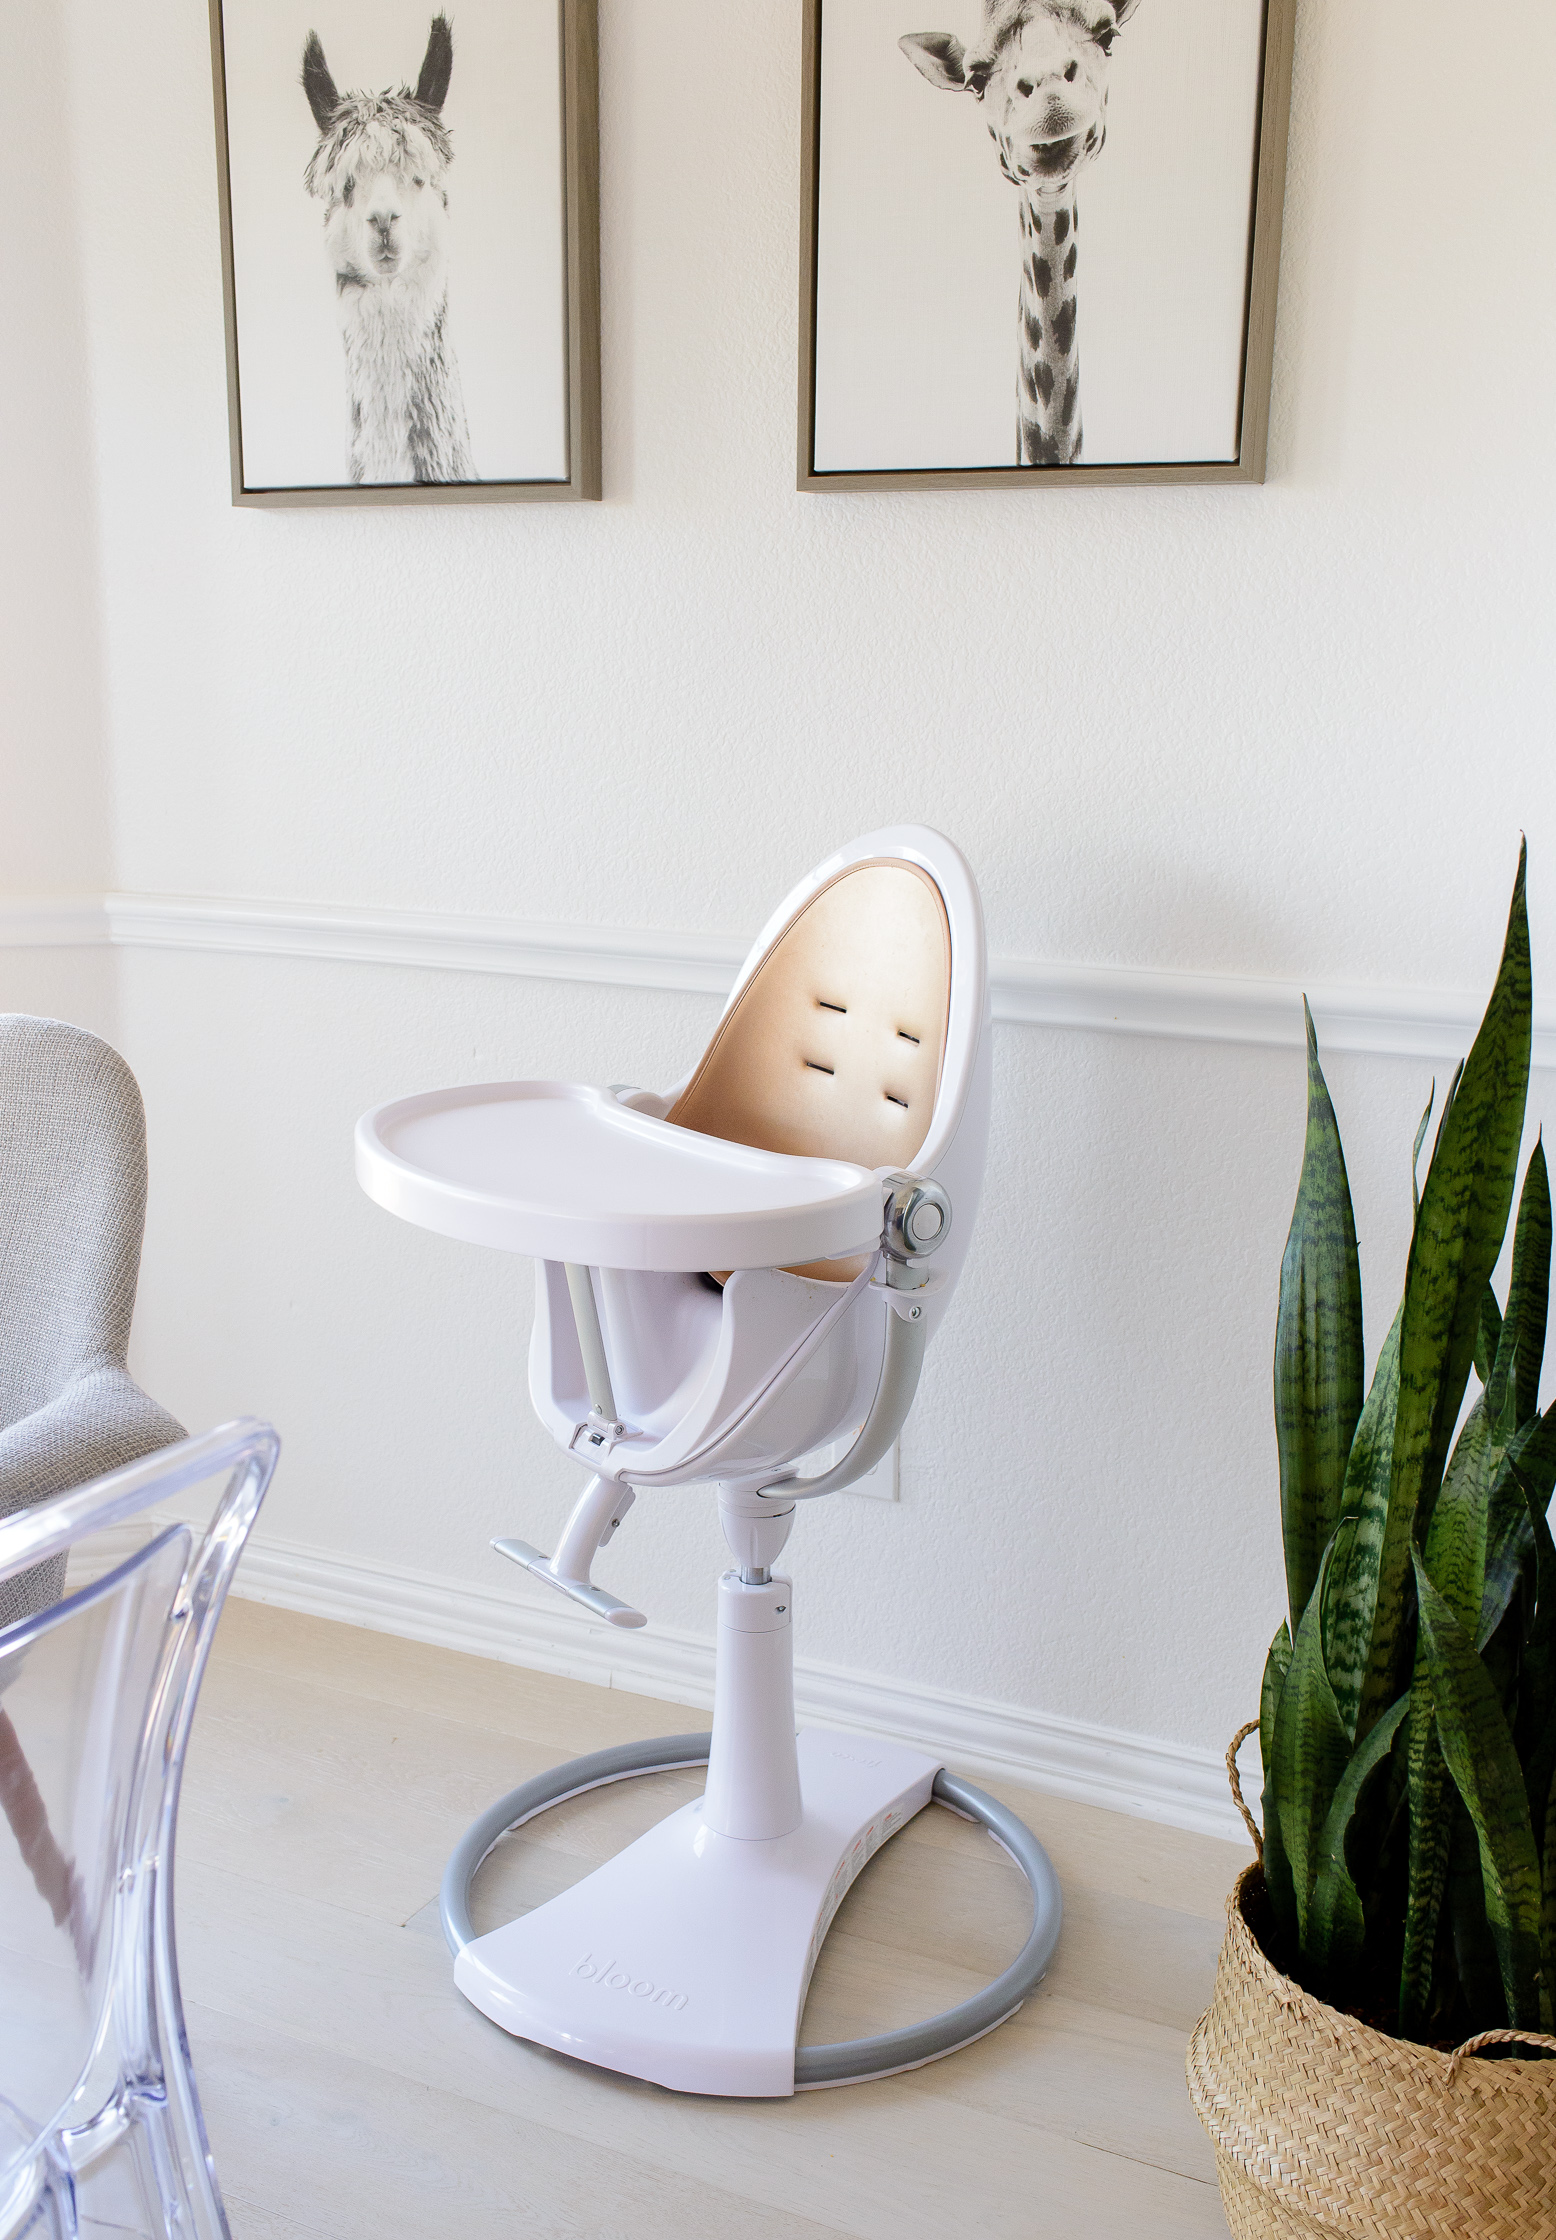
HIGH CHAIR
Any time I post this to my Instastories I get blown up with questions about where Avery’s Bloom high chair is from. This white and rose gold high chair is gorgeous!! The rose gold seat pad is sold separately, making this a great gender neutral chair. I love the modern design and awesome features. A couple of my favorites include the height adjuster and recline lever. Apparently, it’s known as the tallest high chair in the world since it can be raised high enough for me to comfortably feed her while I’m standing up. Pretty cool! It’s certainly a fun splurge.
COUNTERS
Should we go with granite? Or marble? Or quartz? Lot’s of research went in to learning about these stones and which would fit the needs of our family the best. This decision took the longest to mull over and I’m so glad we overanalyzed the crap out of it because it turned out better than imagined! We ultimately decided on quartz. Here’s why: Granite had too much speckling and variation for my preferred style. Granite is very durable and I LOVED the black granite we had in our previous home and would definitely recommend if you find a type that you like. I visited the Arizona Tile store in Dallas and looked at a ridiculous number of slabs. It was extremely helpful to compare the 2 stones I was interested in, marble and quartz. Both were priced pretty-much equally. BUT, if you have children and you don’t want to stress if red juice splashes on to the counter than marble isn’t for you either. I took a few samples home of both stones and I squeezed a dollop of ketchup on to both. Sure enough, the marble that I loved had a big round spot that had been etched into the stone due to the acid in the ketchup. Water splashes will etch the surface of the marble stone, too. So, if you’re okay with the look of the etched spots then marble is a great choice. With 4 little kids and a lot of expected wear and tear, we decided on quartz since it’s relatively non-porous, and very durable like granite. Aaron and I went to the Arizona Tile warehouse and had an awesome experience picking out the perfect quartz stone for our kitchen. The employees were incredibly knowledgable about the different options and offered great perspectives when it came time to choosing the specific slabs we’d install in our kitchen. I picked the 2 slabs that had the least amount of movement and variation. I wanted the light grey veining to be minimal and evenly distributed. I love the New Carrara Quartz! I also had the fabricator extend the counter approx 5-6″ on the overhang over the barstools to offer more table space for those sitting at the bar. Our fabricator was easy to work with and accommodated my schedule, however the countertops are slightly not leveled. We can’t be sure if it was the cabinets that were built that way or if it was the fabricators doing. This effected the backsplash installation quite a bit but nothing else, thank goodness. We are 100% thrilled with the counters and it’s Aaron’s favorite part of the kitchen.
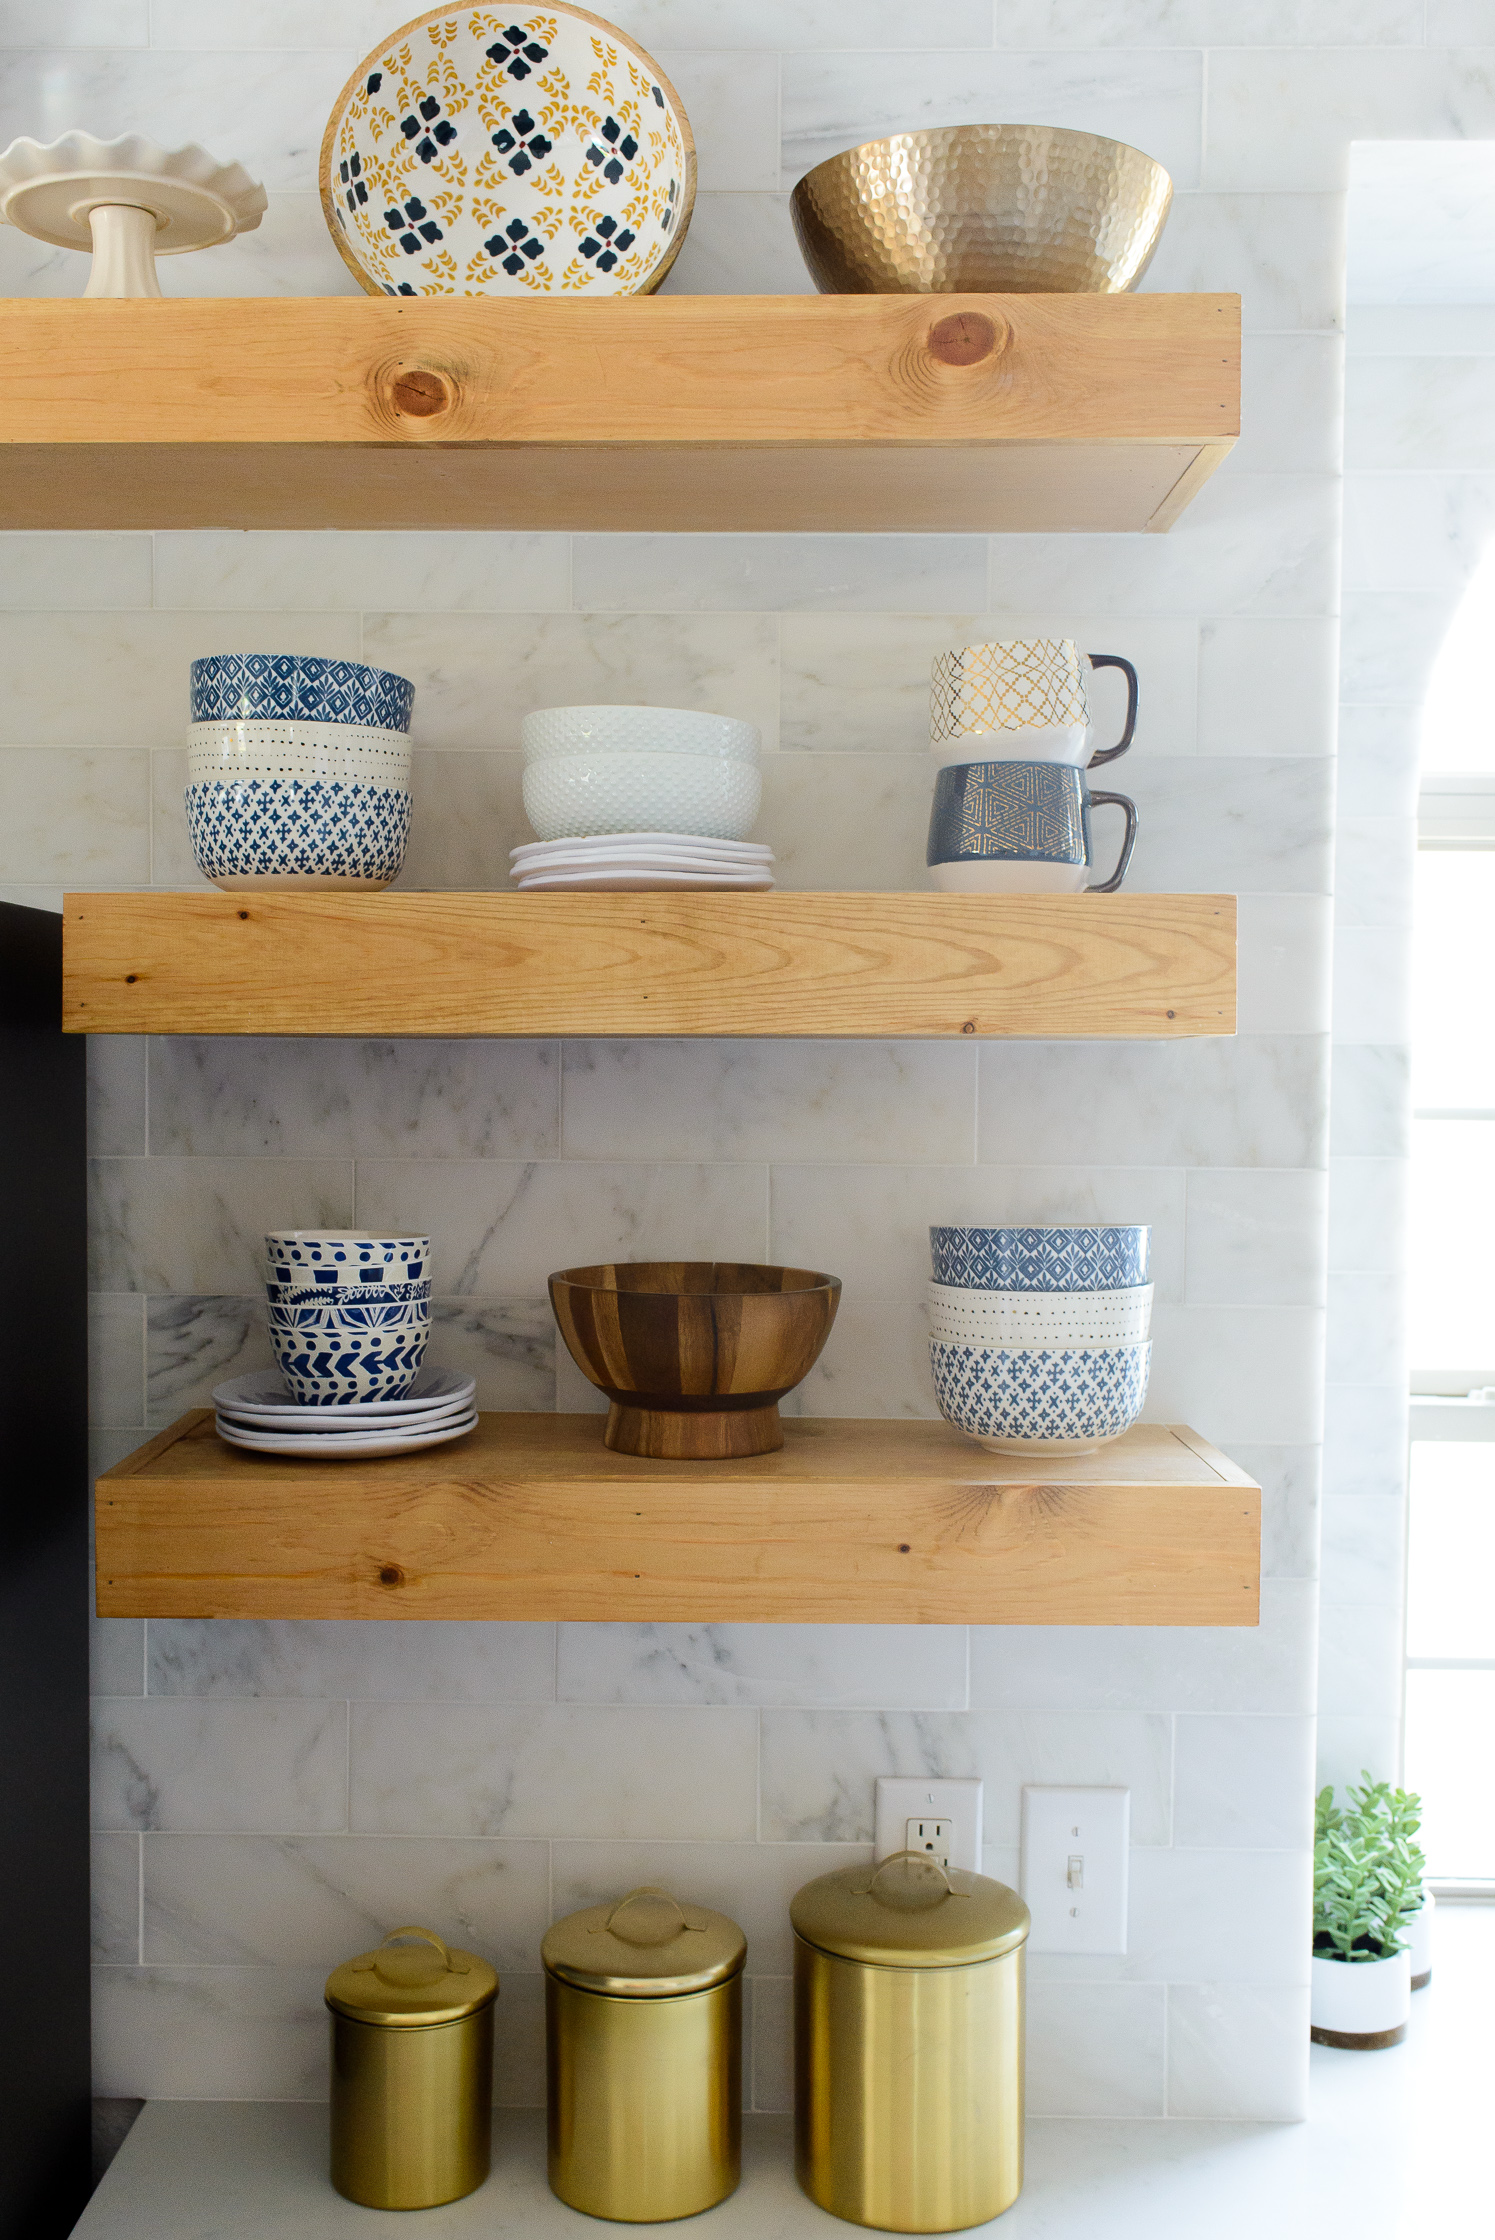
BACKSPLASH
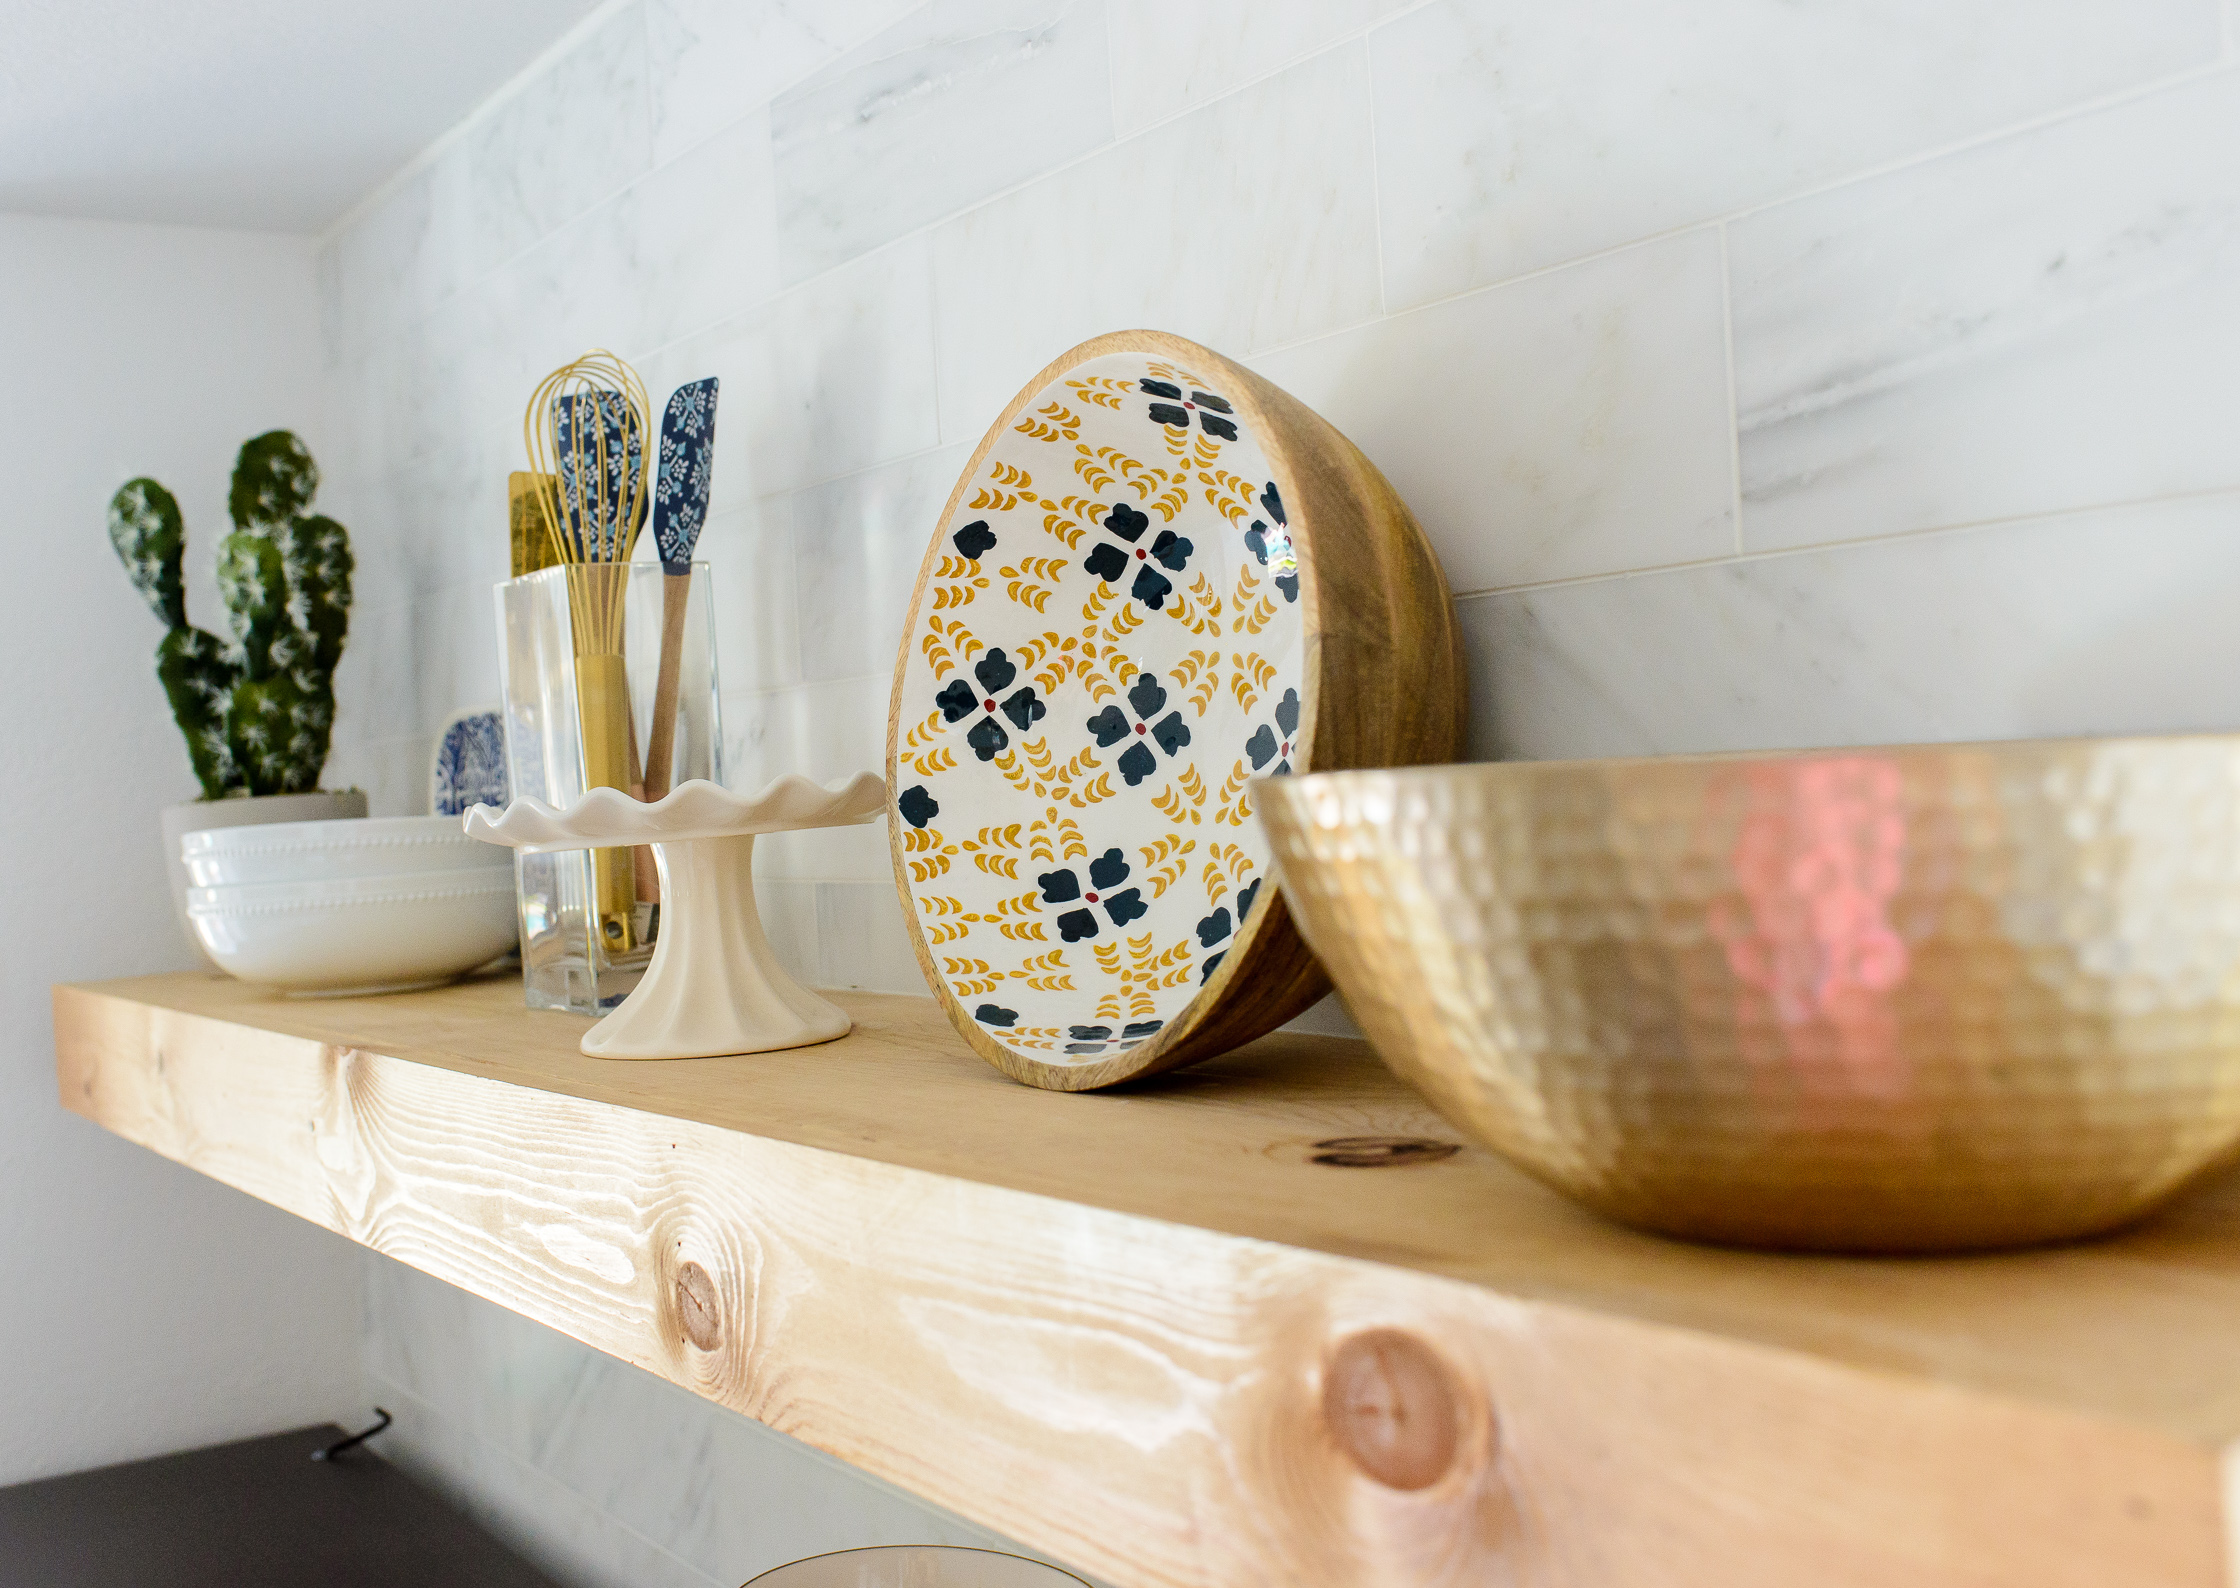
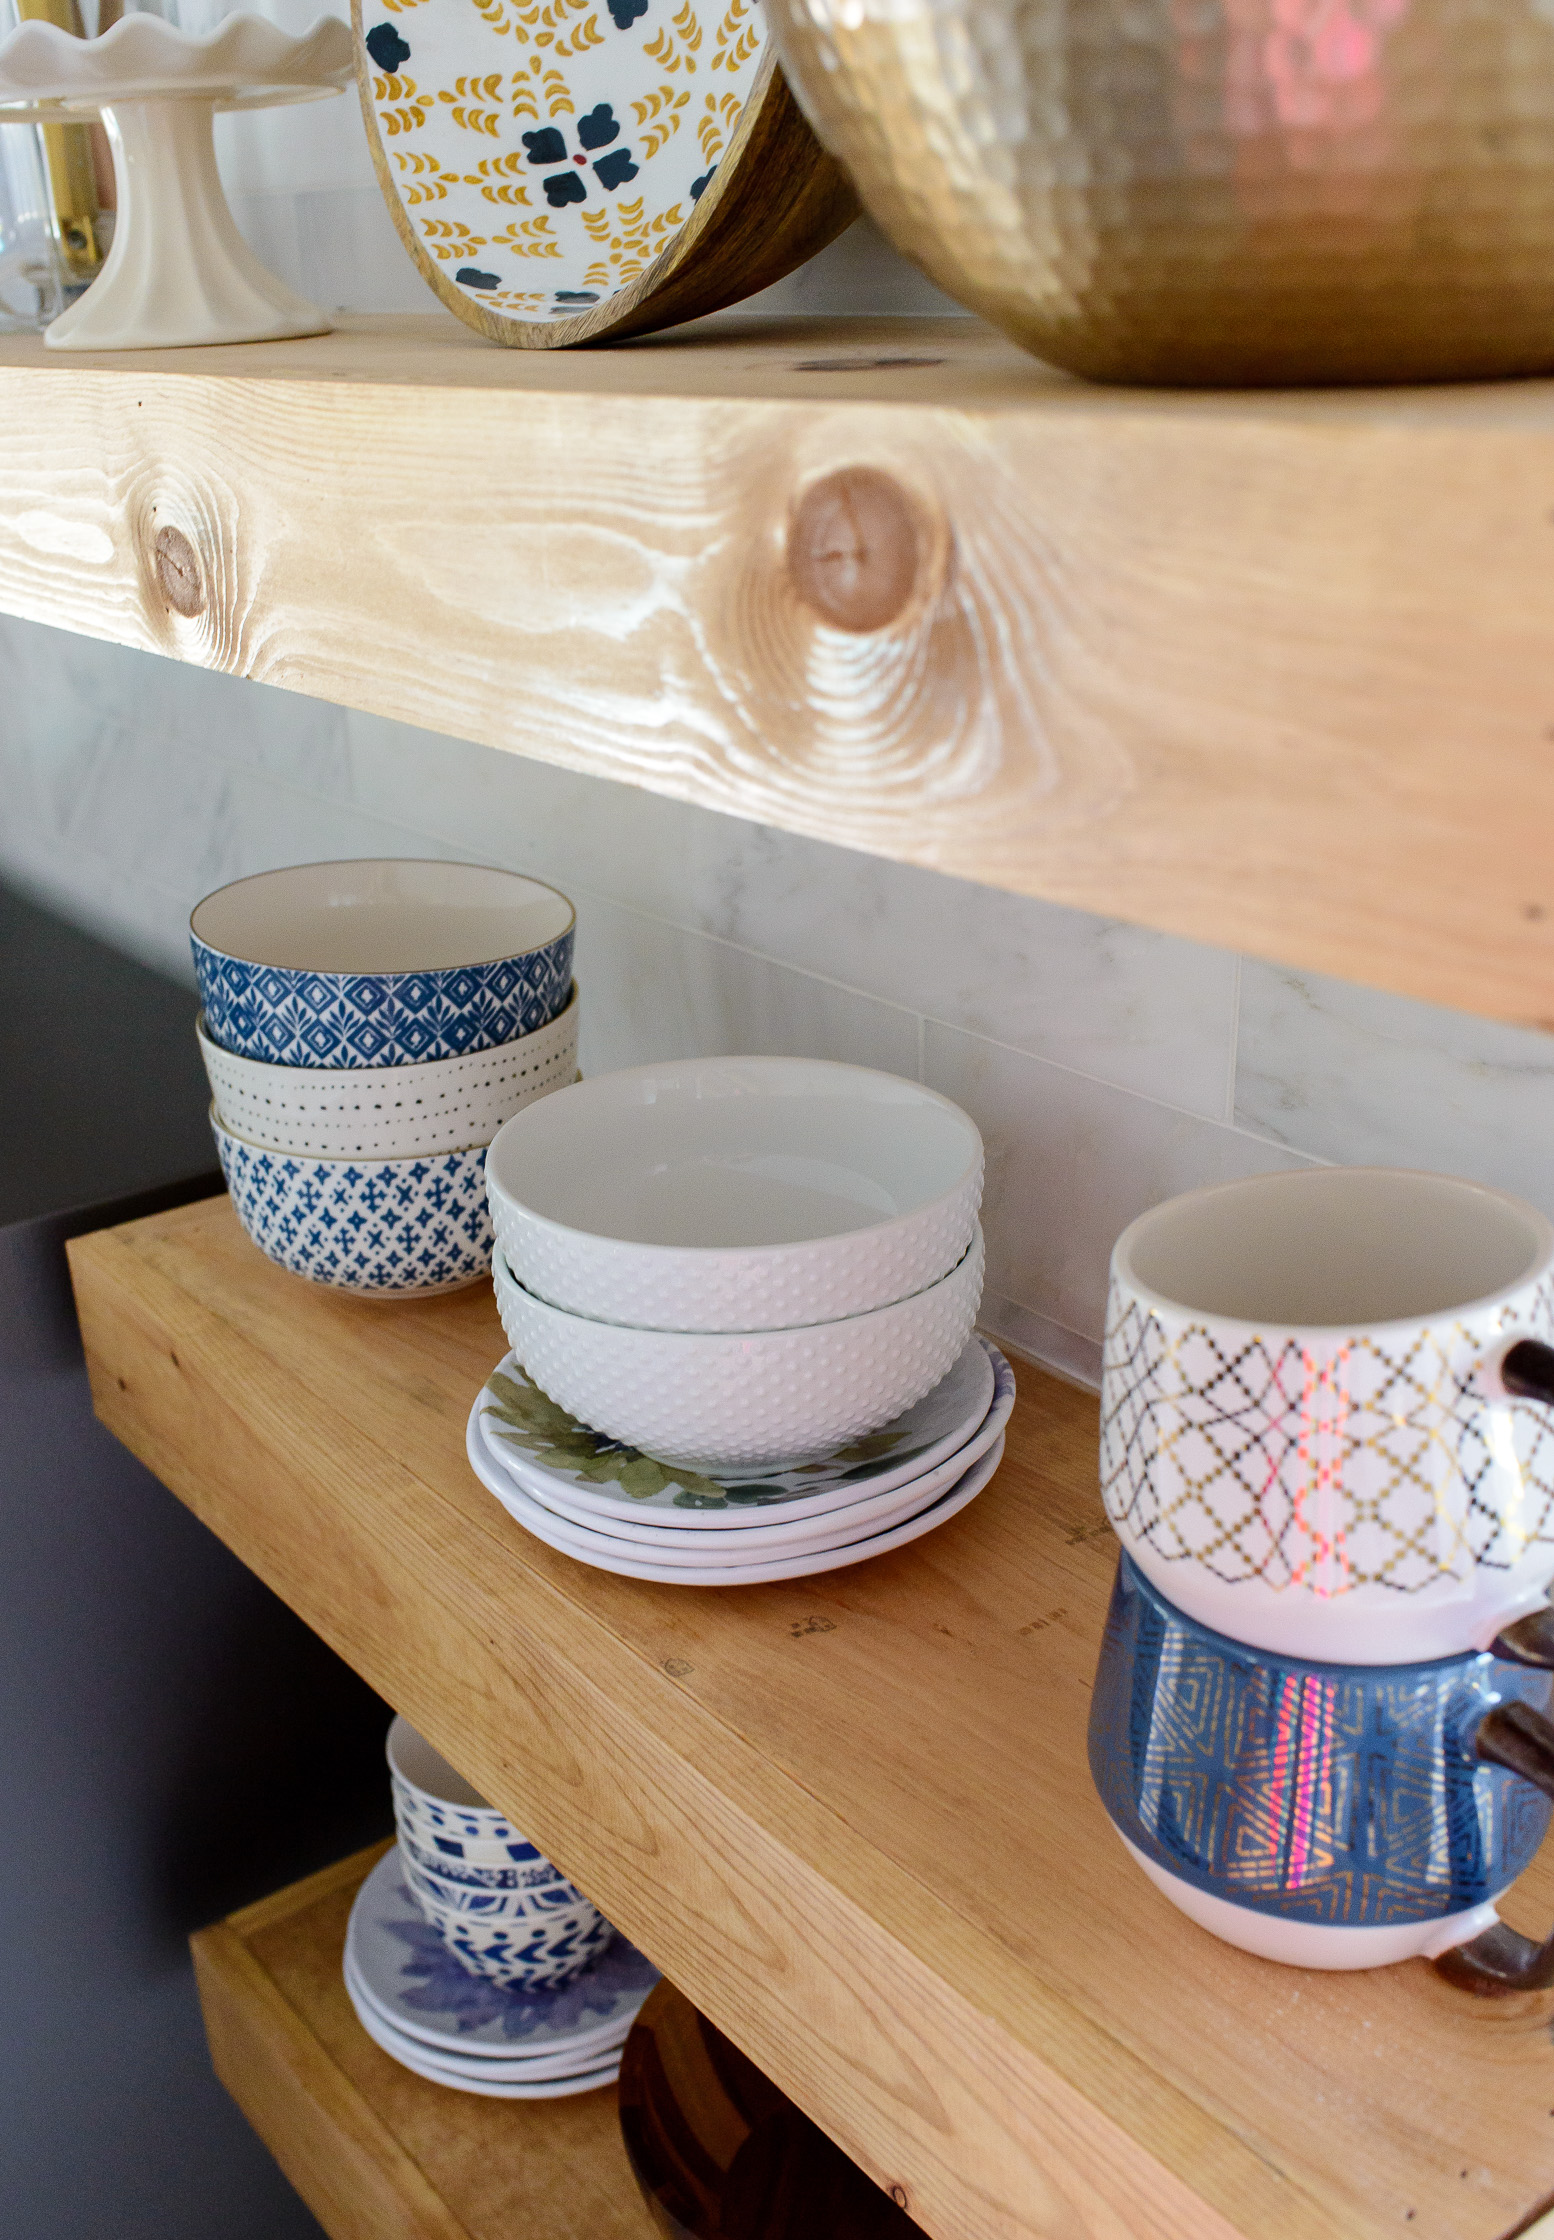
Choosing this particular Carrara Venato 4×12 Marble tile for the backsplash was an easy decision. A white marble with beautiful grey veining extending from the countertop to ceiling?? Yes, please. Our kitchen had a TON of square footage to cover (including the butler’s panty not shown). On the installation day, I spent SO many hours laying out each tile across my floors to disperse and blend the veining and coloring. I HIGHLY recommend ordering all backsplash tile through this company The Builder Depot. The quality is impeccable and extremely affordable compared to all the other tiles I researched. At one point I entertained the idea to install faux cabinets to reach the ceiling. But, once I realized that I could tear out the cabinets to the left of the sink and replace with shelves I was hooked! My husband made these same floating shelves in our last house, so he and my brother-in-law built these 3 shelves. We drilled them in before installing the tiles backsplash. I chose the brightest and most warm grout color. It’s called Bright White by Polyblend. After all the tiles were placed they were then sealed. It took about 4-5 days just to do the tile work since the installer had to walk outside to cut most of the pieces. It turned out beautiful!
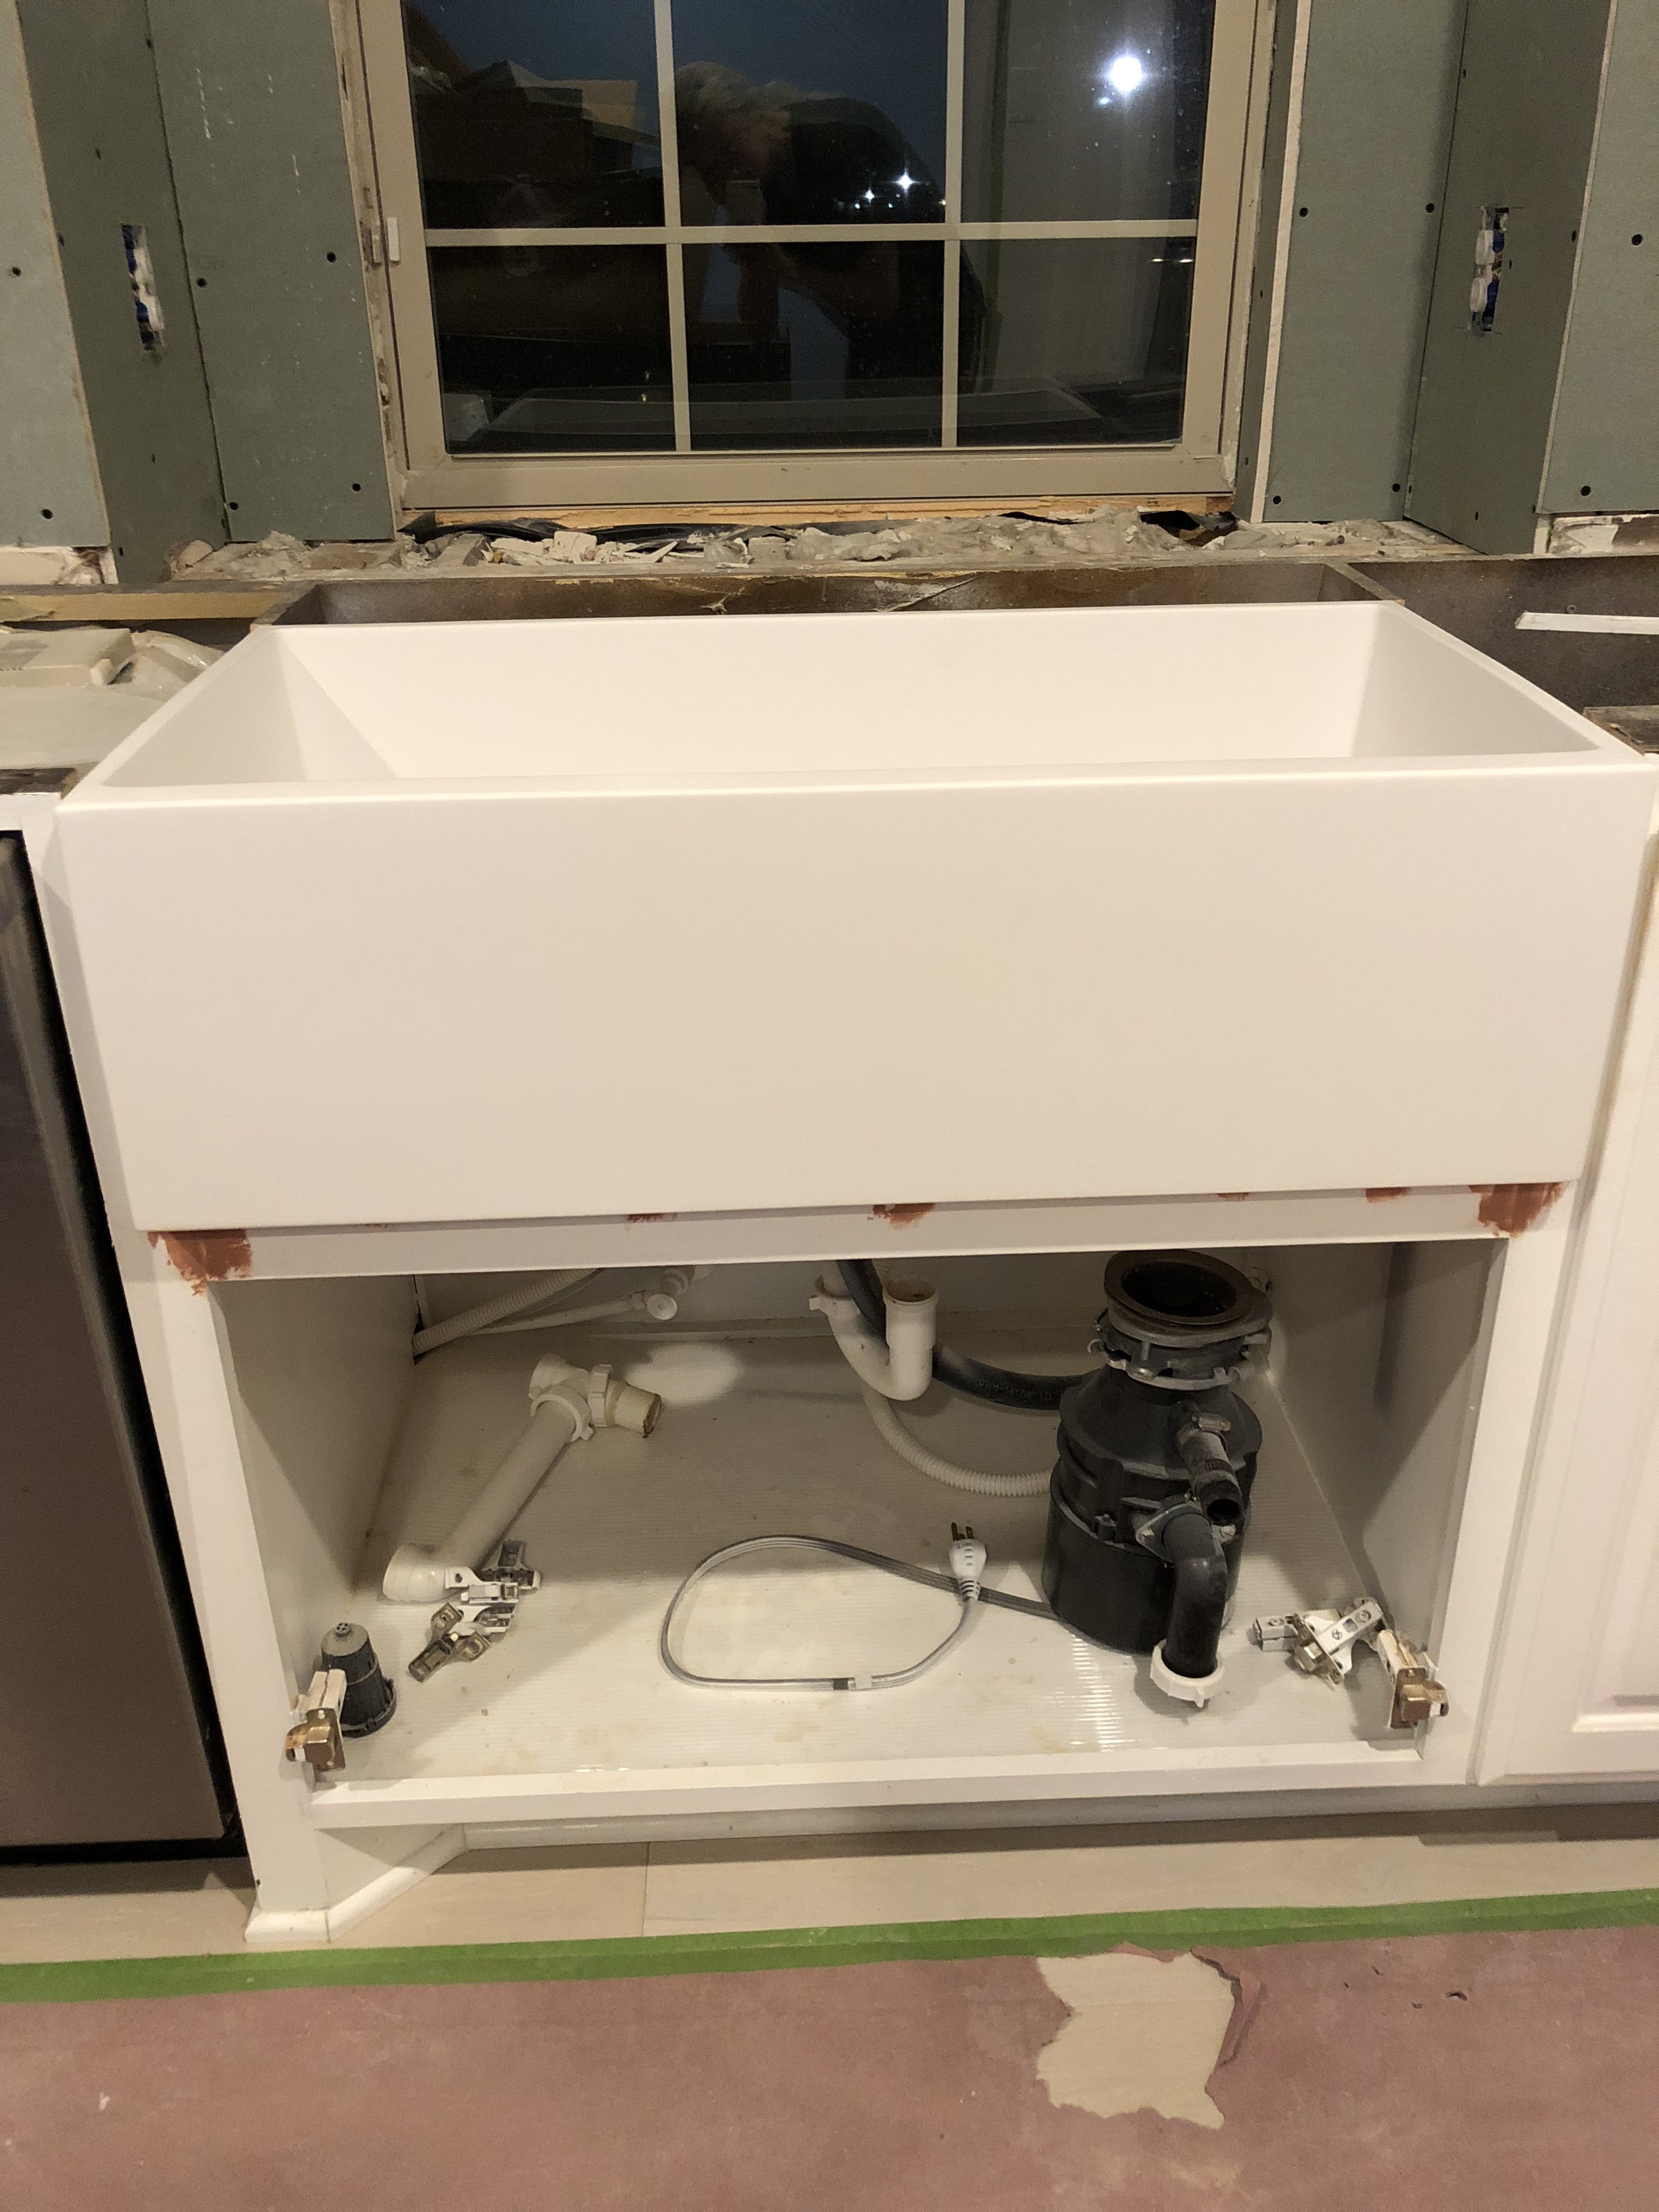
SINK
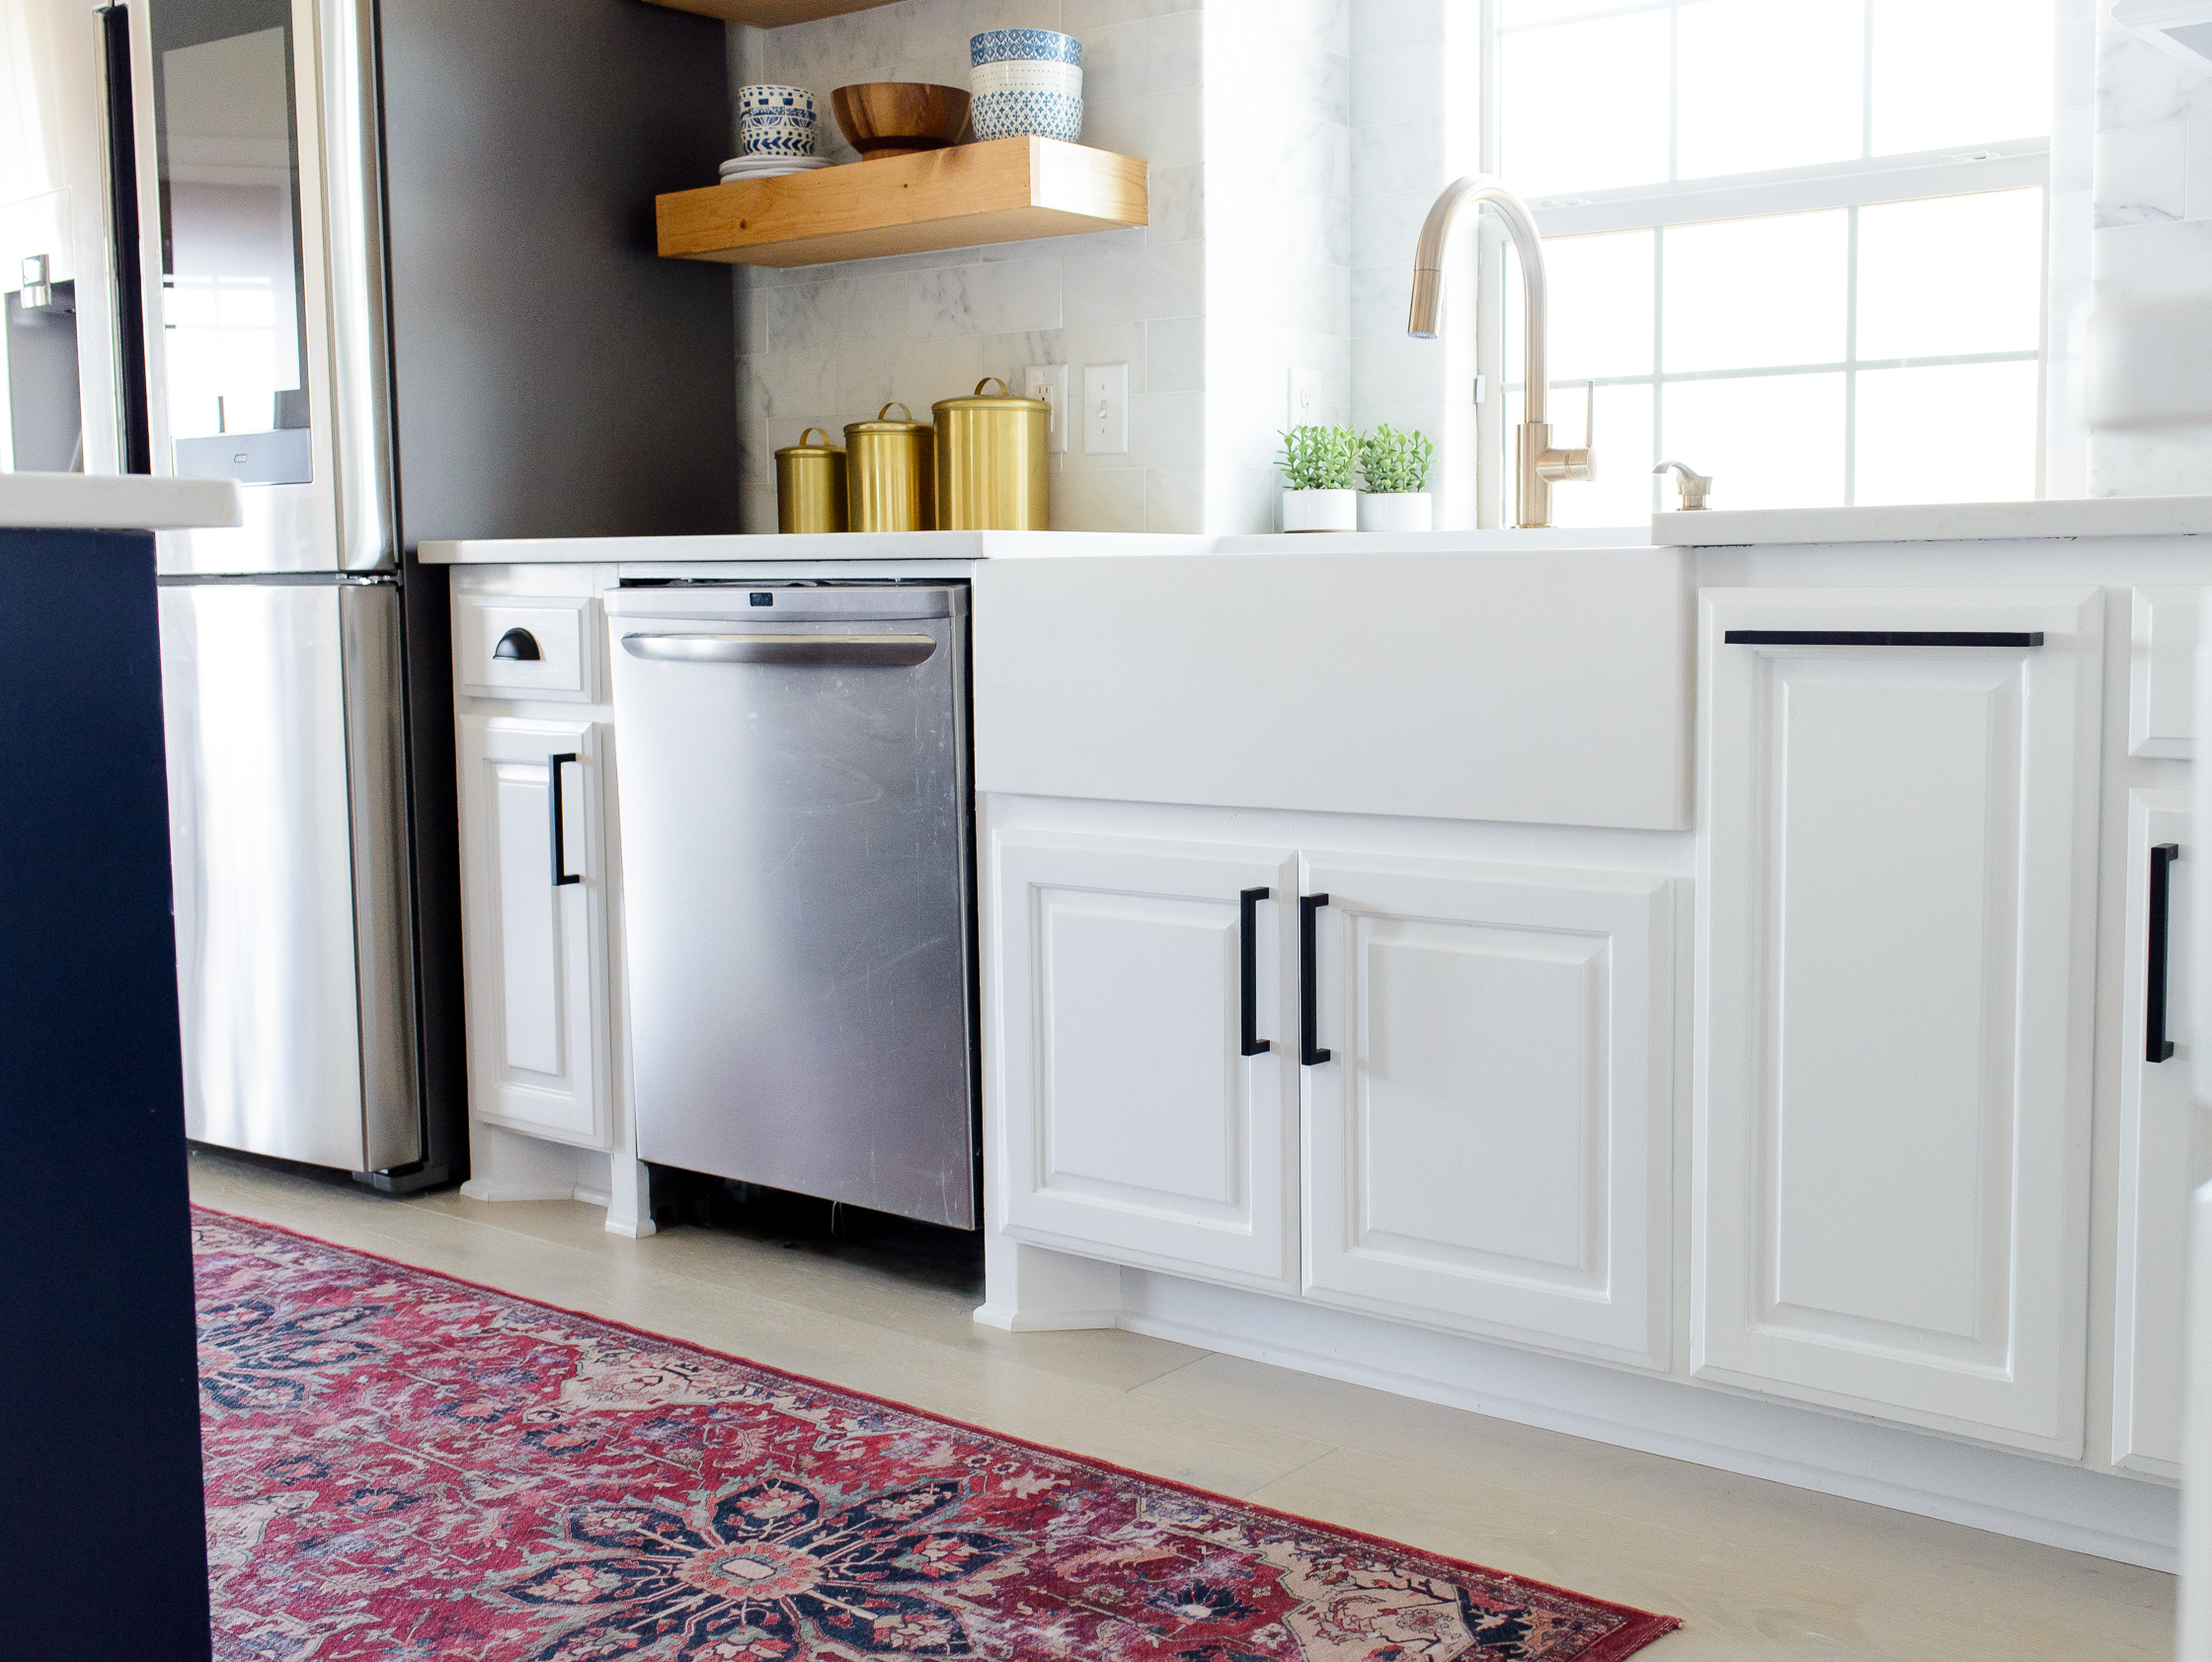
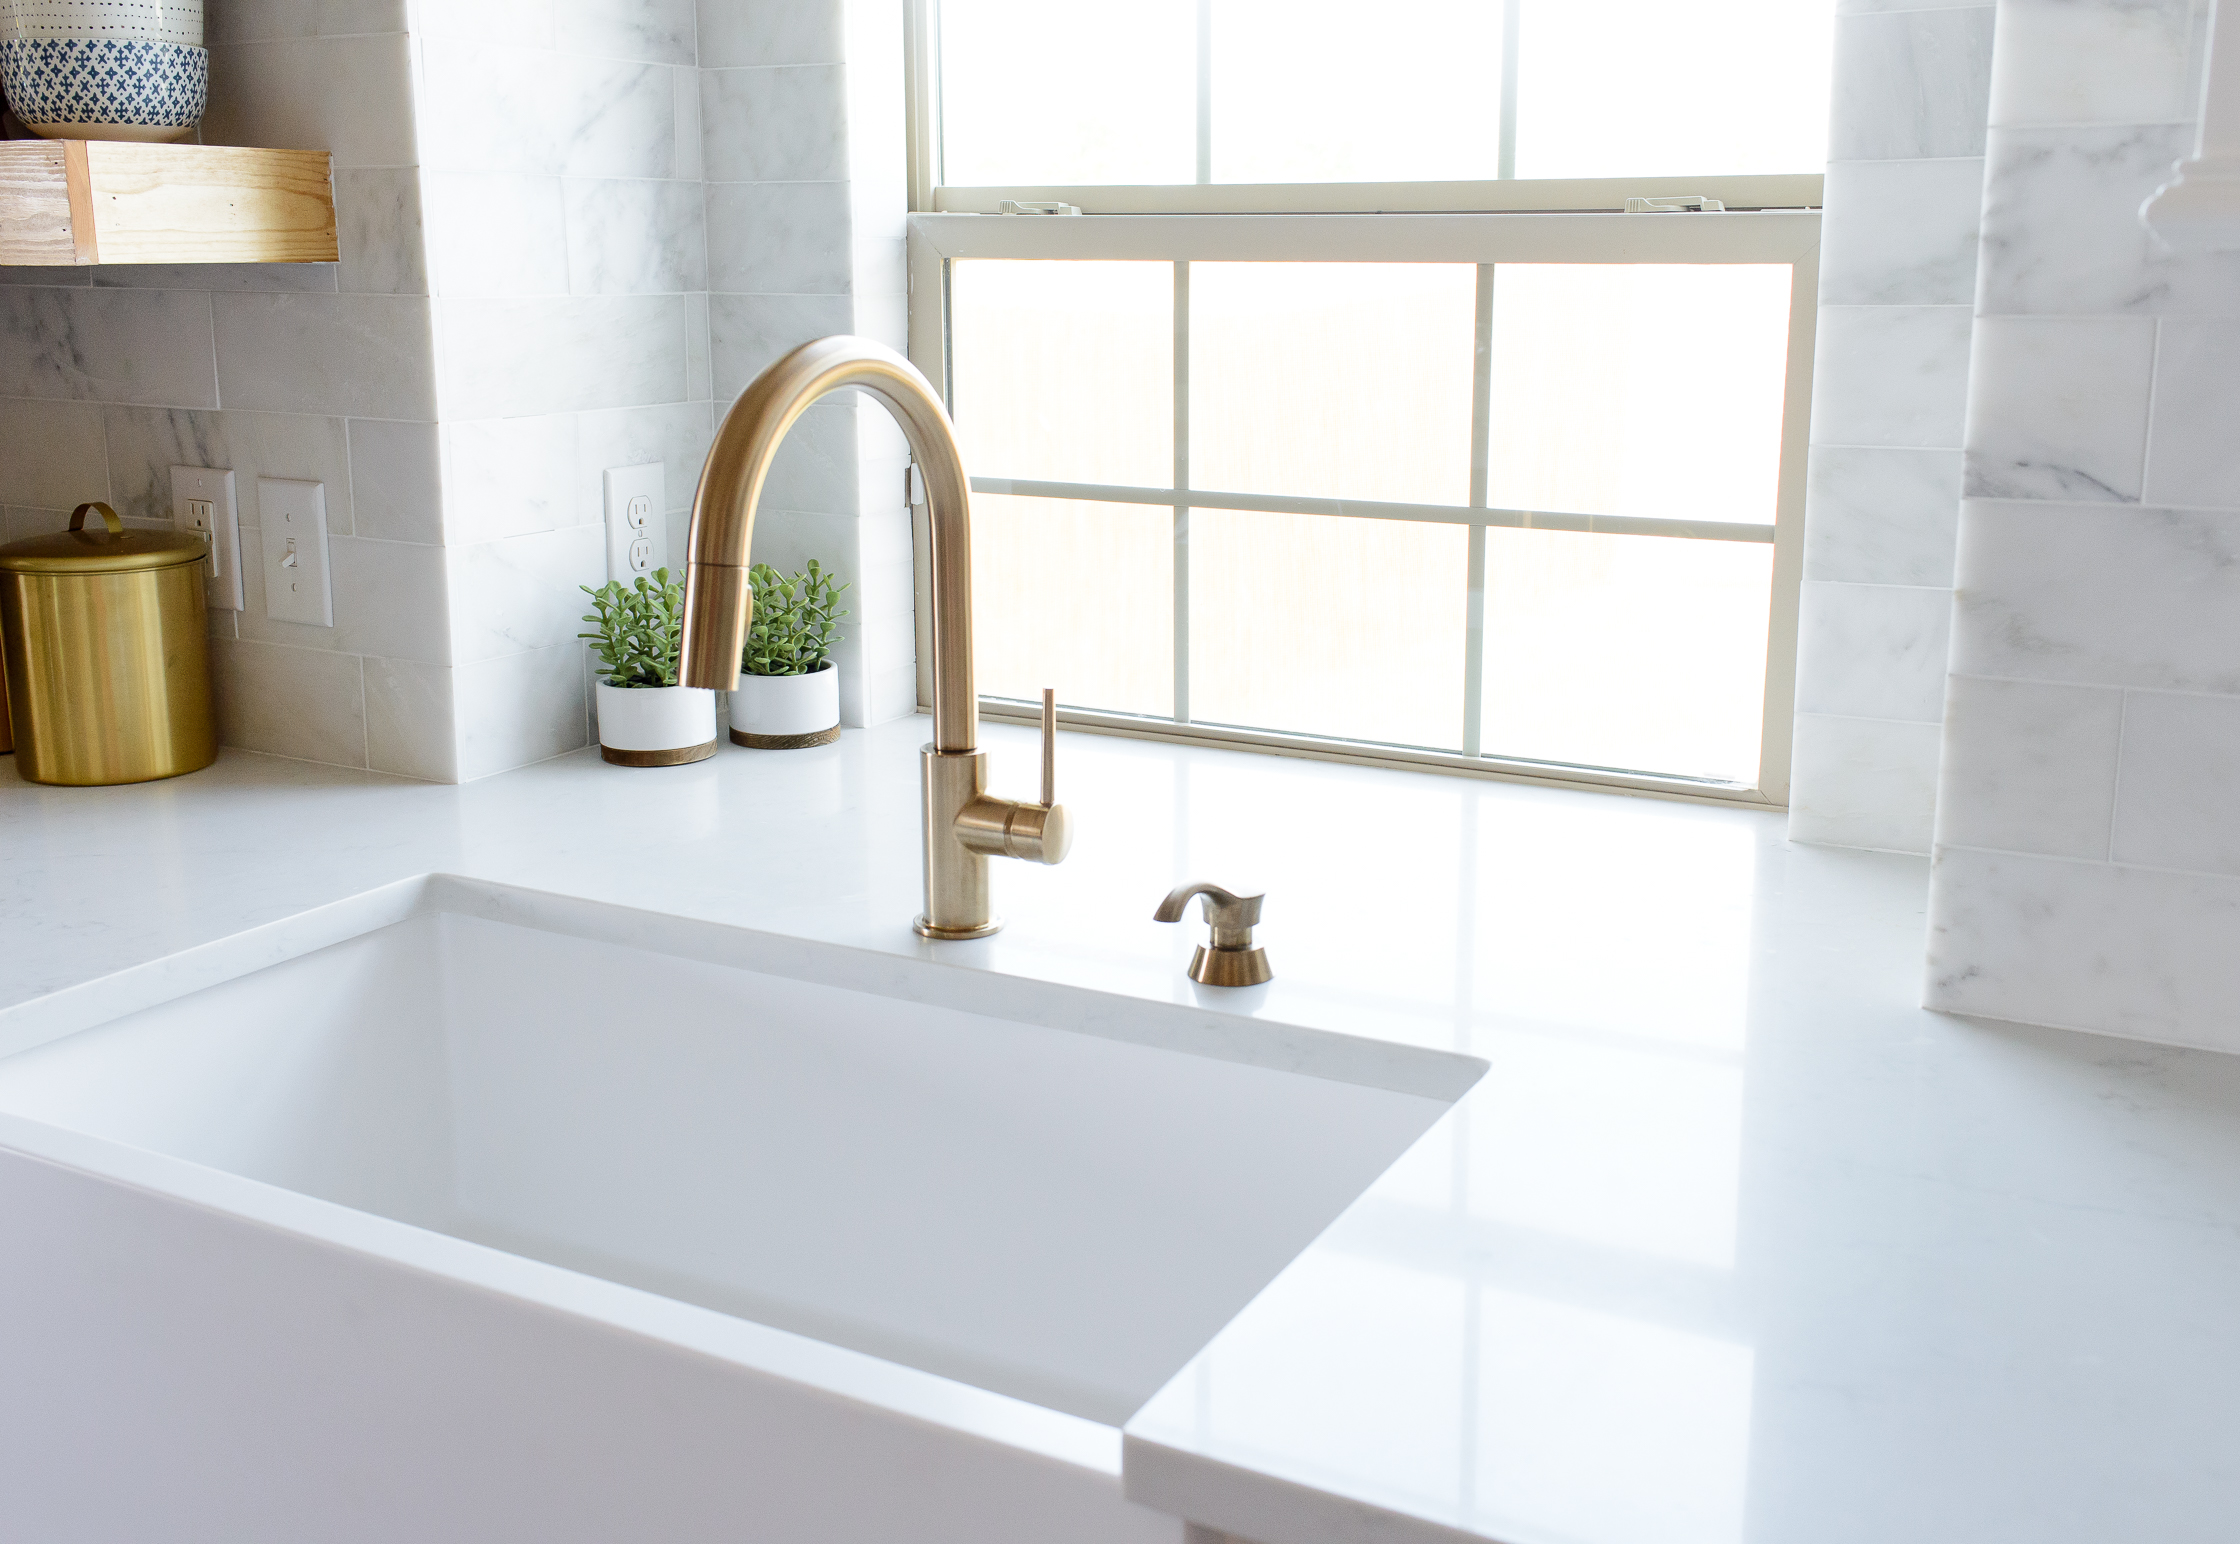
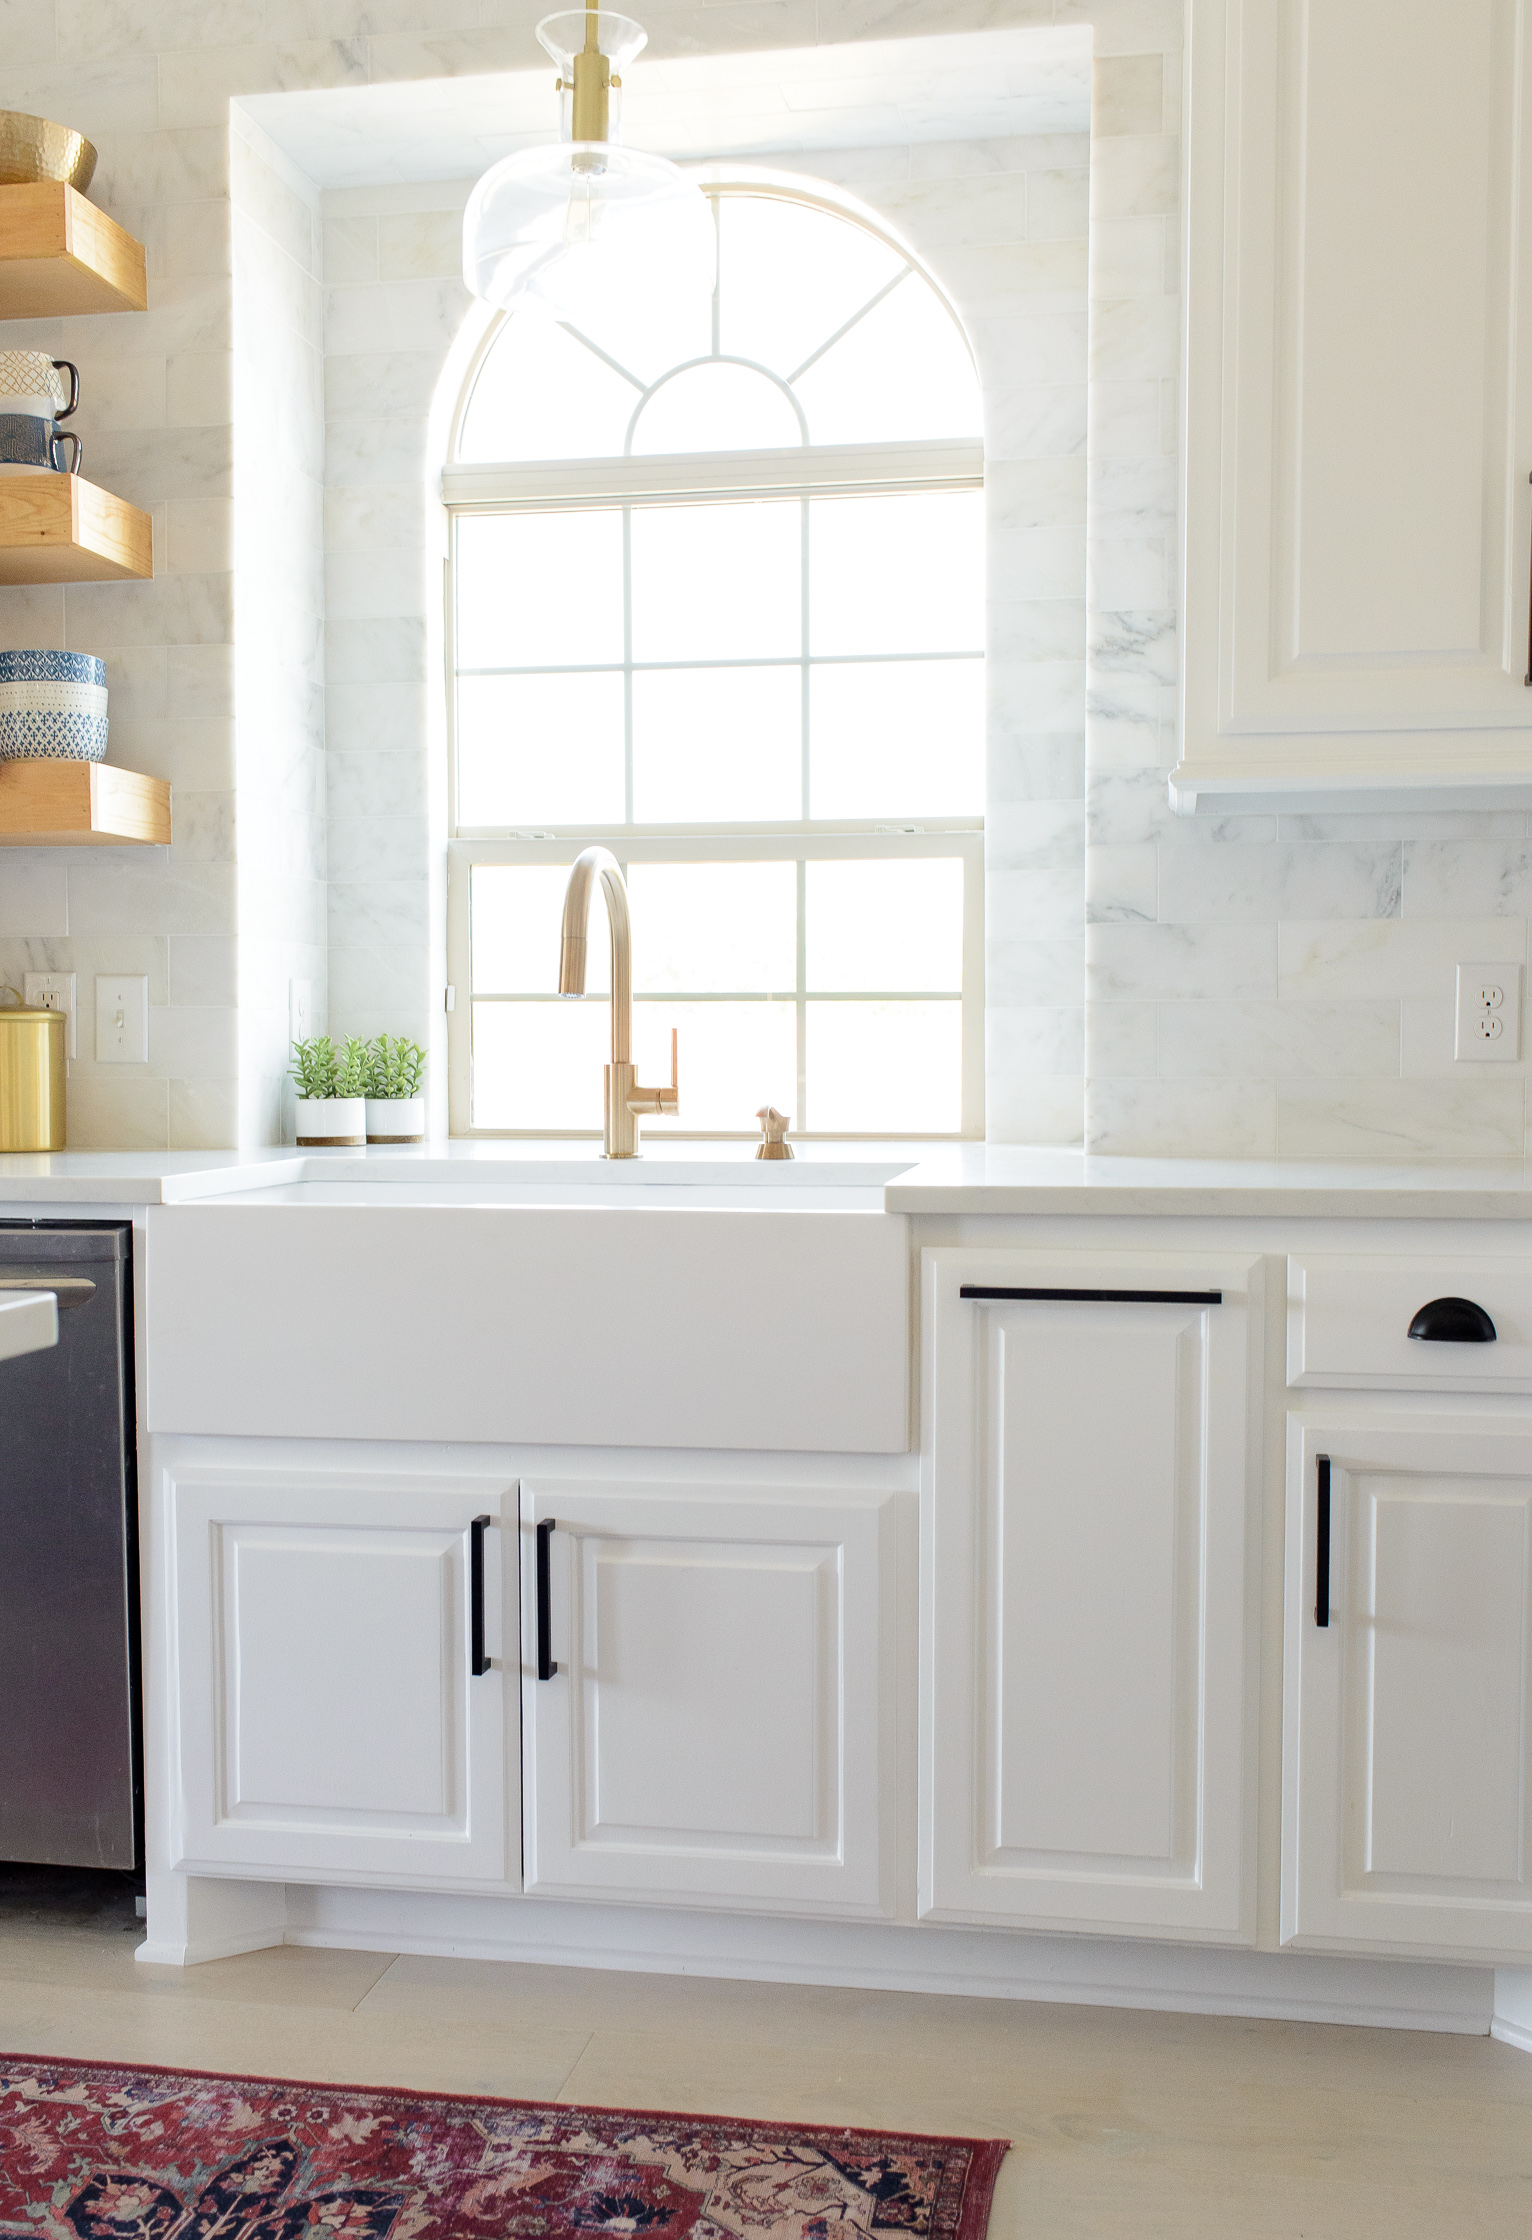
This farmhouse sink by Whyte & Company is the coolest sink ever. I’ll definitely share an entire post talking details about this one since it is THAT cool. I chose the Emma white farmhouse sink. You can literally get this sink made in ANY color. The surface is non-porous and bacteria-resistant. It’s pretty rad. Avery is loving her sink baths in this beauty. It has such a deep bowl helping her water splashes stay contained. Well, mostly 😉 I’ll write more details about this fun part of the project soon!
GOLD FACET/ SOAP DISPENSER
If there is anything that I did right in this kitchen it was getting a built in soap dispenser. I can’t recommend this enough if you have the option to install it! I still think about the convenience of it every. single. day. AND I cannot get over the finish on this facet and soap dispenser. It’s called champagne bronze and is just the perfect, subtle touch of gold. They’re both from Build.com. Funny story, so when I first opened this out of the box I swore it wasn’t gold at all! My eyes couldn’t see it. The next morning, it looked perfectly like the champagne bronze I recognized with a touch of gold. If you’re nervous to add brass to your kitchen because you’re worried you won’t love it in 5-10 years then this is for you. It’s incredibly subtle and beautiful making it the perfect accent to any kitchen! It’s truly timeless.
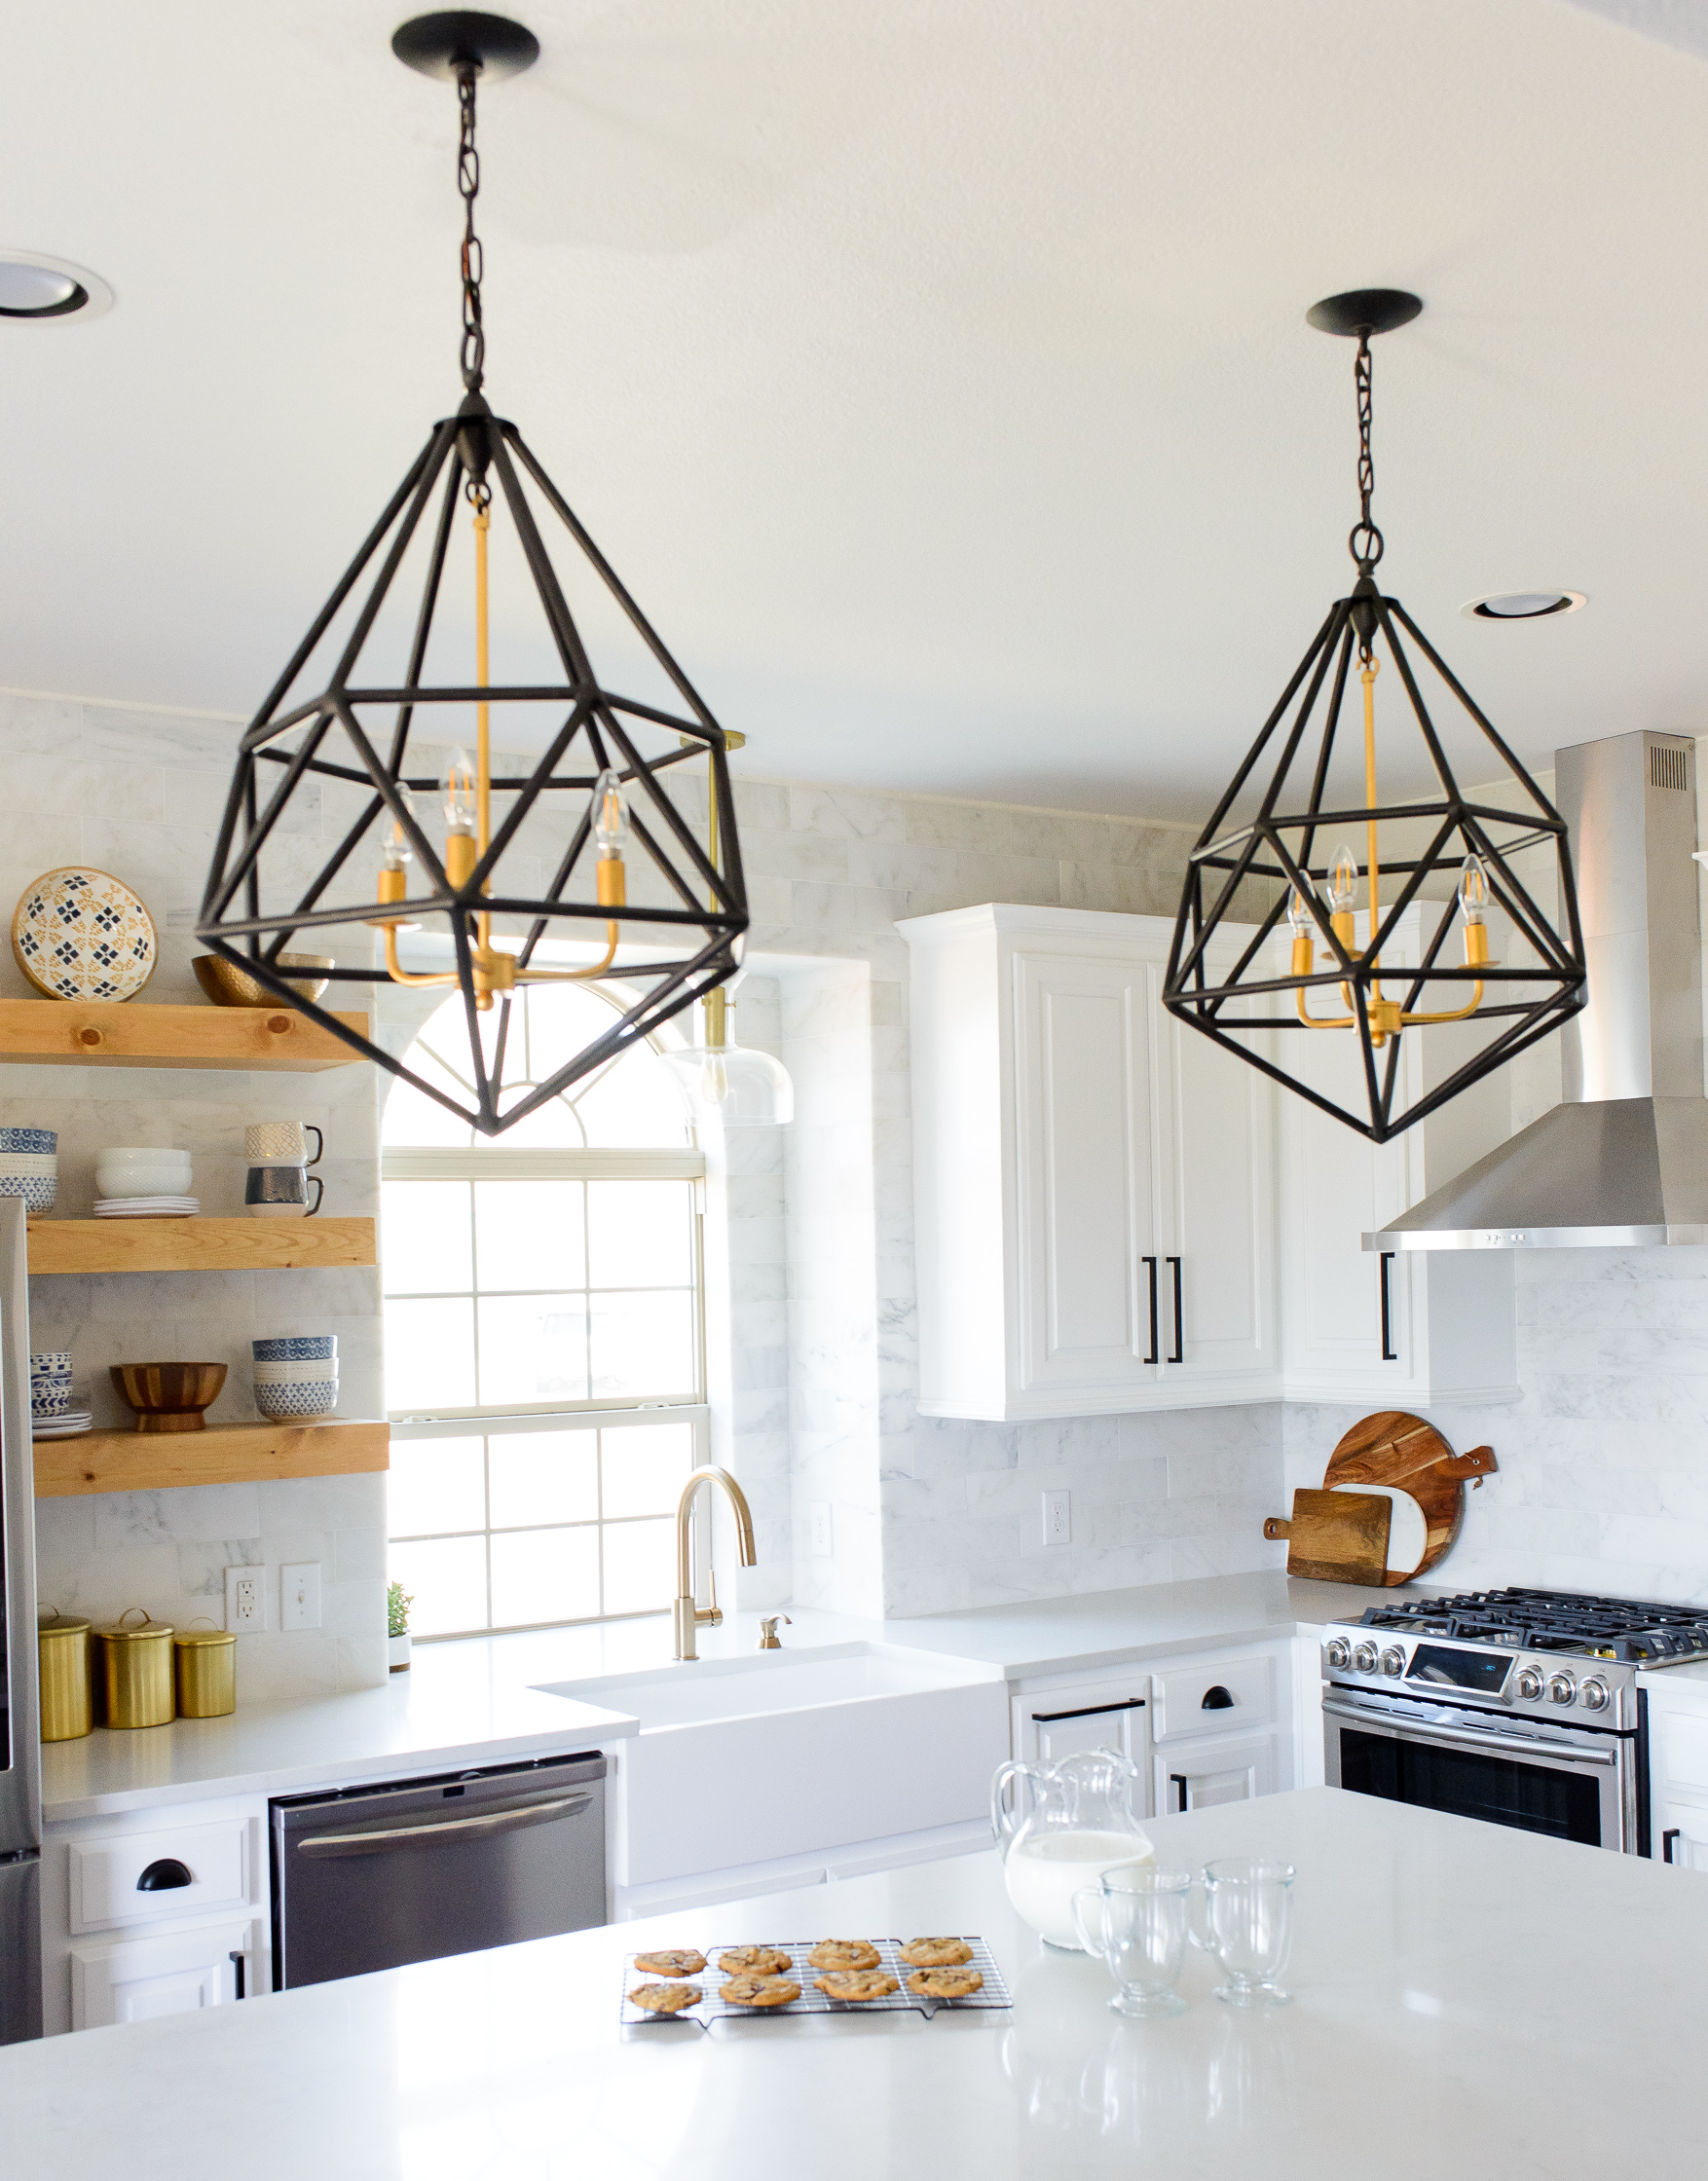
LIGHT FIXTURES
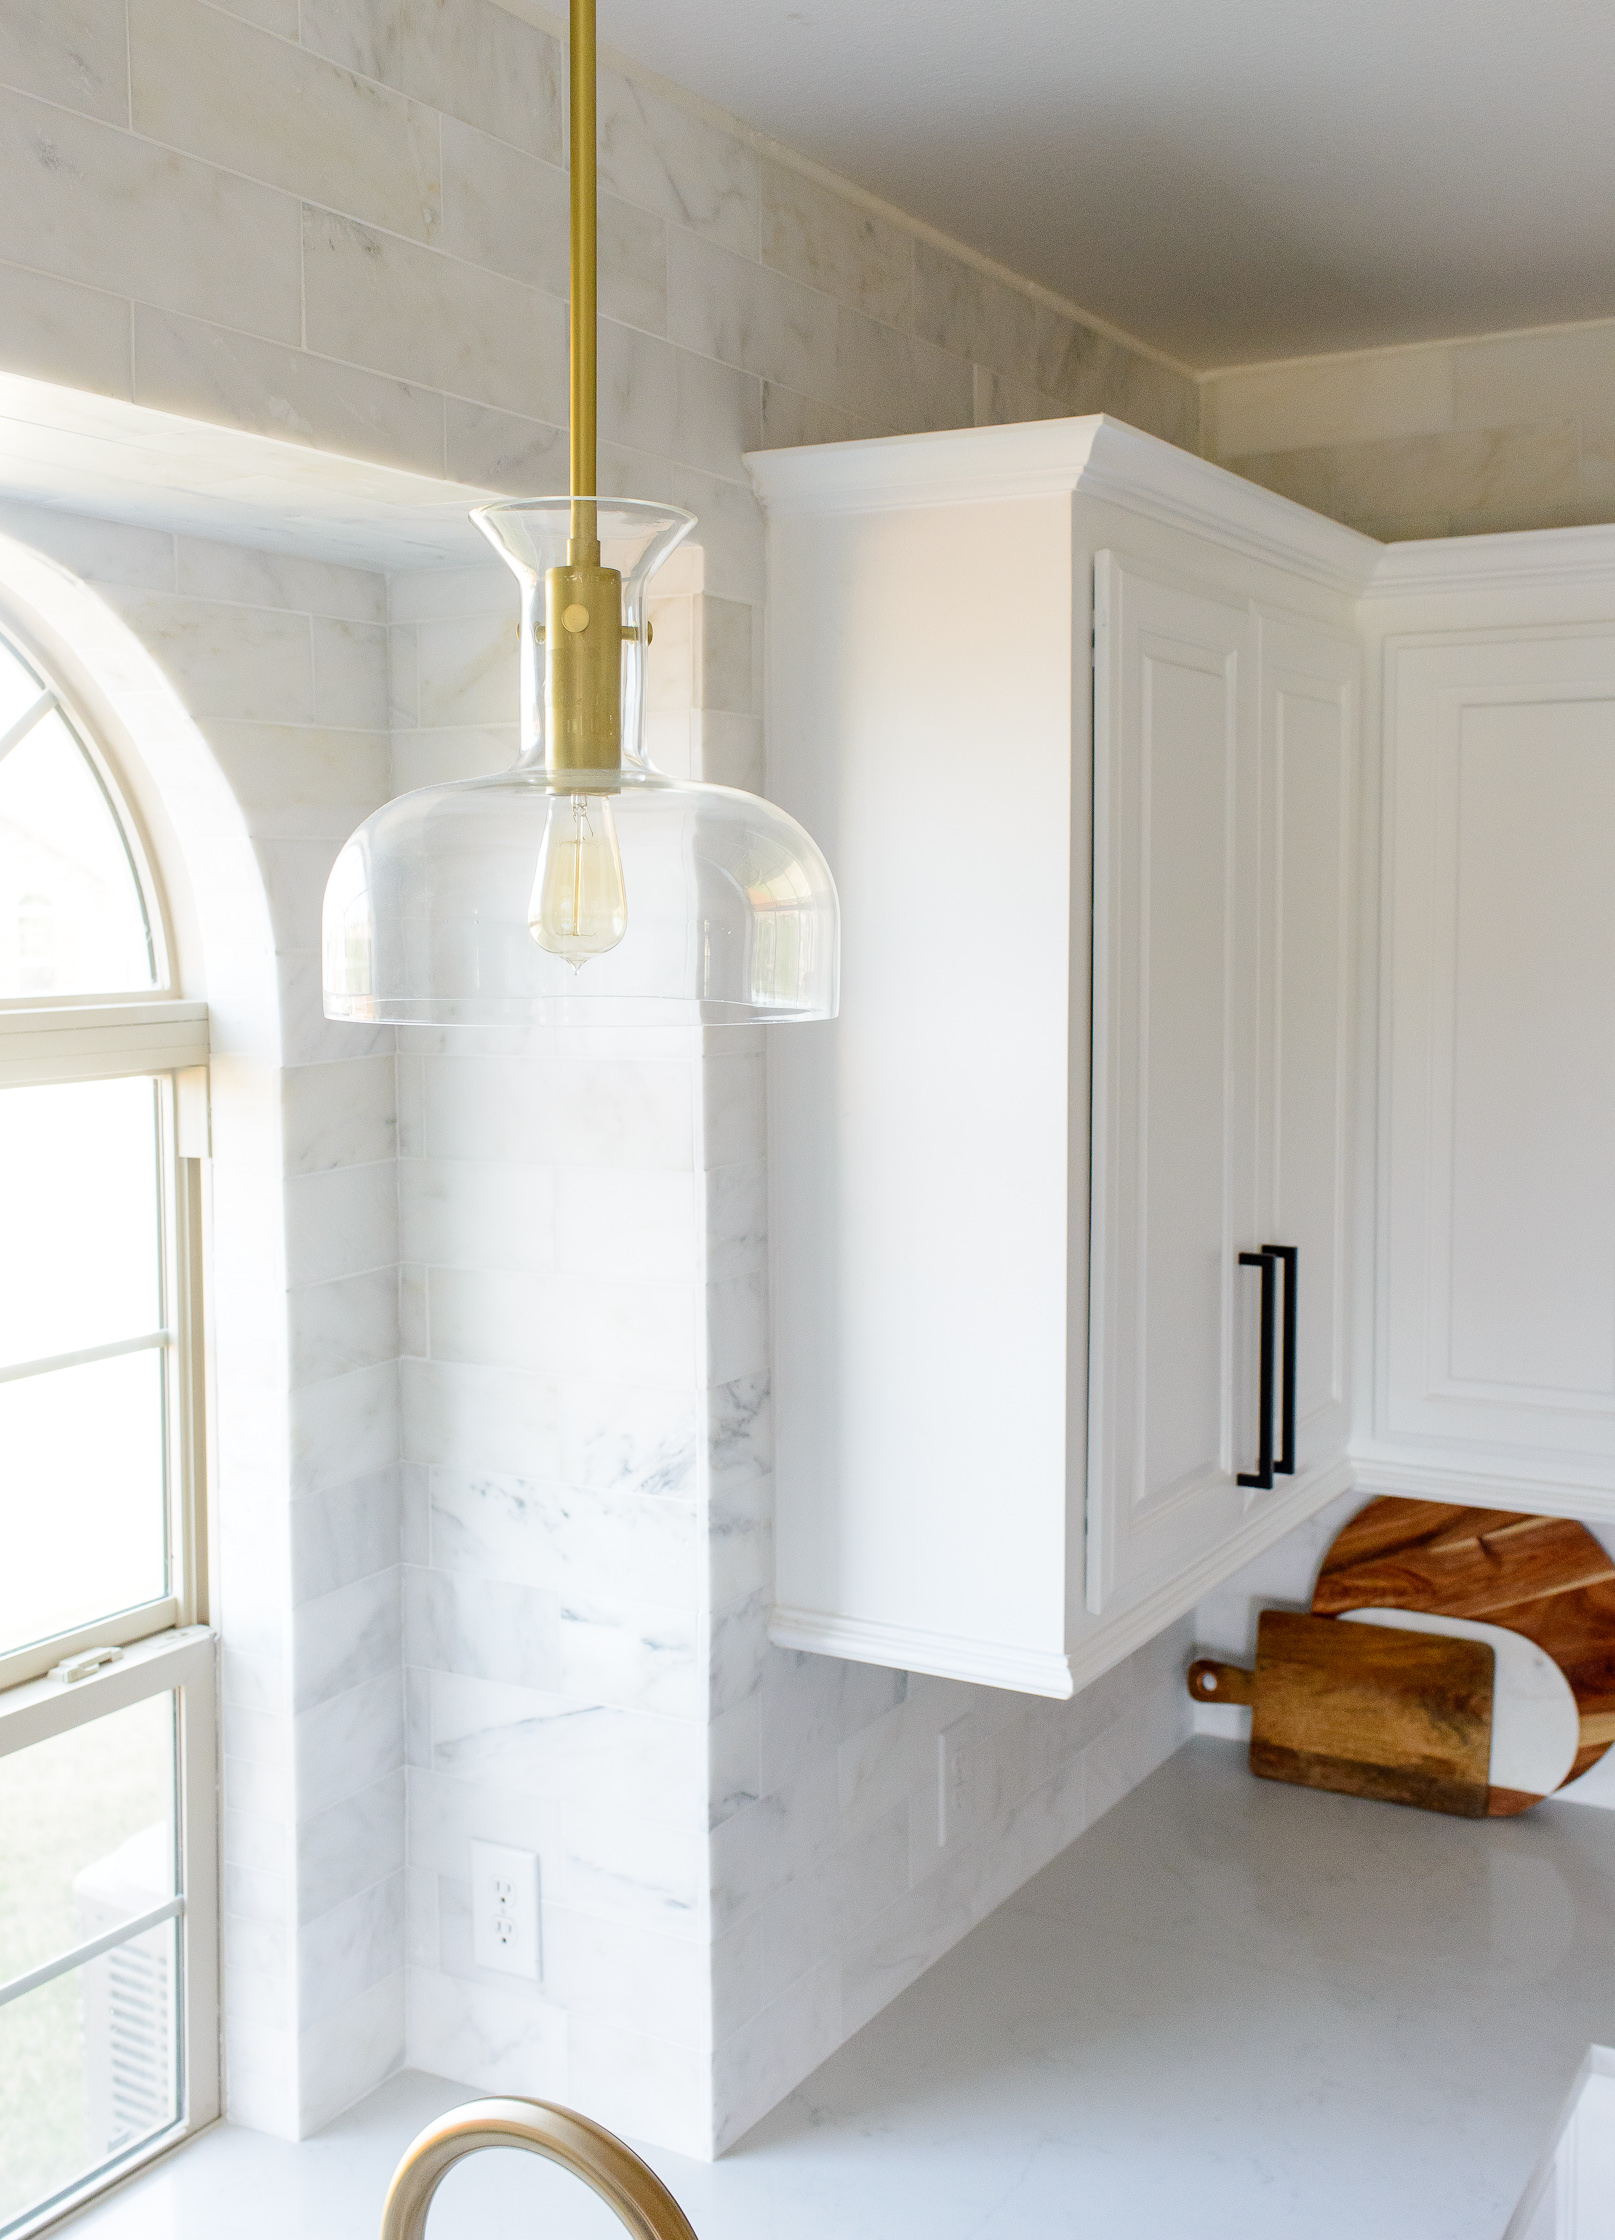
There were SO many option of lighting to hang over the sink. I chose this sleek glass pendant from Lamps Plus. It’s one of my favorites. I wanted one to drop just a few feet off the ceiling. Our installer put it in a few inches too low and it was the 1st thing I noticed as soon as we walked in to the finished room. I’m glad Aaron noticed it being too low as well. Choosing heights to hang lighting is tricky! I did not want it to be in my husband’s face, since I obviously need him to stay comfortable in front of the kitchen sink 😉 I had the installer raise it up a bit and I’m so glad that I did! Any hassle to redo things will always be worth it! It’s a beautiful, thick glass bowl with an aged brass finish. I love the simplicity in this window.
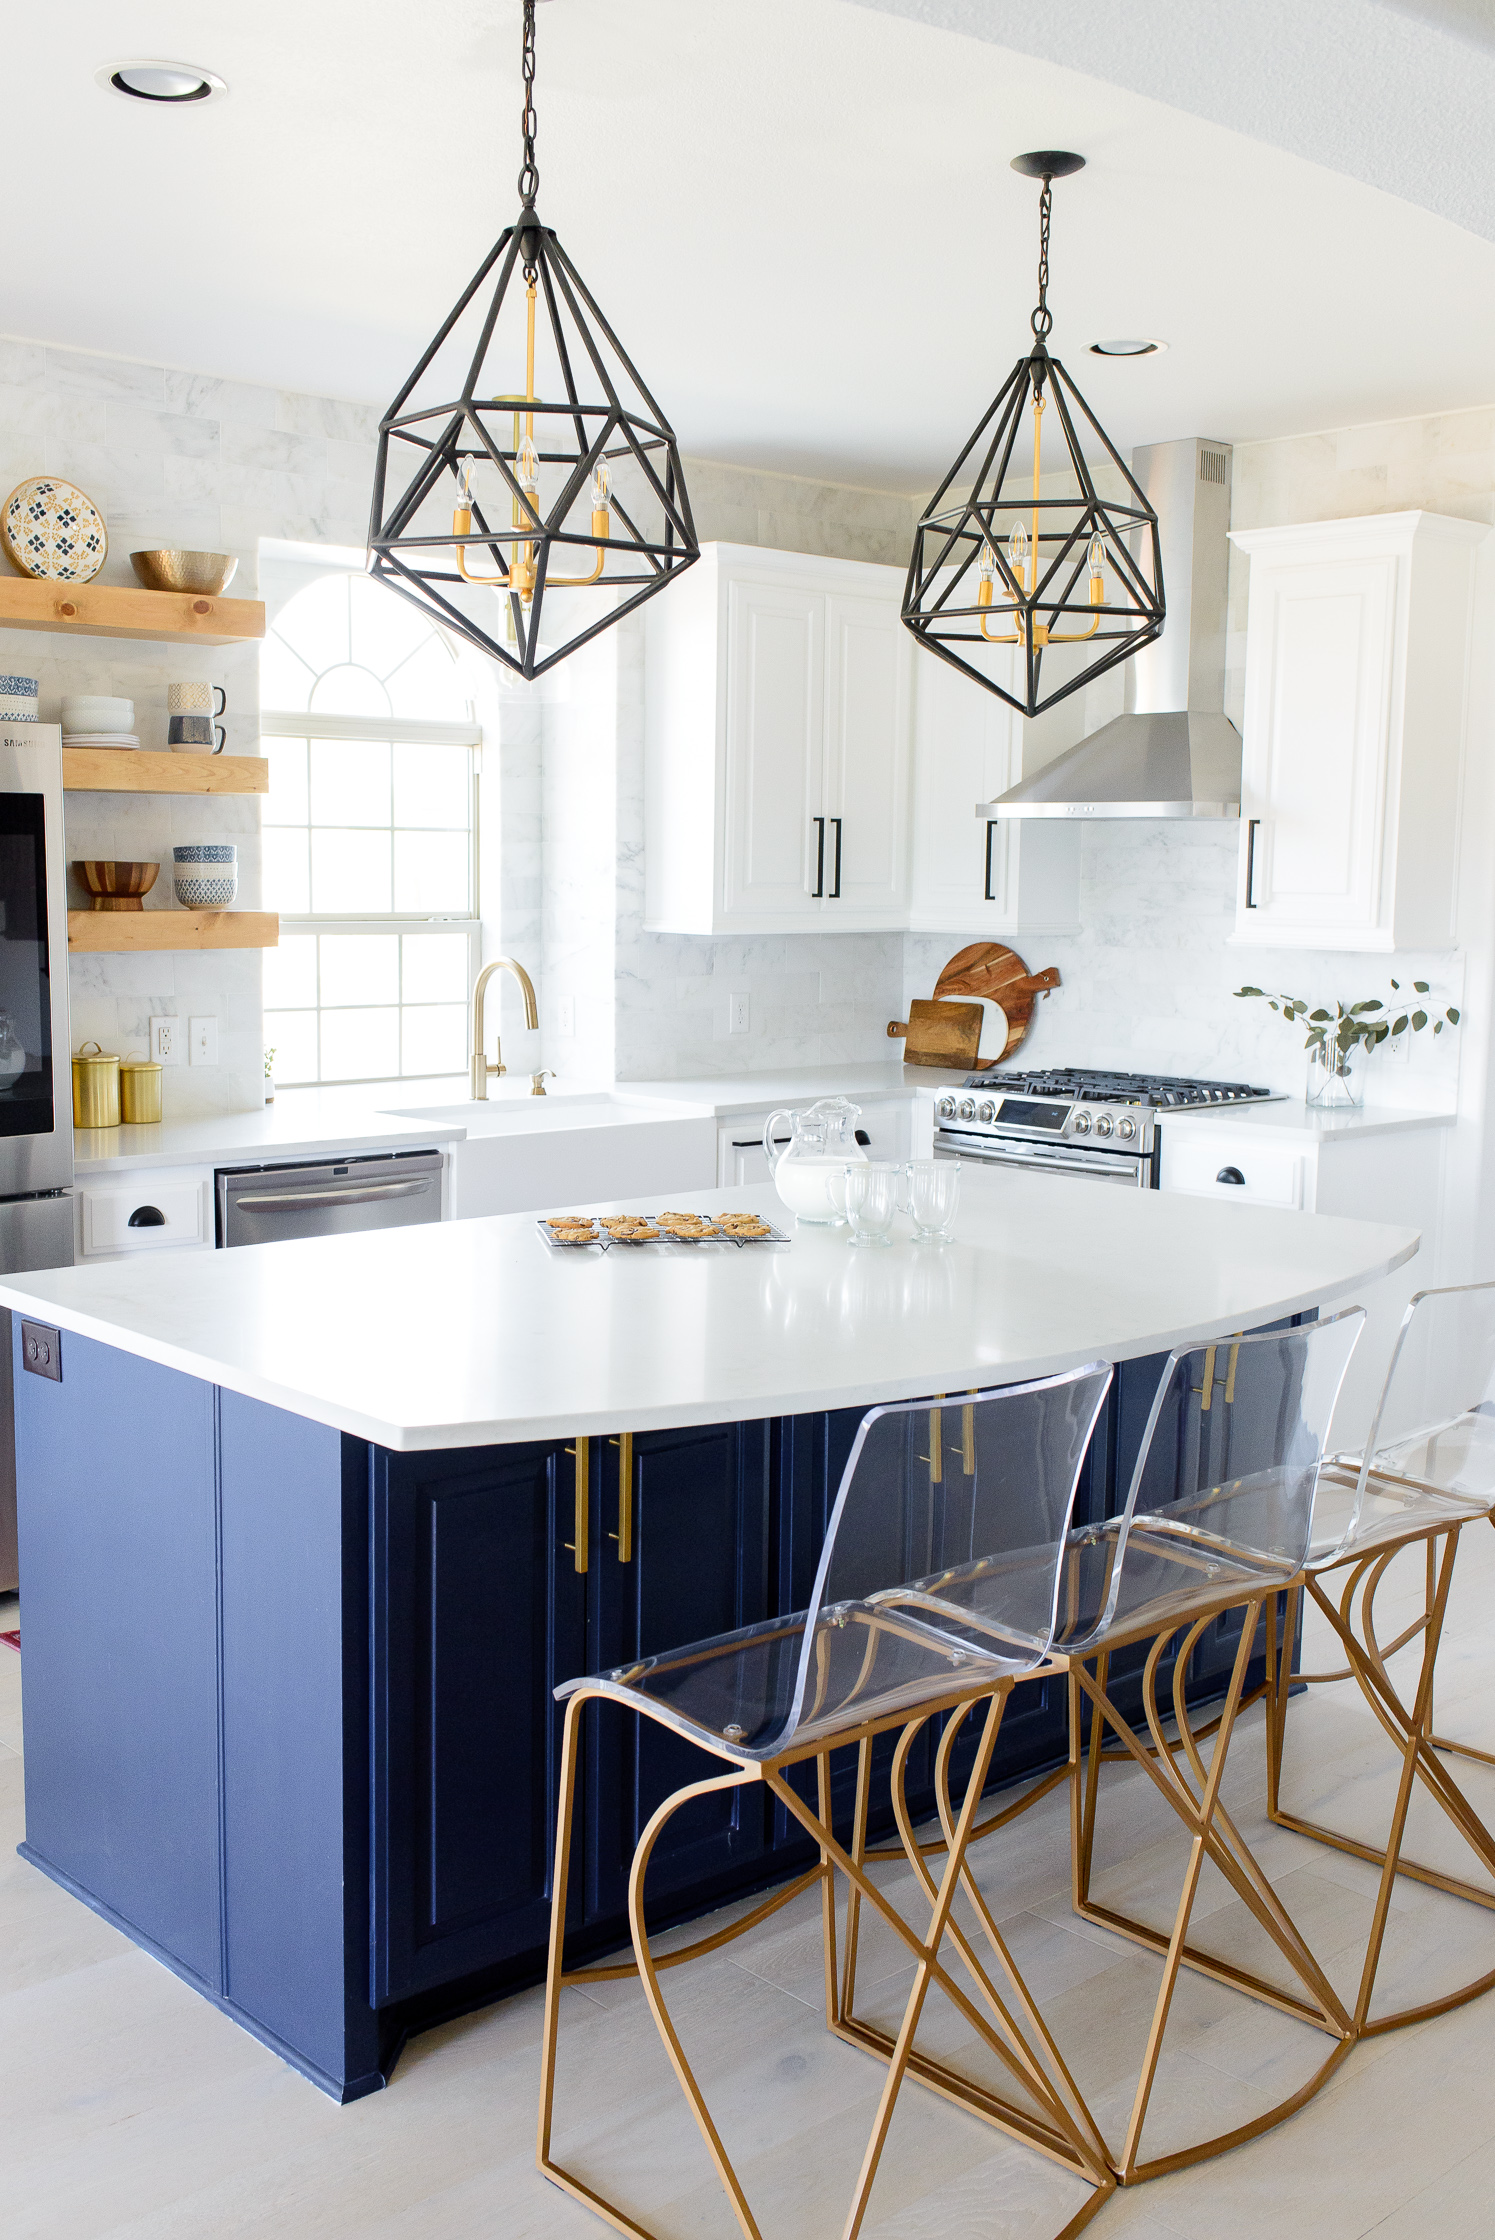
The geometry in these black pendants from Lamps Plus is stunning! I had my installer drill through the ceiling and create 2 spaces to hang new lighting. Unfortunately I realized a little too late that the holes needed to be further apart from one another to accommodate the large pendants. WOOPS! Do you remember when I mentioned earlier that I’m not a designer? ha! The hassle was well worth the headaches all around. Because HOW fun are these?! Such bold statement pieces, I love it!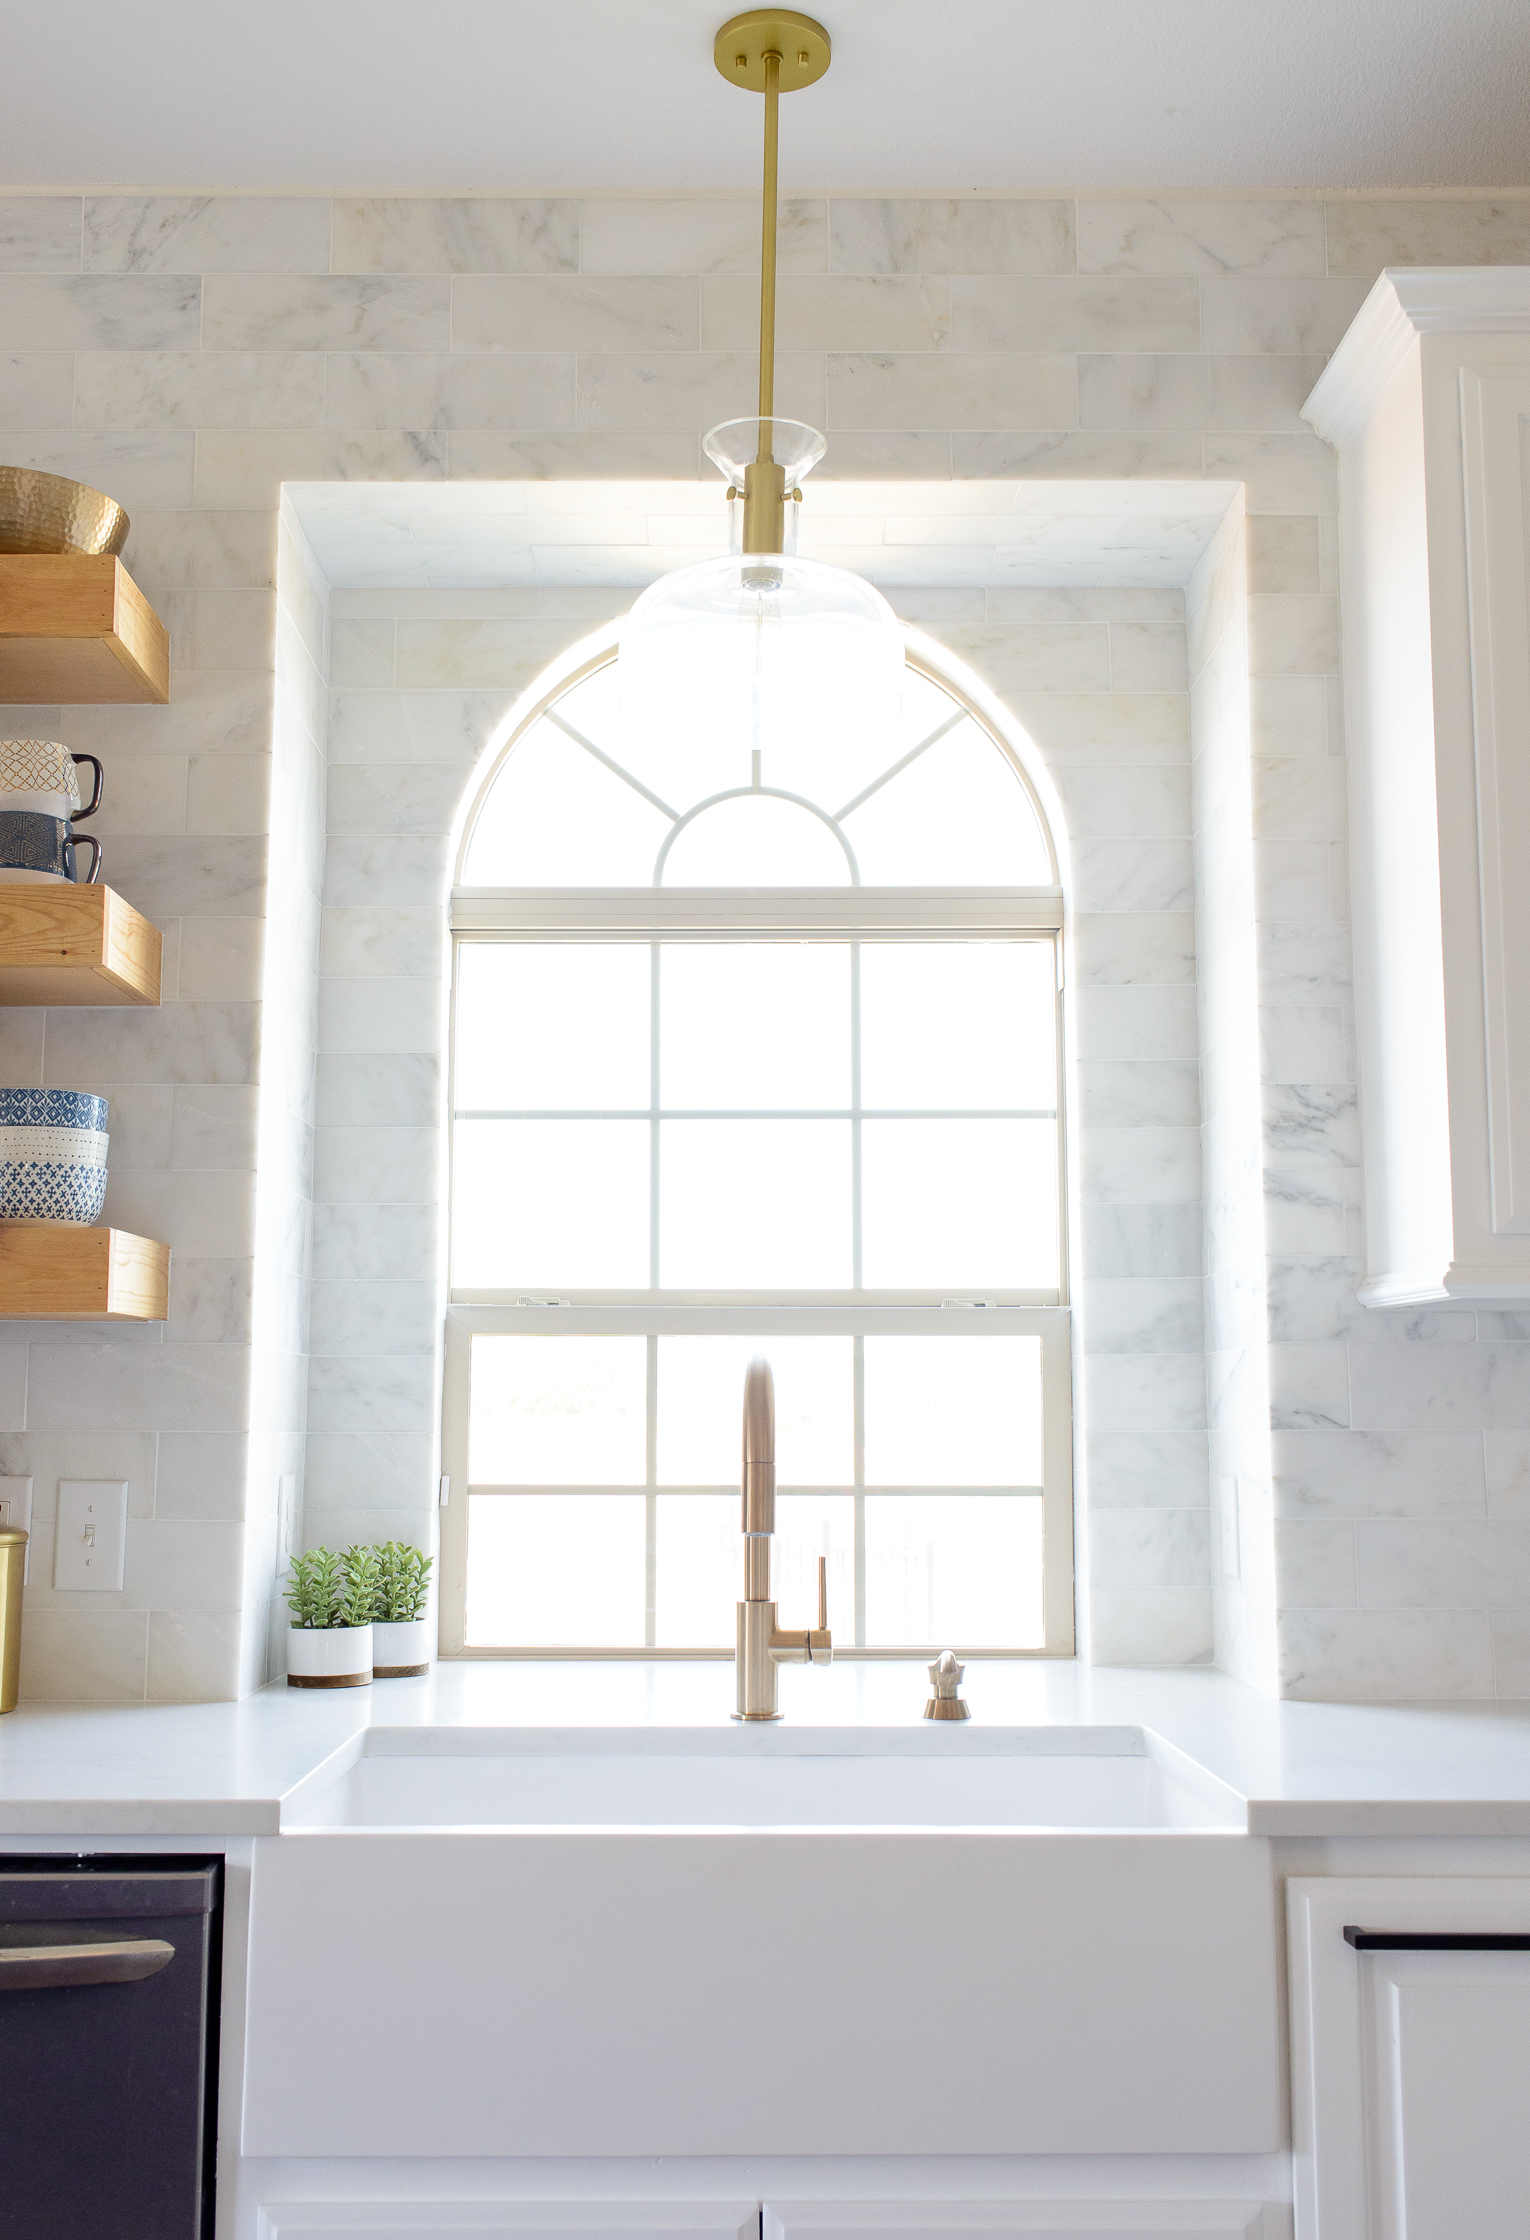
HARDWARE (& MIXING METALS)
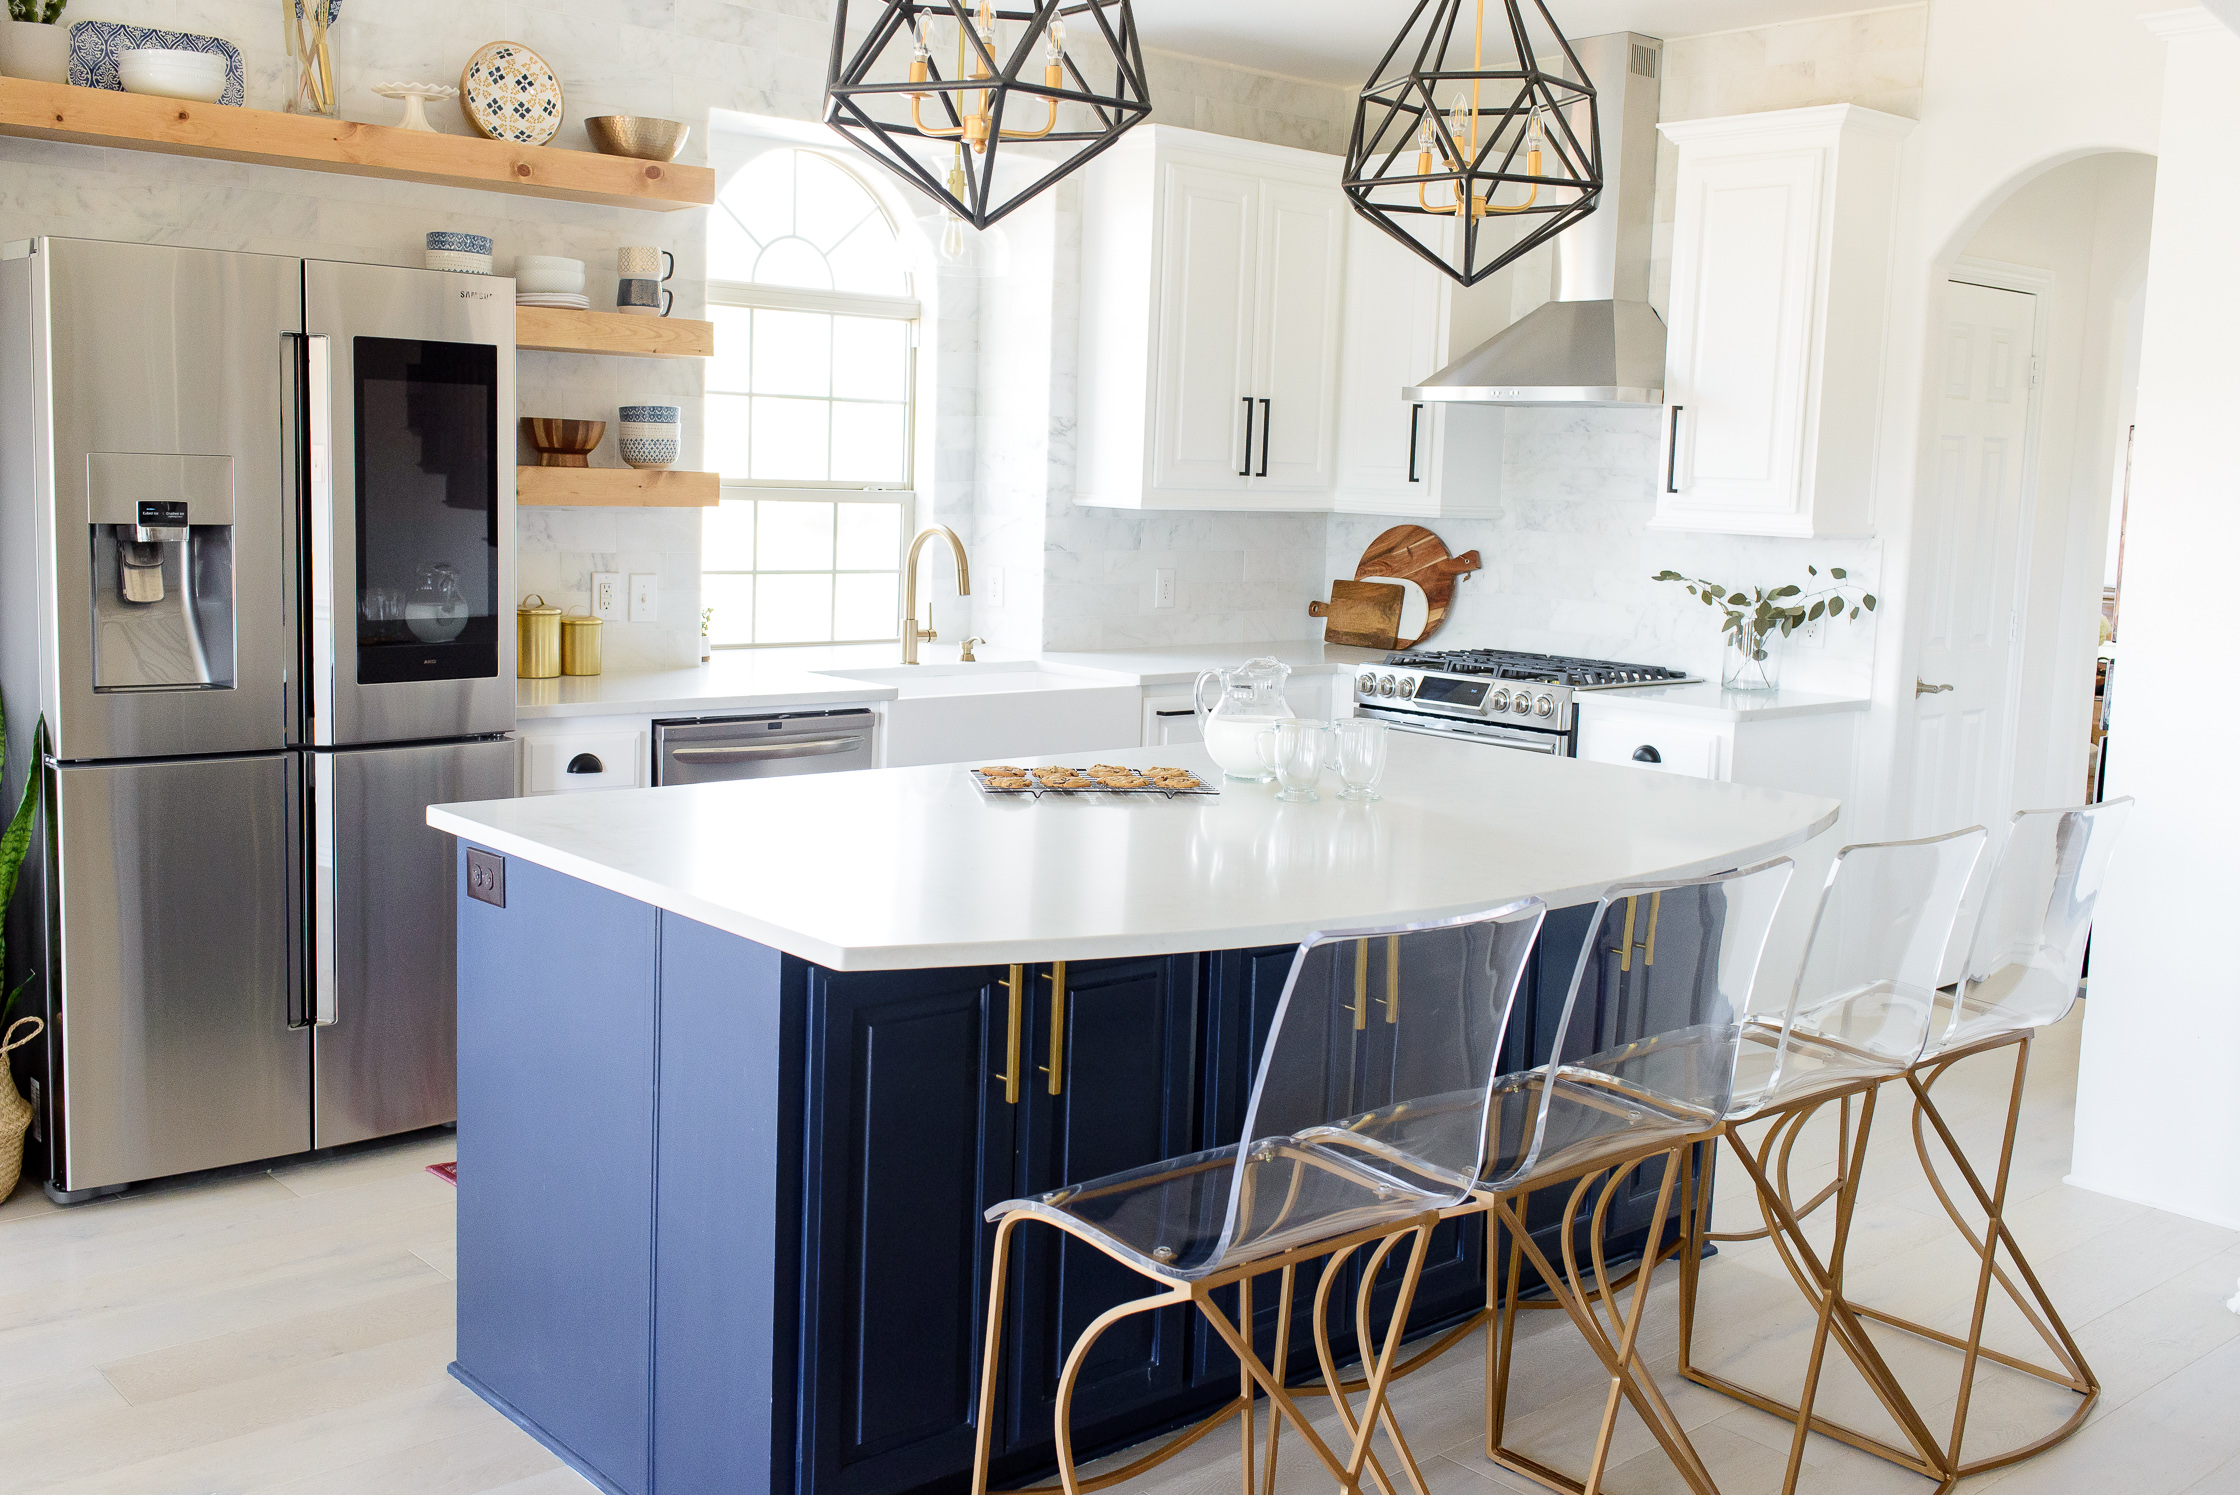
When we 1st moved into our house, I did a poll on my instagram stories asking everyone’s opinion about which mirror I should place in my half-bath. I got tons of messages saying to NOT MIX METALS. Well, call me crazy y’all but I absolutely love to mix 2 finishes. I originally planned to use gold throughout the kitchen since I adore the way it adds depth and interest to the navy island but I didn’t feel that the gold made a big impact on the white cabinets. My favorite combination was black on white + gold on navy. I unified the space by tying in the black light pendants over my navy island and the gold light pendant over the white cabinets. Mixing metals helped the space become a bit eclectic, yet feel completely balanced.
I looked all over for hardware but most were too expensive. I mean, $40 for 1 handle? no. thank. you. I found a killer deal for the black hardware and gold hardware on Amazon: they’re good quality, and so much cheaper than others we had looked at. The round handles were even cheaper but I prefer the lines and edges of the squared pulls. I also mixed both cup pulls + handle pulls depending on the size and style of the drawer. I have various sizes throughout the kitchen! I highly recommend getting a plastic hardware template from Amazon or Lowes to help with installation. My husband Aaron installed them and time started flying after my friend Danica recommended on my InstaStory to use the template!
APPLIANCES
Samsung Family Hub 3.0 – I’m going to do a separate post on the appliances because there’s just too much to say! Our last refrigerator was bought used off Craigslist 7 years ago when Aaron started dental school. Soon after we bought it the water dispenser froze. Only a few times during the summer would it work, bleh! It was starting to have major issues which made us thrilled to upgrade. The Family Hub is a bit mind-blowing, especially with the capabilities from the touch screen. I cannot recommend it enough. The kids write notes and scribble pictures all day long. The kids have added it to their list of their TOP 3 things they LOVE about this house and why they never want to move back to the old one! (the other 2 things all have to do with the pool in the backyard 😉 )
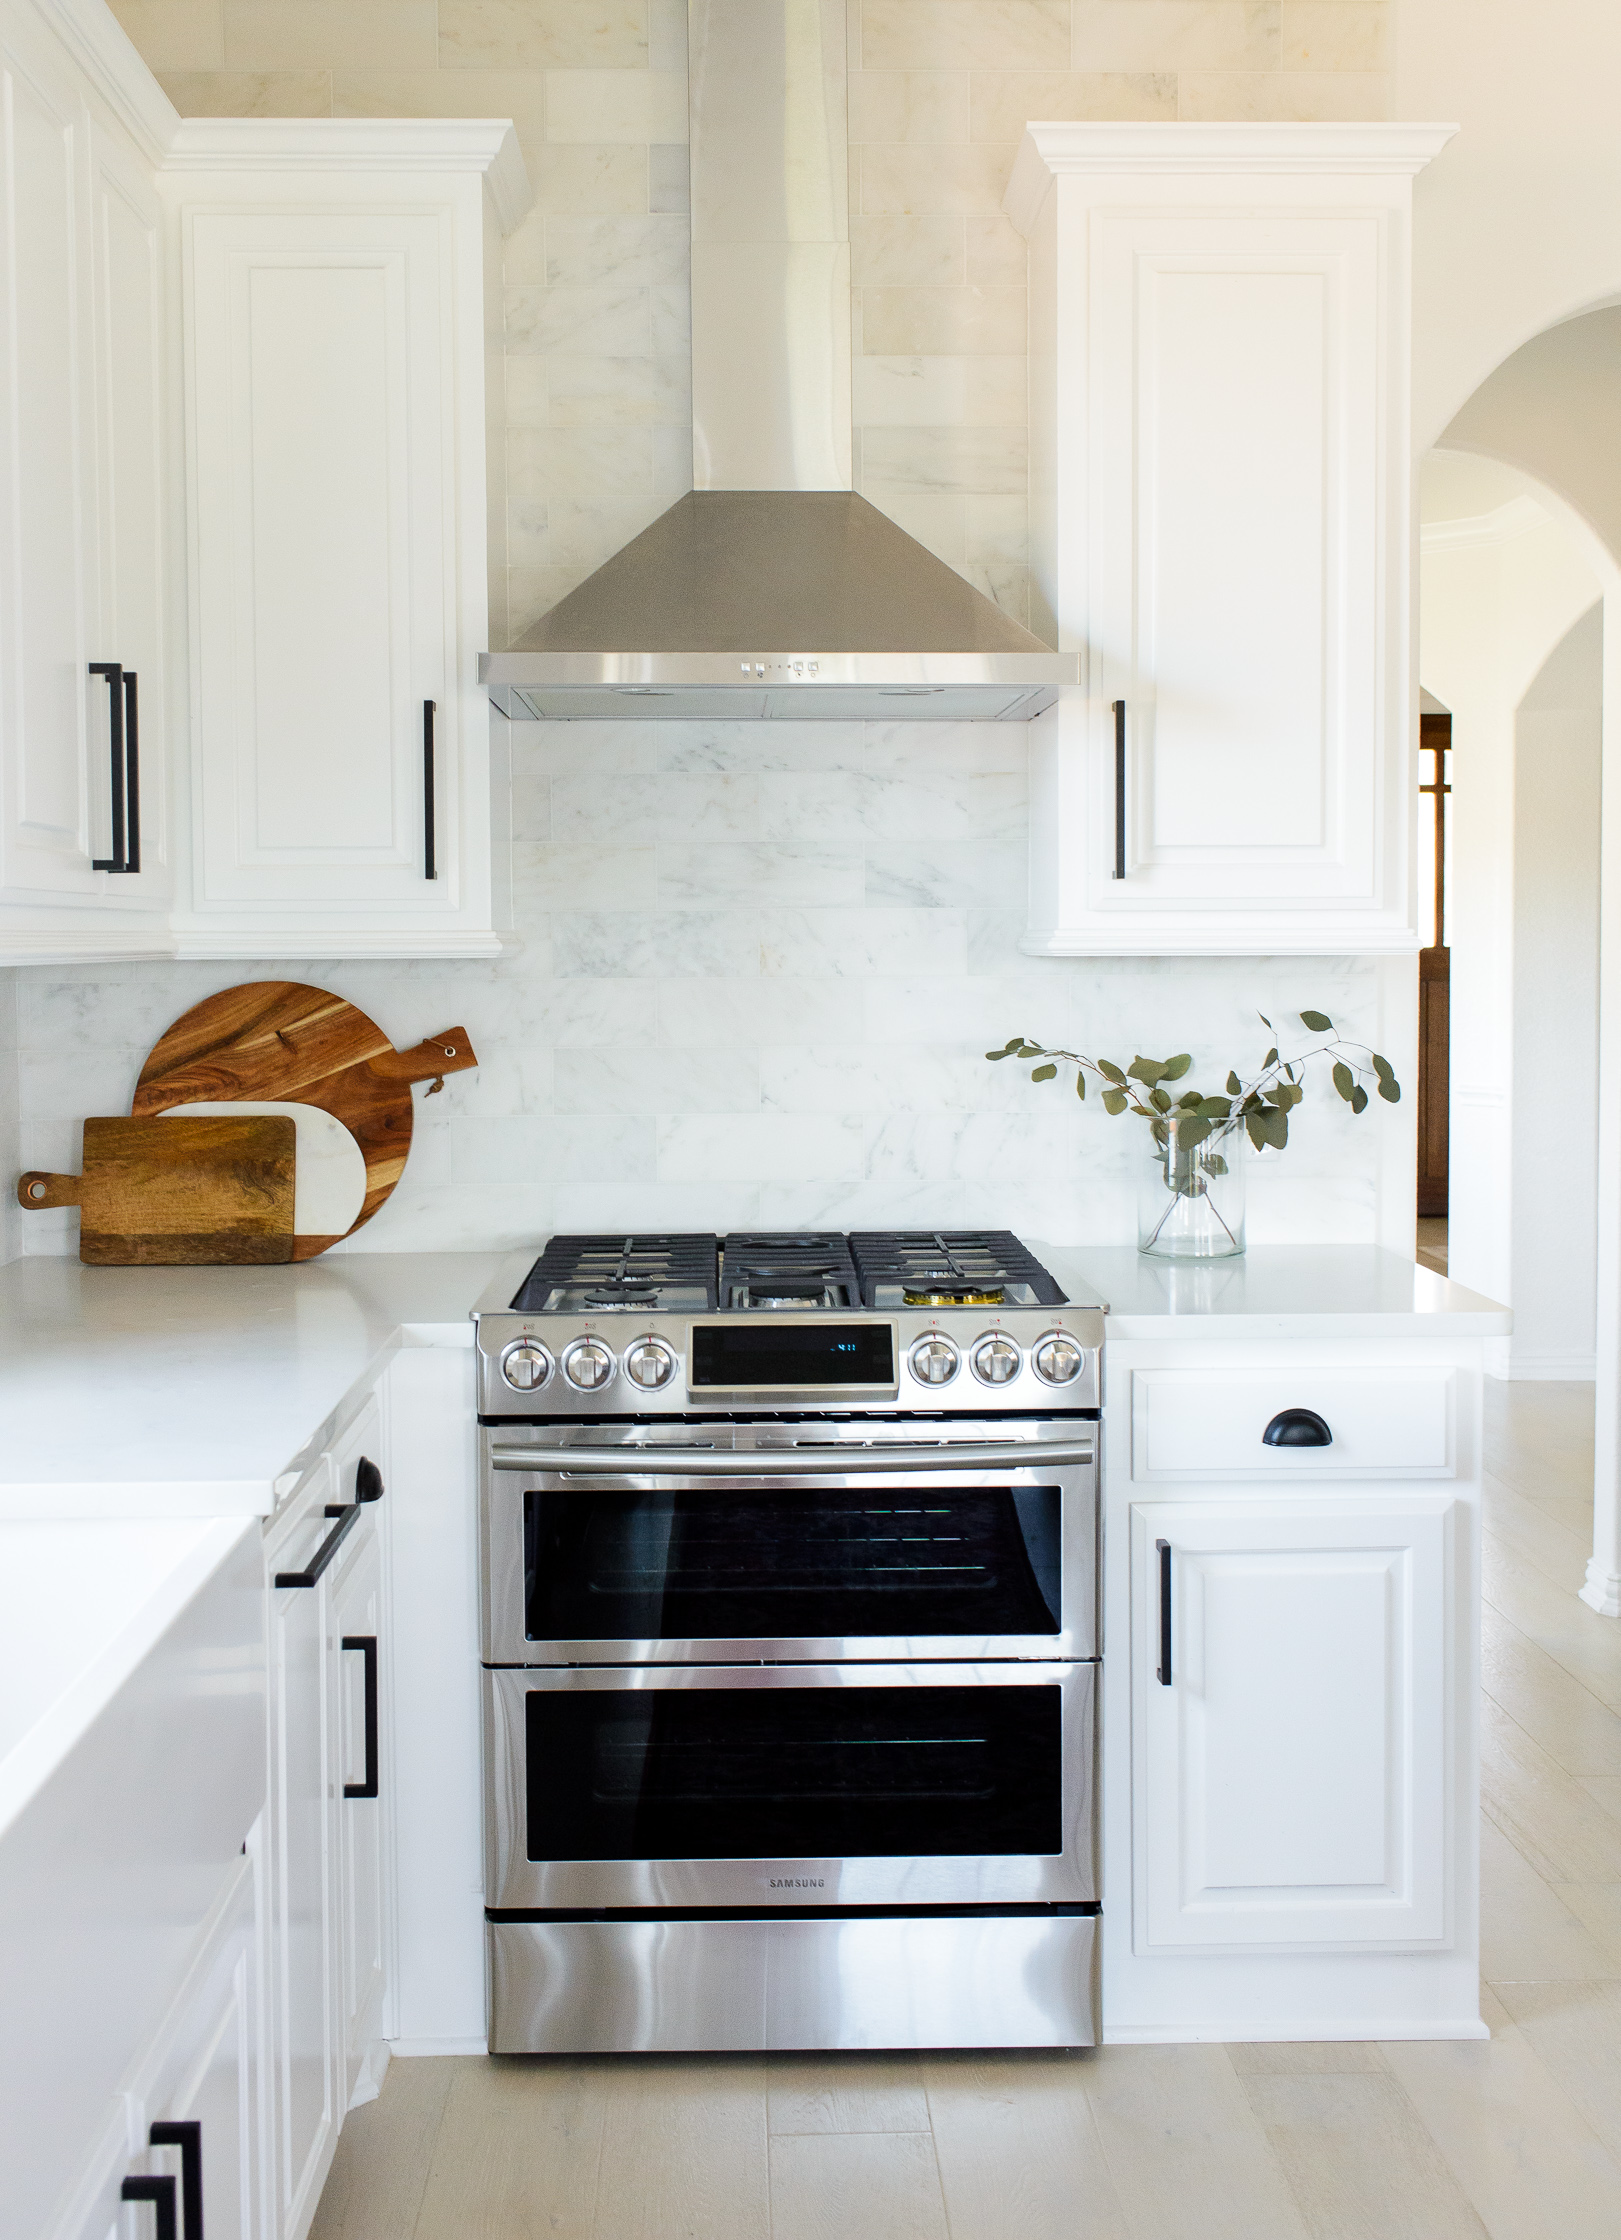
Samsung Flex Duo Gas Range – The kitchen originally came with a wall oven and a separate gas cook-top. Both were already having some issues (I keep hearing that’s a trend with Frigidaire appliances) so when we were re-doing the counters, etc, we thought it would be ideal to add a range with an oven and cook-top. I’ve always wanted a double oven and it was now or never! I’ve had too many experiences where a second oven would have made a party or holiday so much easier to host and so I was really excited about this. Actually, Aaron was twice as excited as I was. This range is incredible and I’ll dive into those reviews in a separate blog post coming soon as we use it more often.
VENT HOOD
You’d be surprised with how much research goes into a simple vent hood. Goodness! But I’m so glad that I did my homework because this 30″ Stainless Steal has been perfect. It was a great size wall mount, has 3 lighting options as well as 3 fan options. The highest option is incredibly powerful and clears away smells and smoke SO fast. I mean, not that I’d know that from experience..
BAR STOOLS
If I had a dollar for every comment, DM, or email I’ve gotten about THESE BAR STOOLS then I could buy another set. Ha! These were one of my biggest and happiest splurges of the entire house. I needed 2 things from a bar stool. It had to have a back rest #becausekids. And it had to be very solid and heavy so that it could not be knocked over #becausekids. These bar stools are over 50lbs each. They’re perfectly safe for the kids, easily wiped down after messes, and they make me super happy every single day. Legit LOL.
Wall Paint- “Nano White” by Behr (Satin)
Cabinets- “Ultra Pure White” by Behr (Semi-gloss)
Blue Island Paint- “Starless Night” by Behr (Semi-gloss)
Have any questions or comments? Please leave them in the comments below! I’d love to hear from you! xo

I LOVE your kitchen! the blue cabinets and the brass handles and hardware is such a cool colour combination! Ive never seen a bar stool ghost chair before they are amazing!
Wow so amazing, I just cant believe how you manage to transform your kitchen. The images give the experience of having breakfast in your old kitchen and dinner in your new the same day. I would love my space to look like that…
Greate article keep it up, i wuld like to share it with friends. here is also something new for you.The greate array of countertops
aastone
Actually, I like the way your kitchen looked before but after a makeover, it looks even better. Sometimes there are troubles with white color… You have to think about everything as white and 3 or more other colors can make room messy.. But in your situation, everything looks great. I love the textures, colors, and decorations. Space looks clean and a bit luxury. Well done!
I have to ask..
I am remodeling my kitchen and the layout is similar to this as far as the separate stove and oven… like yours, my oven was on an entirely different wall. I am doing a range but I can’t decide what to do with the space where the oven used to be.
I was looking through your pictures and I didn’t see that wall shown. Can you share what you did in the space leading to the butlers panty on the opposite wall?
Thank you so much!
I really need help with this!
How can a man be so creative like you? I just wonder! Beautiful design also. I’ll follow your instruction obviously. Thanks for sharing.
Can you tell me what grout color you used for your backsplash? I just bought the same Venato Carrara and am stressed out of my mind choosing which one. Your kitchen is lovely.
Thanks and Happy New Year!
Author
You’re going to love it! We used Bright White non-sanded grout Polyblend. Best of luck!
Can I ask if your backsplash was the honed or polished?
Author
We did honed! I love the way it looks.
Author
Hi Christina- It’s honed. I wanted a matte finish
What are the dimensions of your kitchen? Thanks!
How long is your island?
Your kitchen cabinets turned out very nicely. As a cabinet painting company, we really enjoy seeing good work by other companies and Five Star Painting is in our neck of the woods here in Charlotte and I look forward to more posts from you and hopefully connecting with Five Star here.
Do you mind telling me exactly the name of the black pendant lights. I can’t find them on the website, the link you attached takes me to a different kind of lamp. Thanks 🙂
Author
Hey! It looks like they were discontinued everywhere last year. Ugh! I’m so sorry!