
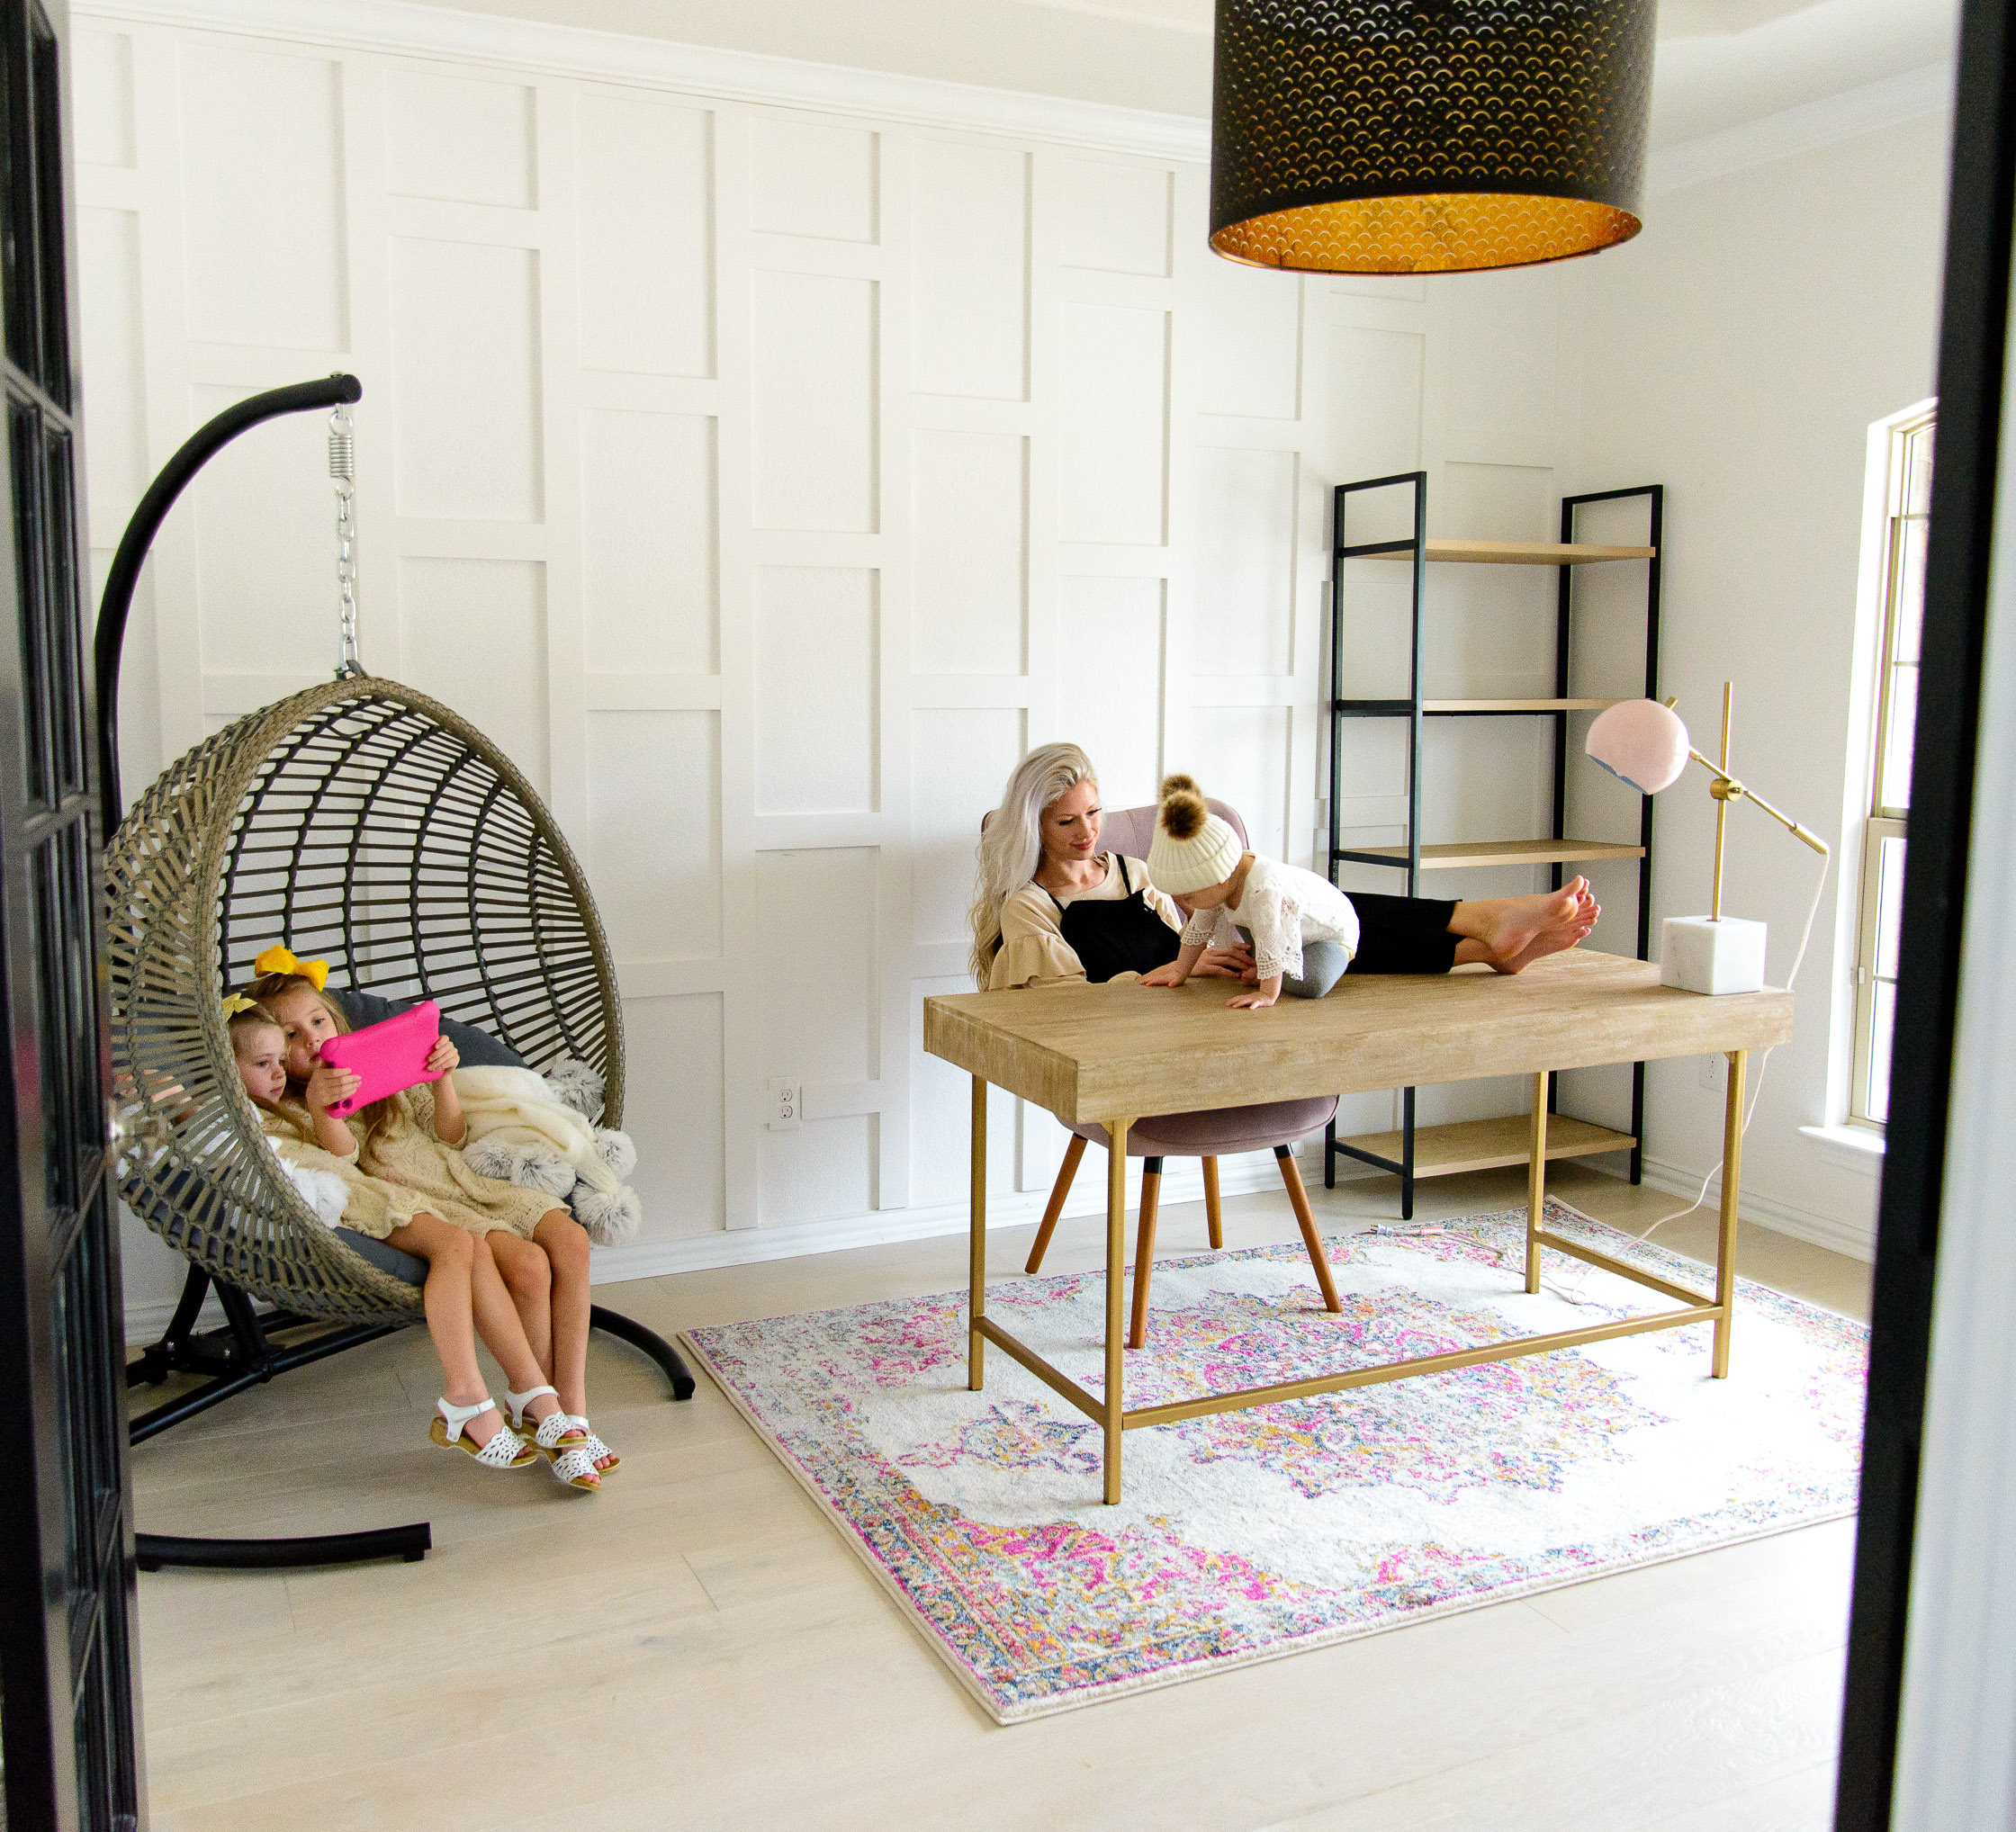

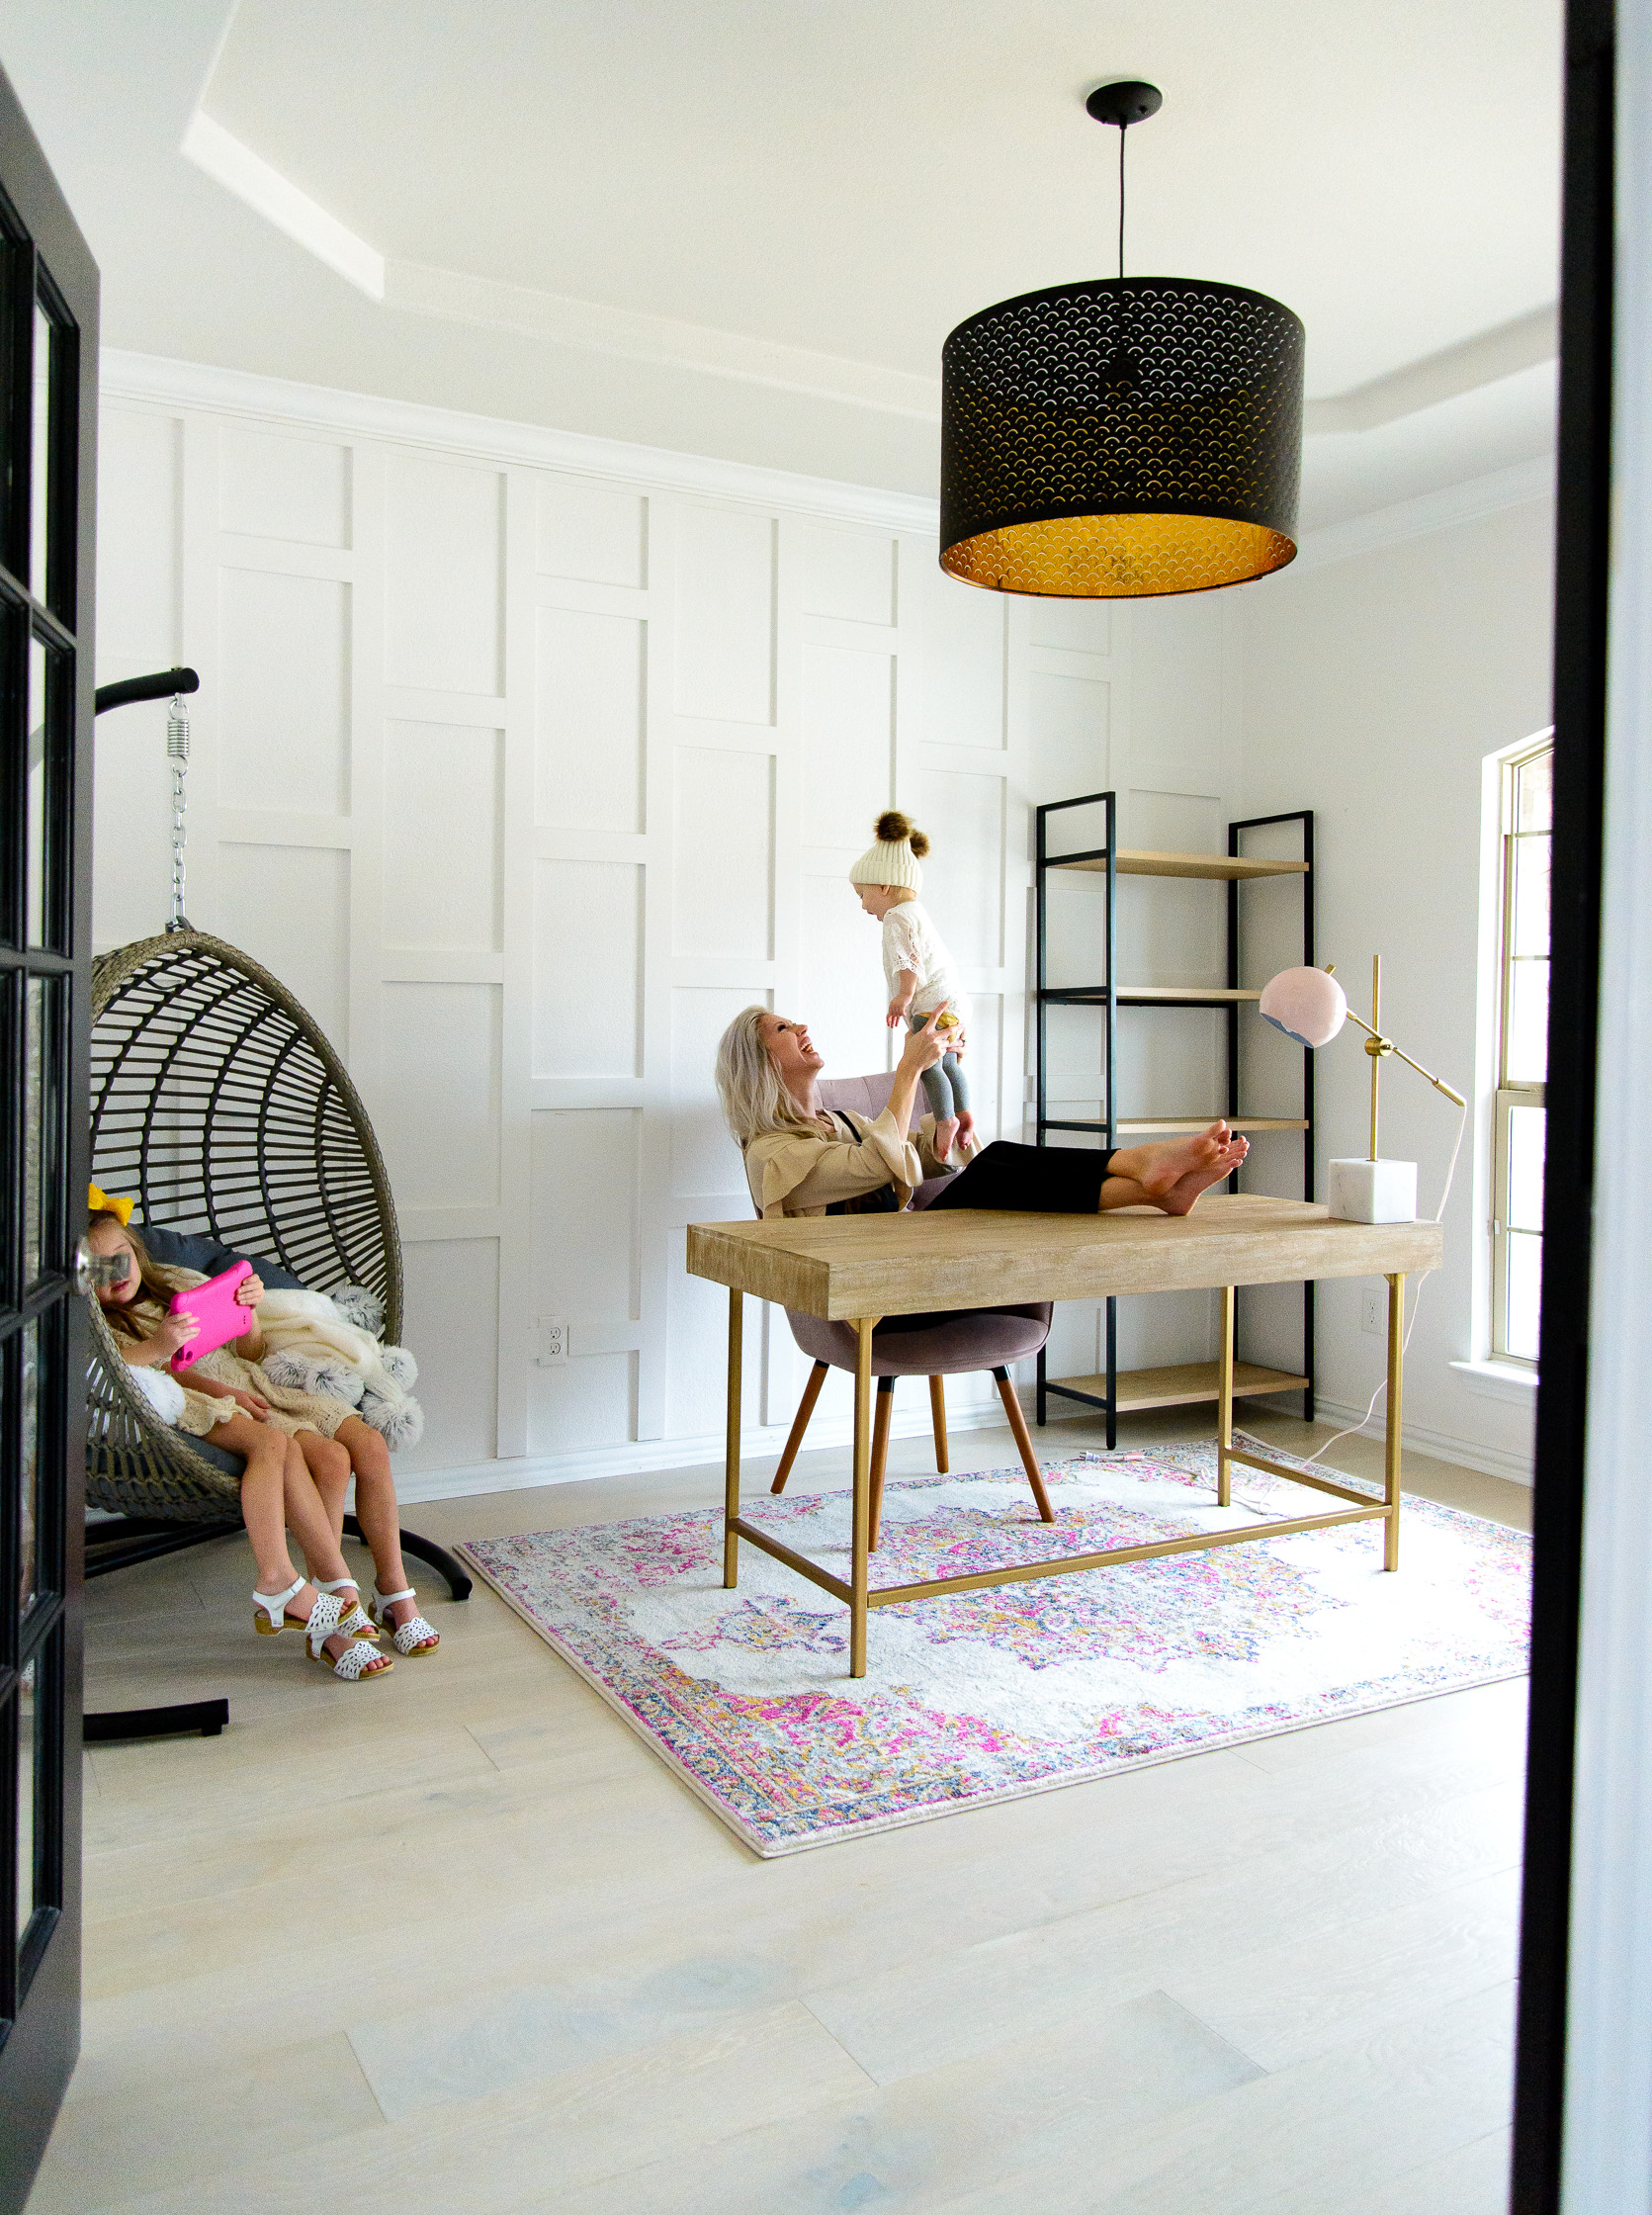
Hey friends!!! Guess WHAT?! My cute husband is sharing with you the steps to build your own wood accent wall at home! We plan to build a similar wall in our master bedroom when Aaron is home for spring break. My “honey do” lists are a mile long when I know he’ll be home, haha. Sorry, babe! We love working on our home and creating a space that is fun and unique. The great thing about this accent wall project was that he came up with it on his own! Before we moved into this house, he was in Home Depot and must’ve seen a photo of a navy wall that was similar to the one we did. He loved it so much and I thought it would be perfect for my home office. So, without further ado….
 Aaron: Hello everyone! I’ve ventured out from behind the camera to share with you how we created the accent wall in Janene’s office. We pretty much exclusively did DIY projects on our last house and really enjoyed it, but as life has gotten much, much busier, we’ve started hiring people who actually know what they’re doing for some things. But for this one, it looked cool and pretty simple, so I happily decided to take it on. Plus I got to feel manly for a day, which is always a bonus. This project took my brother-in-law and me about 5-6 hours total. Total cost for materials was less than $75. The wall we did is about 8′ tall x 13′ wide. My brother-in-law is the wood-working expert, so that was super helpful. But even if you’re not really experienced with wood-working (like me), this is a surprisingly simple project! You got this.
First off, here are some things you’ll need:
- 3/4 inch plywood. You can buy nice plywood, but I decided to use premium MDF board. It can be a little harder to paint than plywood, but it’s really smooth, which meant I didn’t have to spend time sanding before painting. It was a 4’x8′ panel from Lowes for around $32. I bought two, but only used one for this project. I had Lowes cut the sheet in half length-wise to make getting it home easier. If you have access to a table saw, that’s the only cut you’ll need at the store. Lowes and Home Depot will make as many cuts as you need, but I think they start charging after a certain number.
- Nail gun
- Mitre Saw
- Liquid nails
- Measuring Tape
- Level
- Paintable Caulk and wood filler
- Paint (We used Behr Premium Plus with Primer + Paint)
1. Cut the plywood orMDF panel in long strips. We decided we liked the look of 3″ boards, so we cut the MDF board length-wise into 3″ strips (So 3 inches x 8 feet) with a table saw. Again, if you don’t have access to one, Lowes or Home Depot can do this for you.
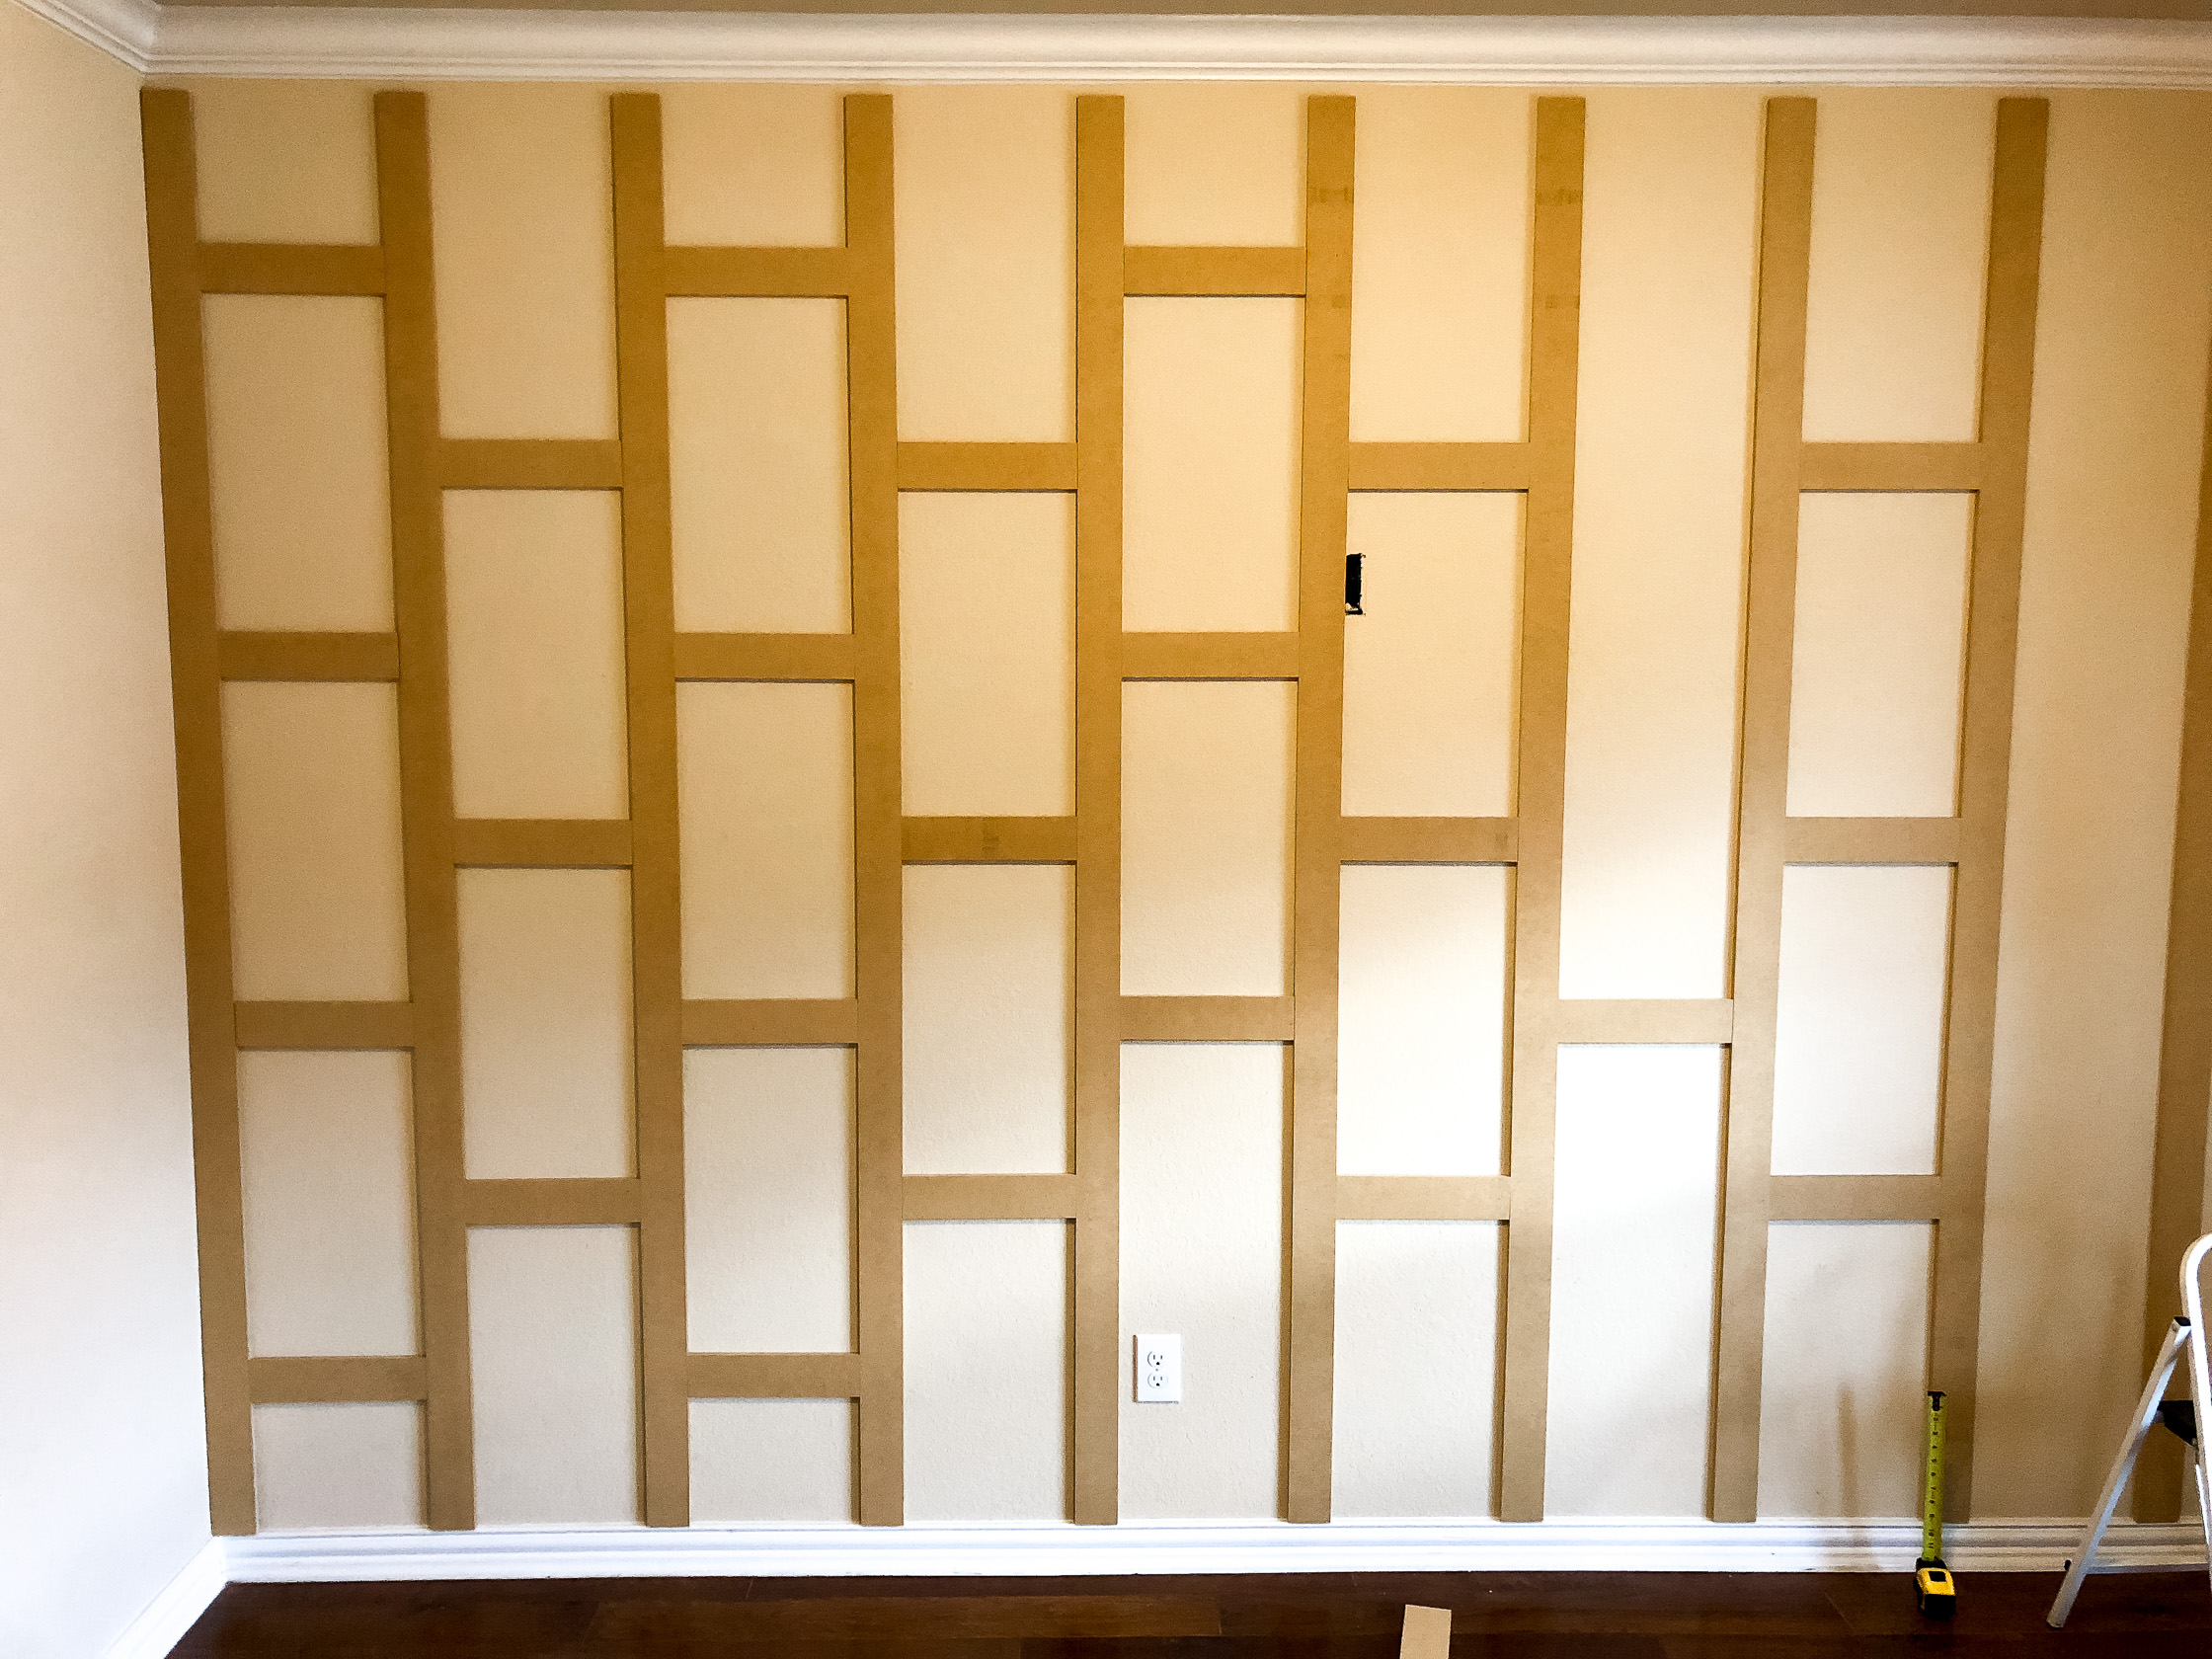
2. Do some math. We wanted the space between the vertical boards to be somewhere around 12 inches, so we measured the width of the wall, took into account the 3 inches for each board, and figured out how many vertical boards we would have and what the spacing between them needed to be. Don’t sweat this too much… my brother-in-law and I have quite a bit of post-graduate schooling between the two of us, we double-checked our work, and still managed to be about 2 inches off when we placed the last board. And after discovering our mistake, we did the math again and still couldn’t figure out where our math skills went wrong. We concluded it was math’s fault, not ours. The last space is 2 inches bigger than the others, but since it’s the furthest away from the entrance to the room, no one can tell. Some advice that we just got lucky on: Start putting up the vertical boards on the most visible side first, just in case math lies to you too.
3. Put up vertical boards. We placed the first board flush with the left wall. The spaces between each board was exactly 12 inches from our math. Since we knew we would need 12 inch boards for the crosses, we went ahead and cut some of those so we could use them to measure the distance between vertical boards. For each vertical, we added a small line of liquid nails to the back, then used the nail gun to attach it to the wall. After attaching the first one against the left wall, we would put the two 12 inch horizontal pieces against the nailed board, one somewhere near the top and bottom, butted up the next vertical board to those 12 inch pieces, check it with a level, and then nail it in place.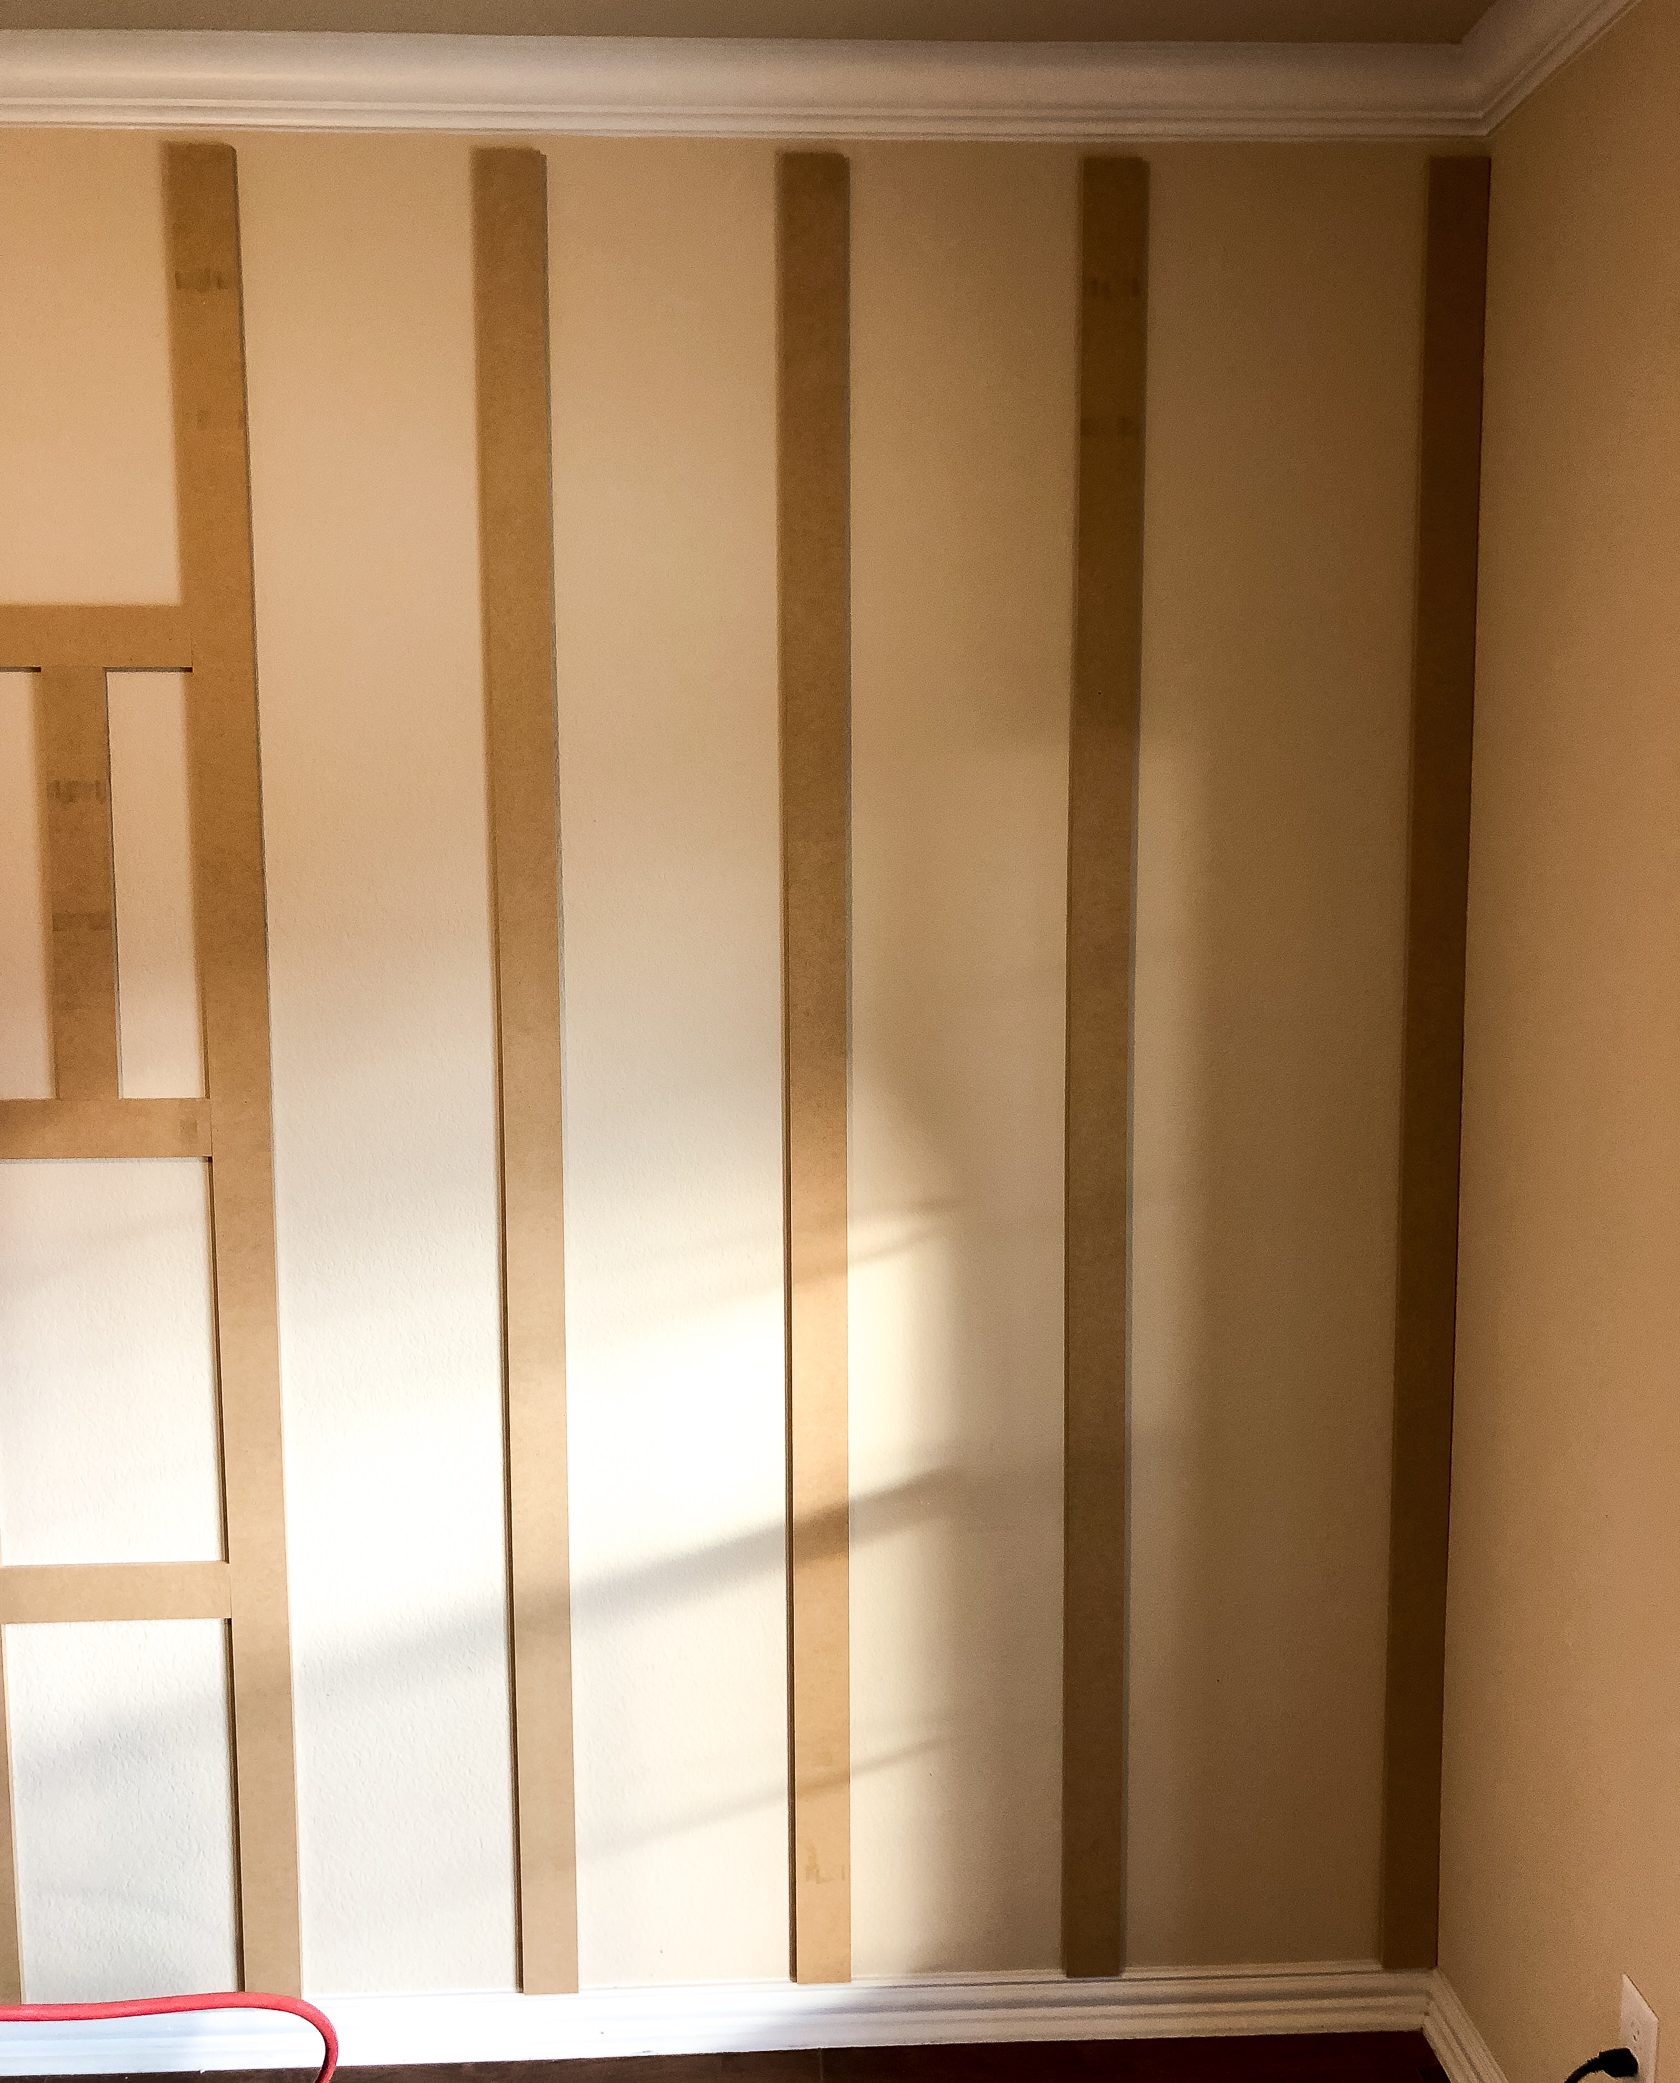
4. Start with 1st set of horizontal pieces. The space between the base board and crown was 8′ (96″), so we needed to make 4 spaces total: so 3 horizontal pieces. Subtracting the 3″ for each cross piece, the spaces needed to be 21.75″. (Math behaved this time). We cut one board 21.75″ to help. Starting at the baseboard, we placed the measuring board parallel with the verticals, put the 12″ cross board on top, checked with a level, and then nailed in place. We repeated this two more times to make 4 spaces between the verticals. We then skipped one section and continued on every other. 

5. Put up remaining horizontal pieces. We had to measure the midpoint in the space between the 1st set of crosses to place the first piece in the 2nd set. After that, the same measuring board (21.75″) worked to put the other 3 crosses up for a total of 4 horizontal pieces for the 2nd set. (This is a little hard to explain with words, so I’m hoping the pictures make up for that.)
6. Sand/ Fill in gaps. Since we used a high quality MDF, I didn’t have to sand anything. Which saved tons of time. But if you want to use real wood, or plywood, you’ll definitely want to sand before painting or staining. Our vertical boards didn’t go all the way to the crown molding, so we added a thin strip to fill that space in. After that, it was filling and caulking to fill in nail holes, spaces between boards, and between the boards and the wall. Again, this is where that MDF board was really helpful— we didn’t have to do much caulking at all because there was such little variation between the pieces.
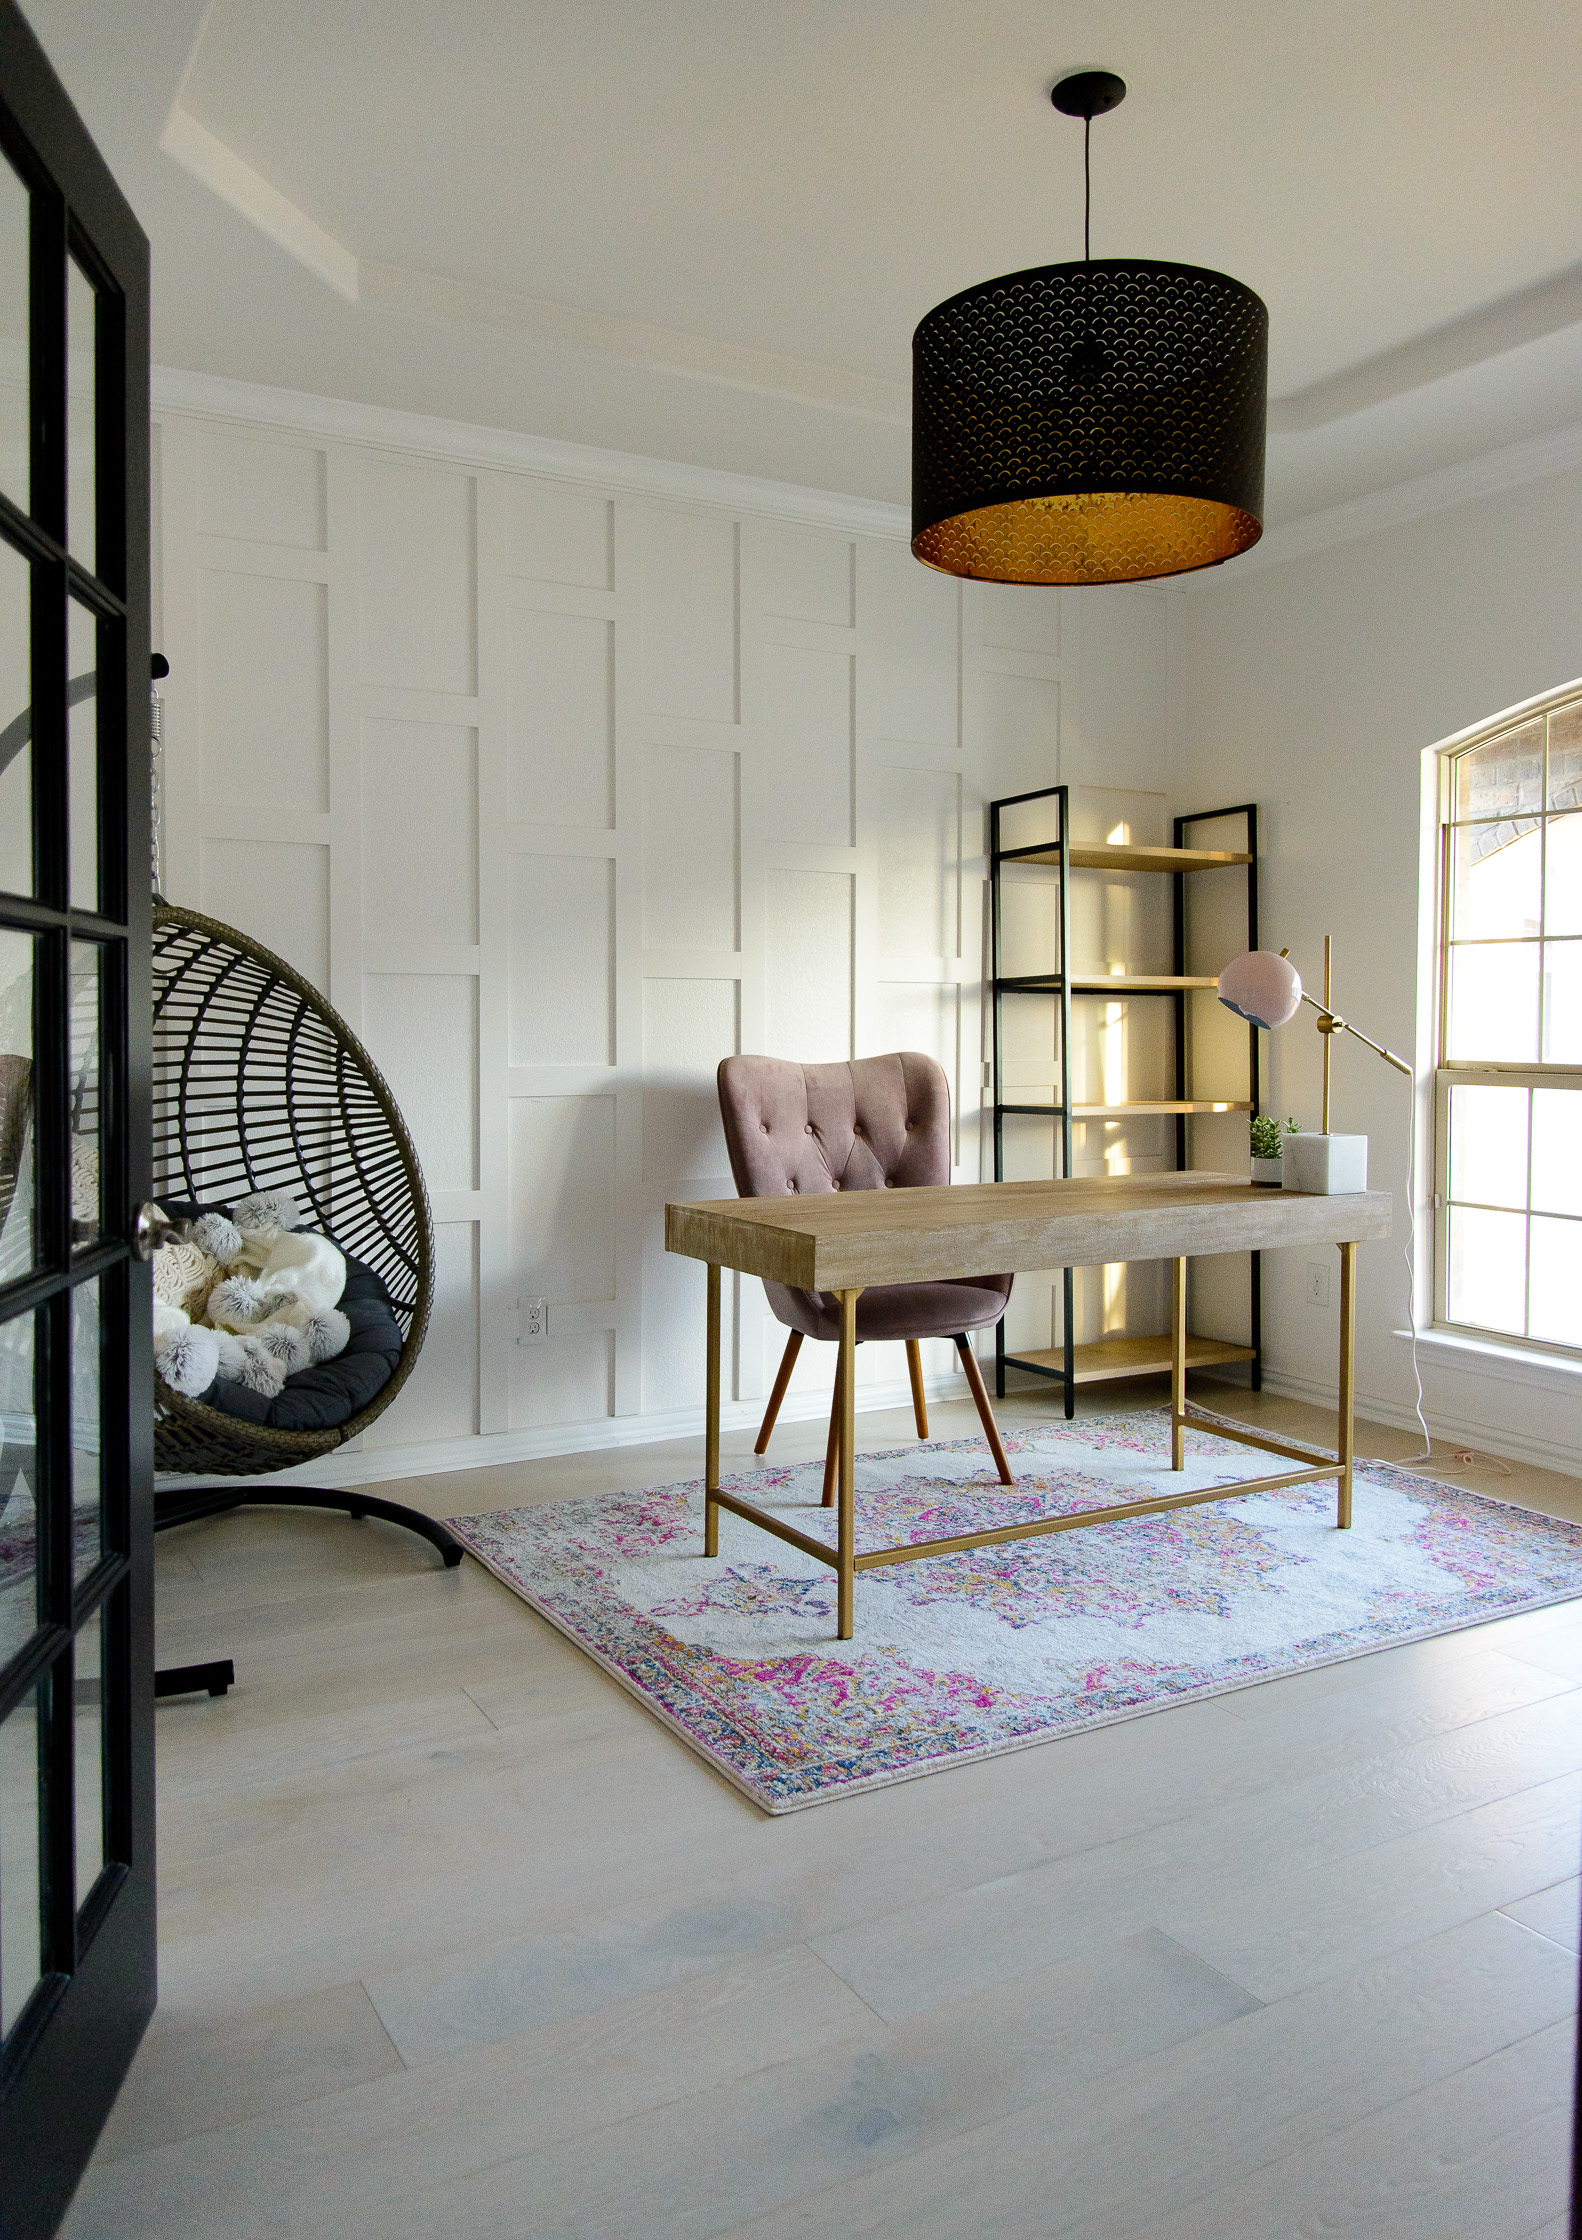
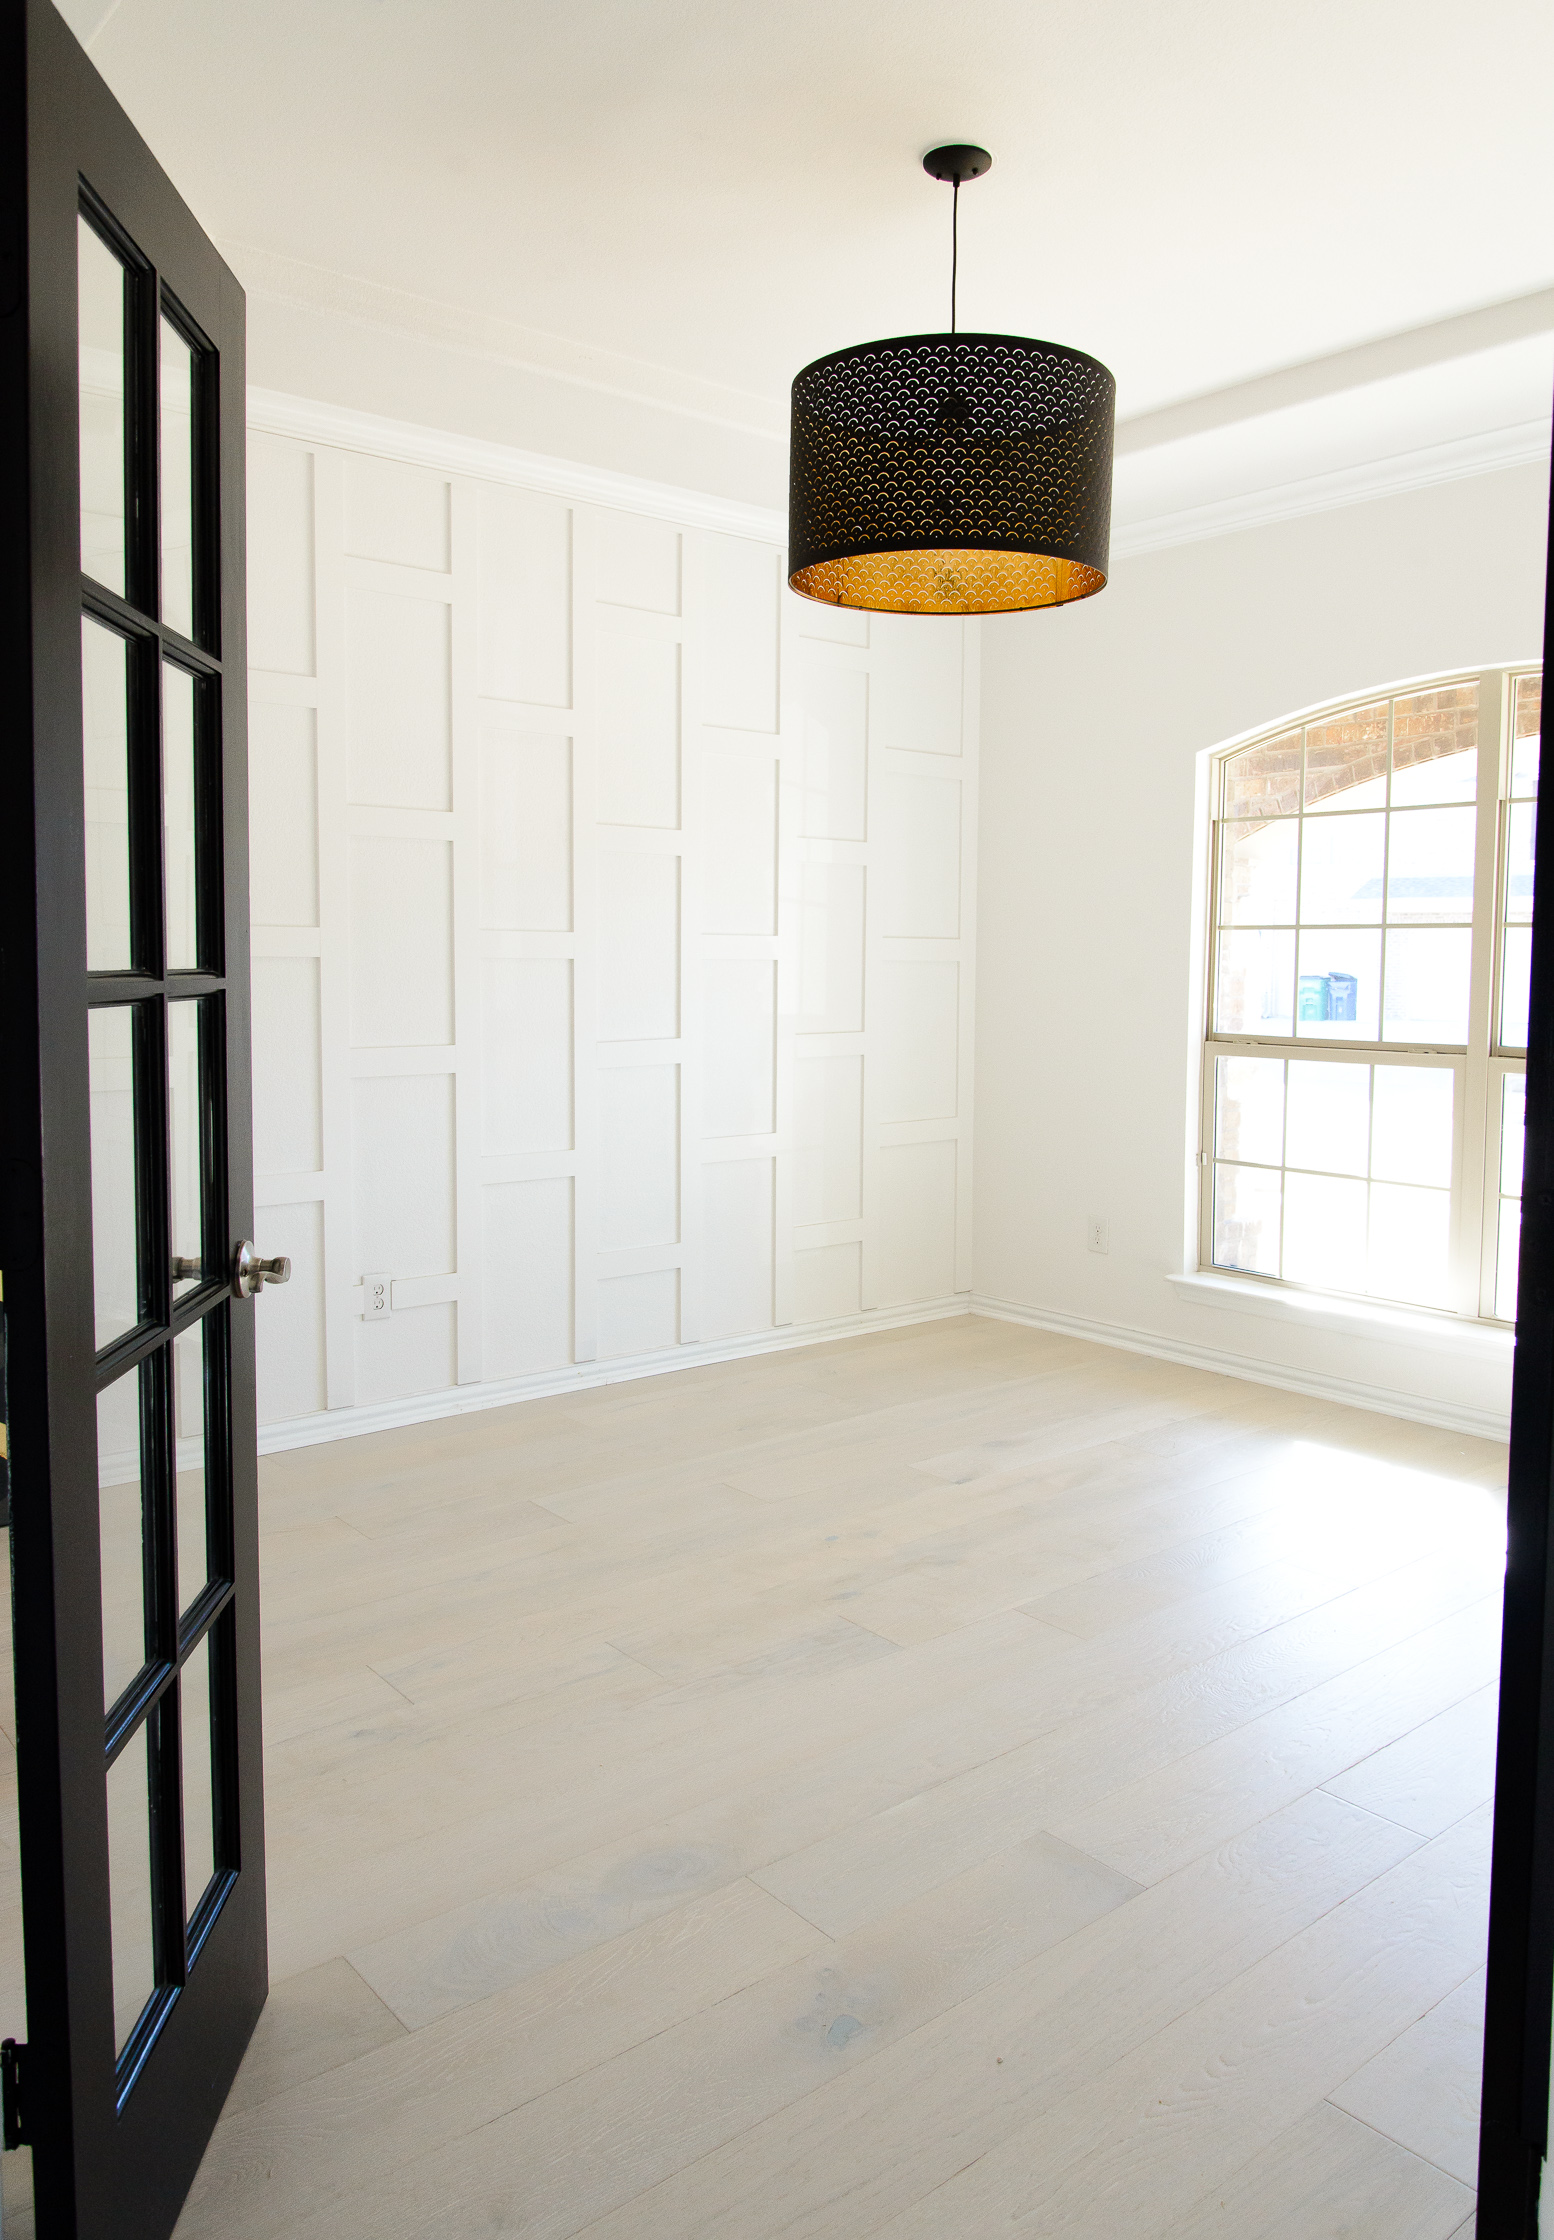
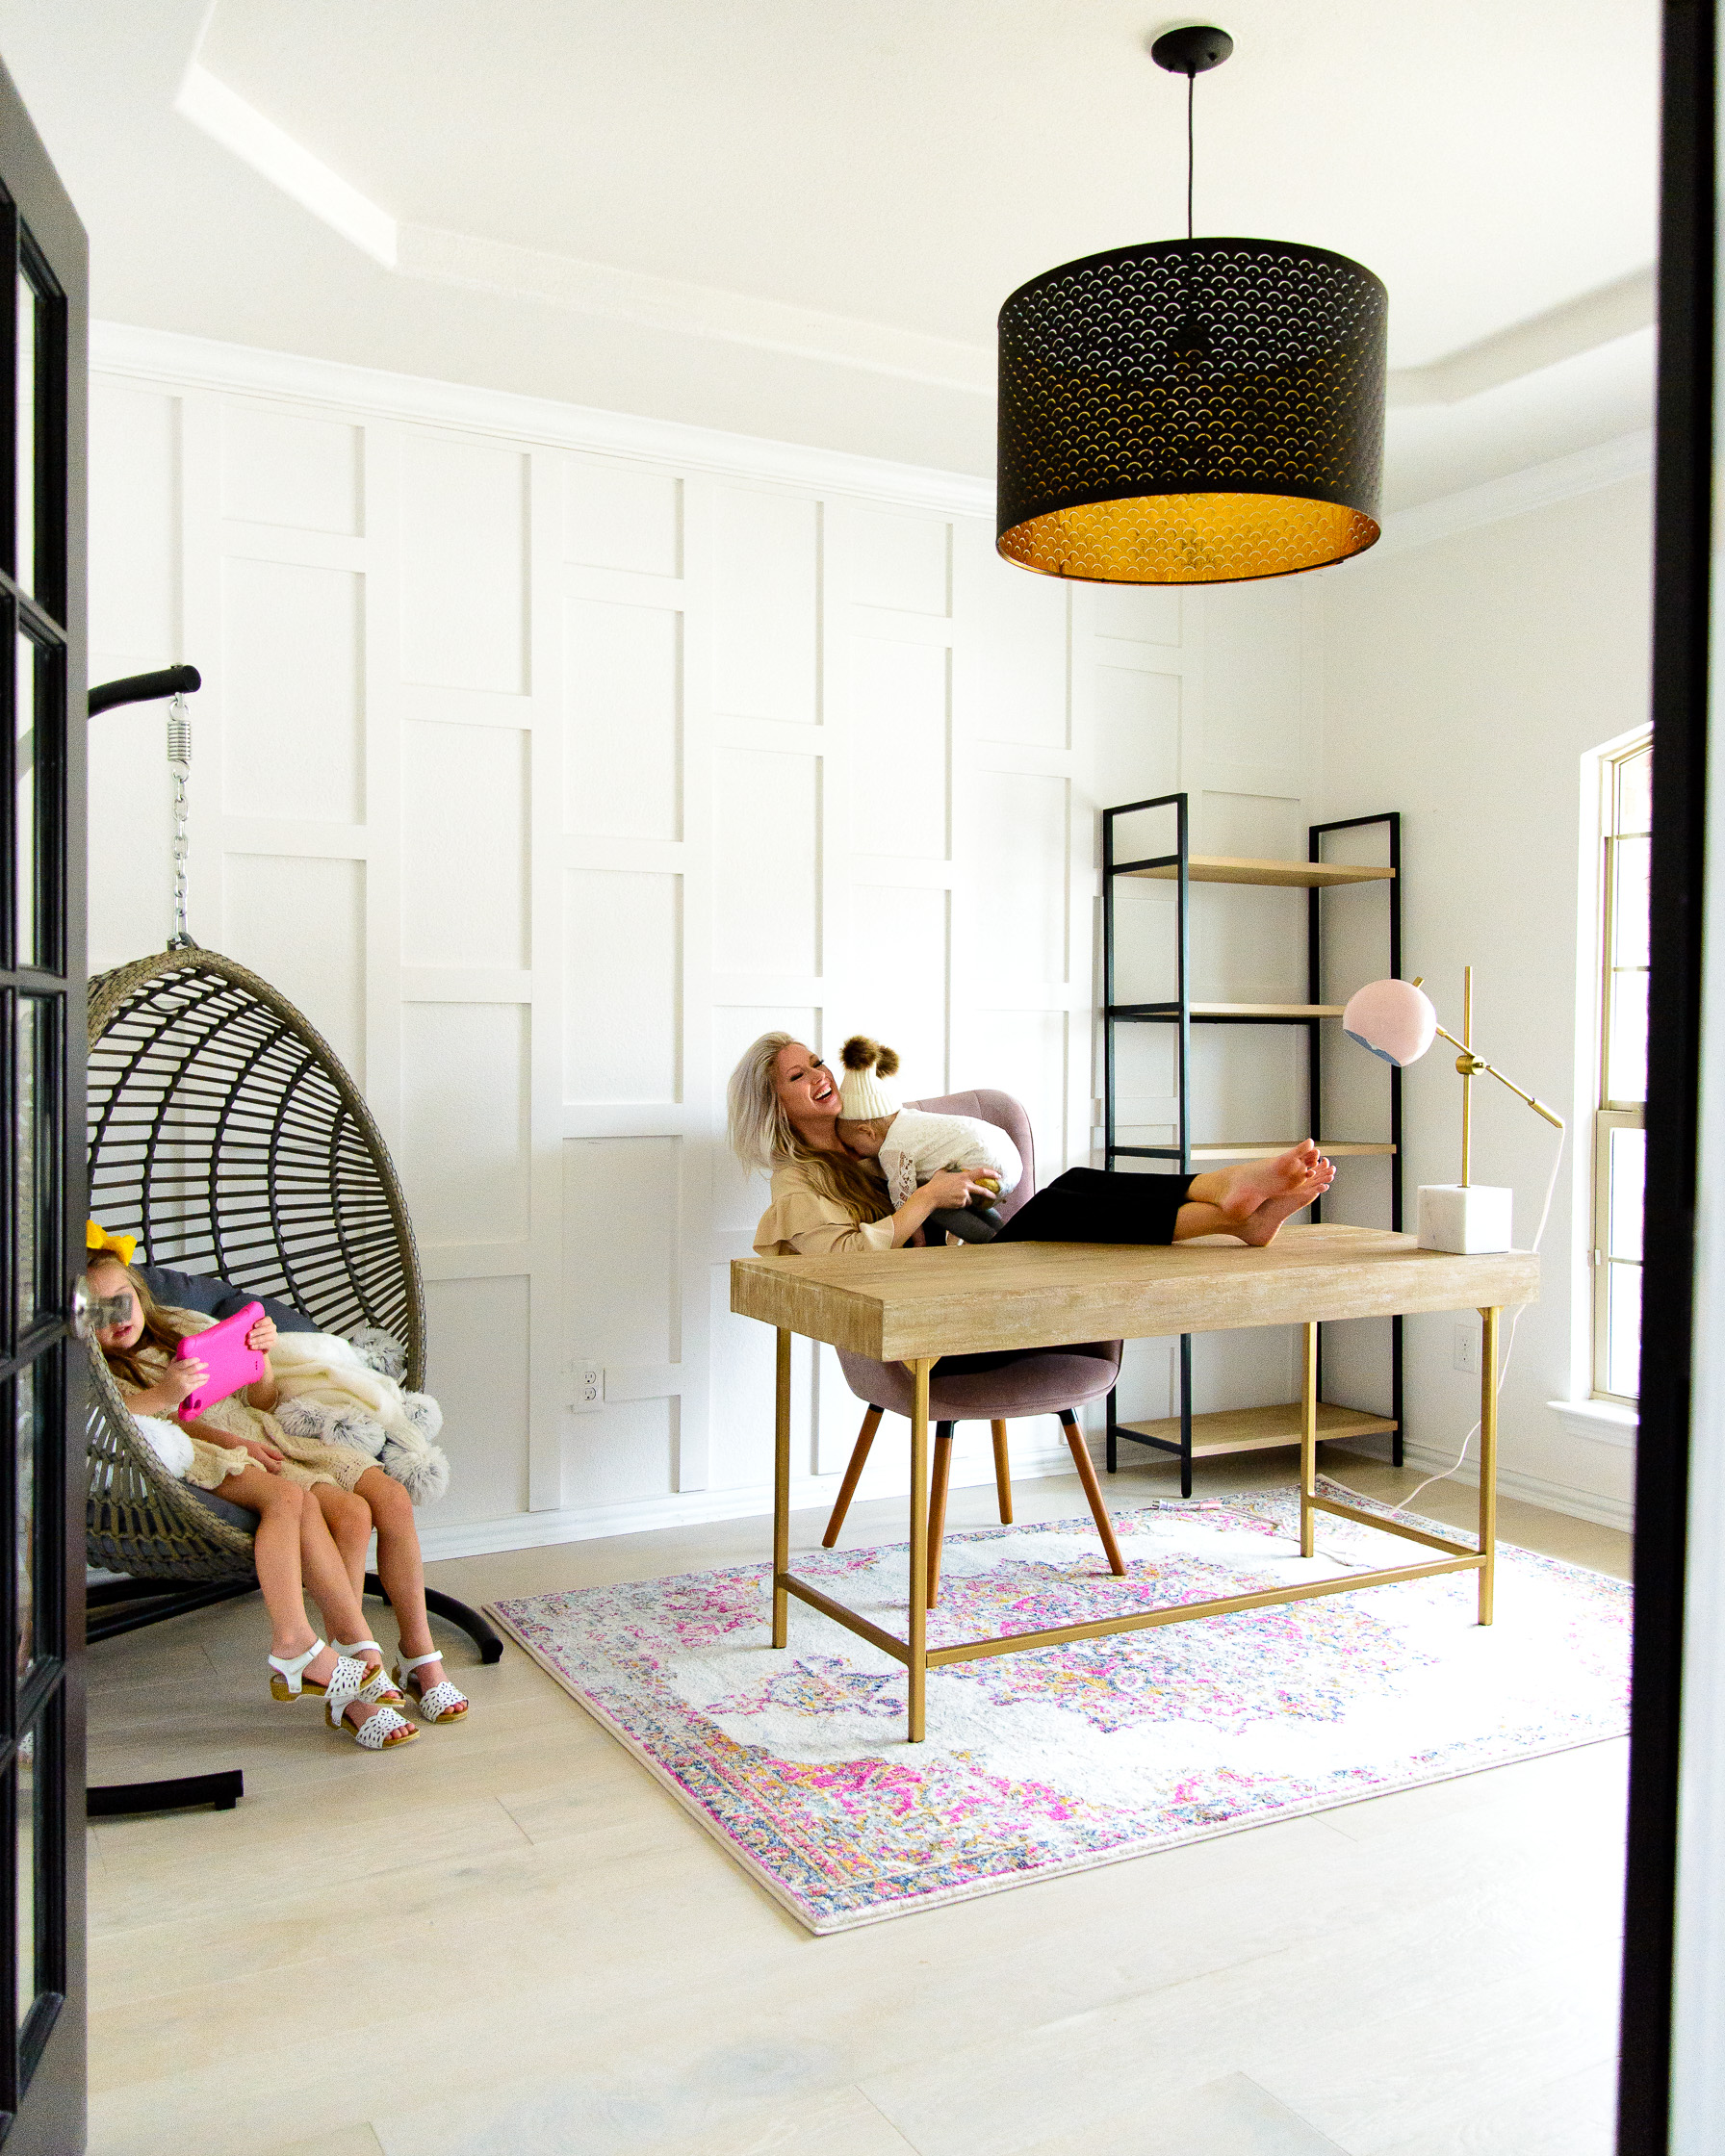
7. Paint and Enjoy! We were having the house professionally painted by Five Star Painting so this step was really relaxing for me. 🙂 (You can see before/after photos of the house and our experience with choosing paint/ a painting company here) We had them paint the boards the same color/ sheen as the wall. I’ve read a few places online where people recommend using a primer before painting MDF. We didn’t need that for this project. I’m not saying it will always work for every type of wood or paint color, but for us it wasn’t necessary. They painted with Behr Premium Plus, which has paint + primer in it. The color was Behr’s Nano White, sheen: eggshell. Five Star Painting did an amazing job with this accent wall! I know it was a lot more work than a typical flat wall, but they were more than accommodating and it looks perfect.
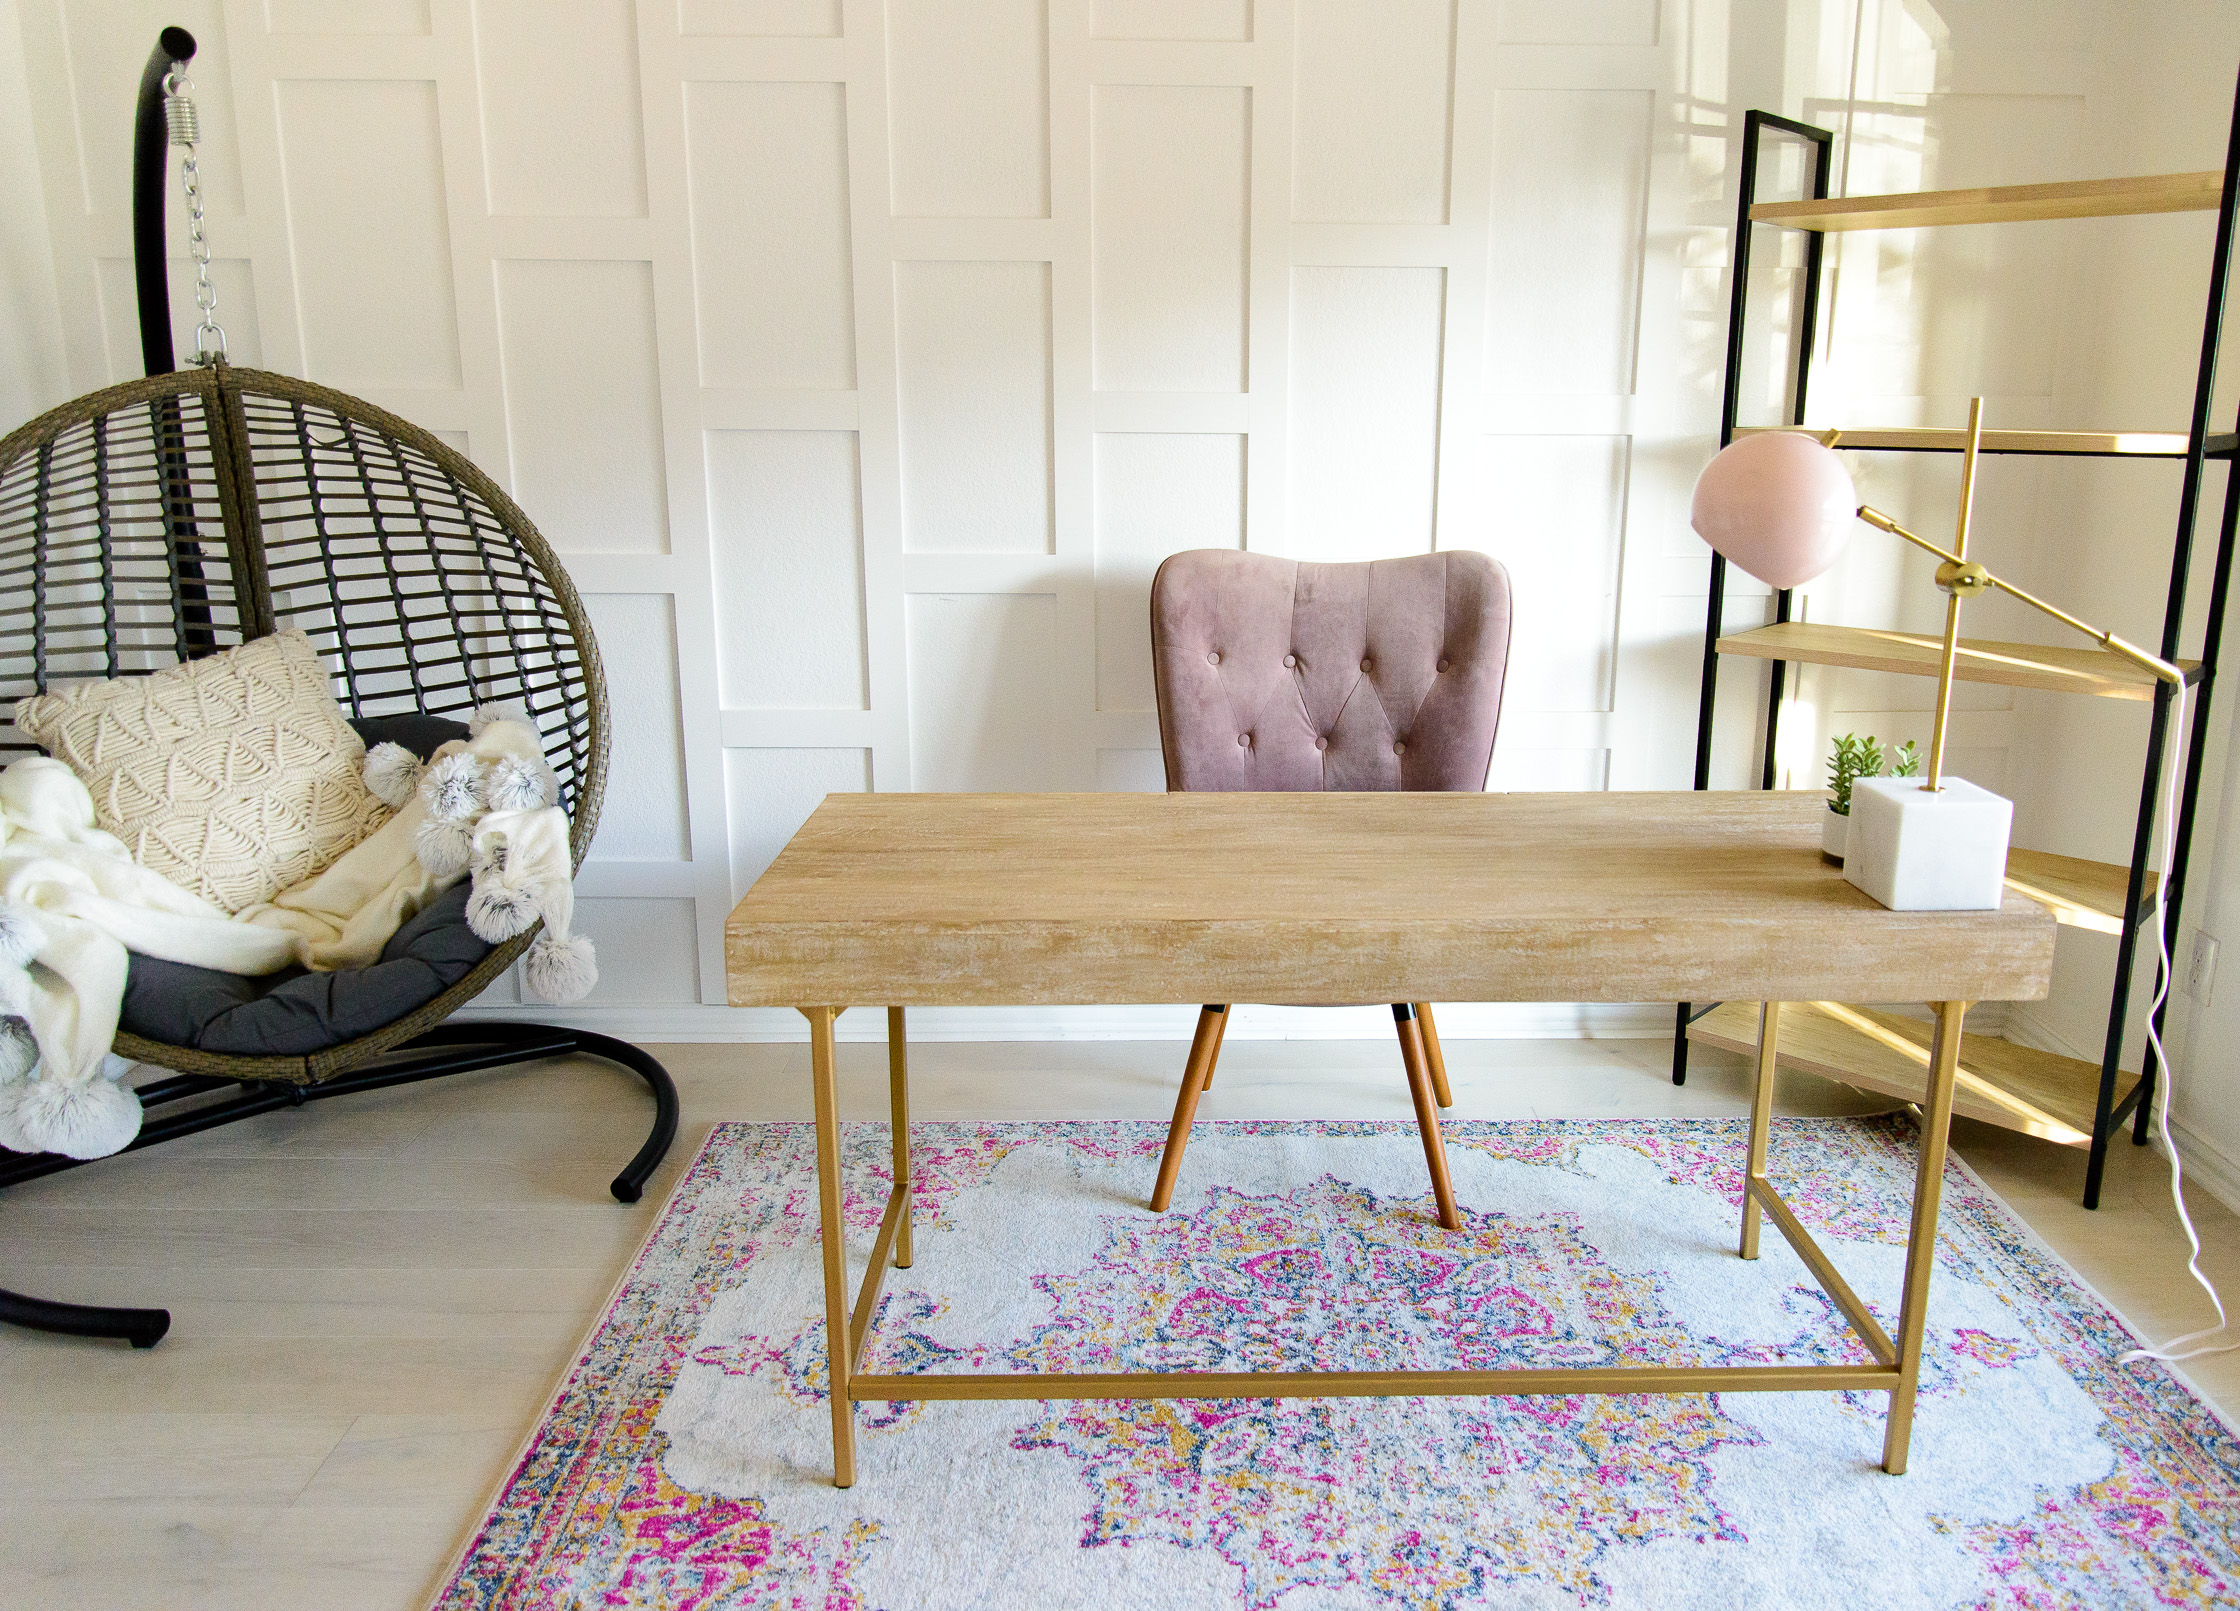
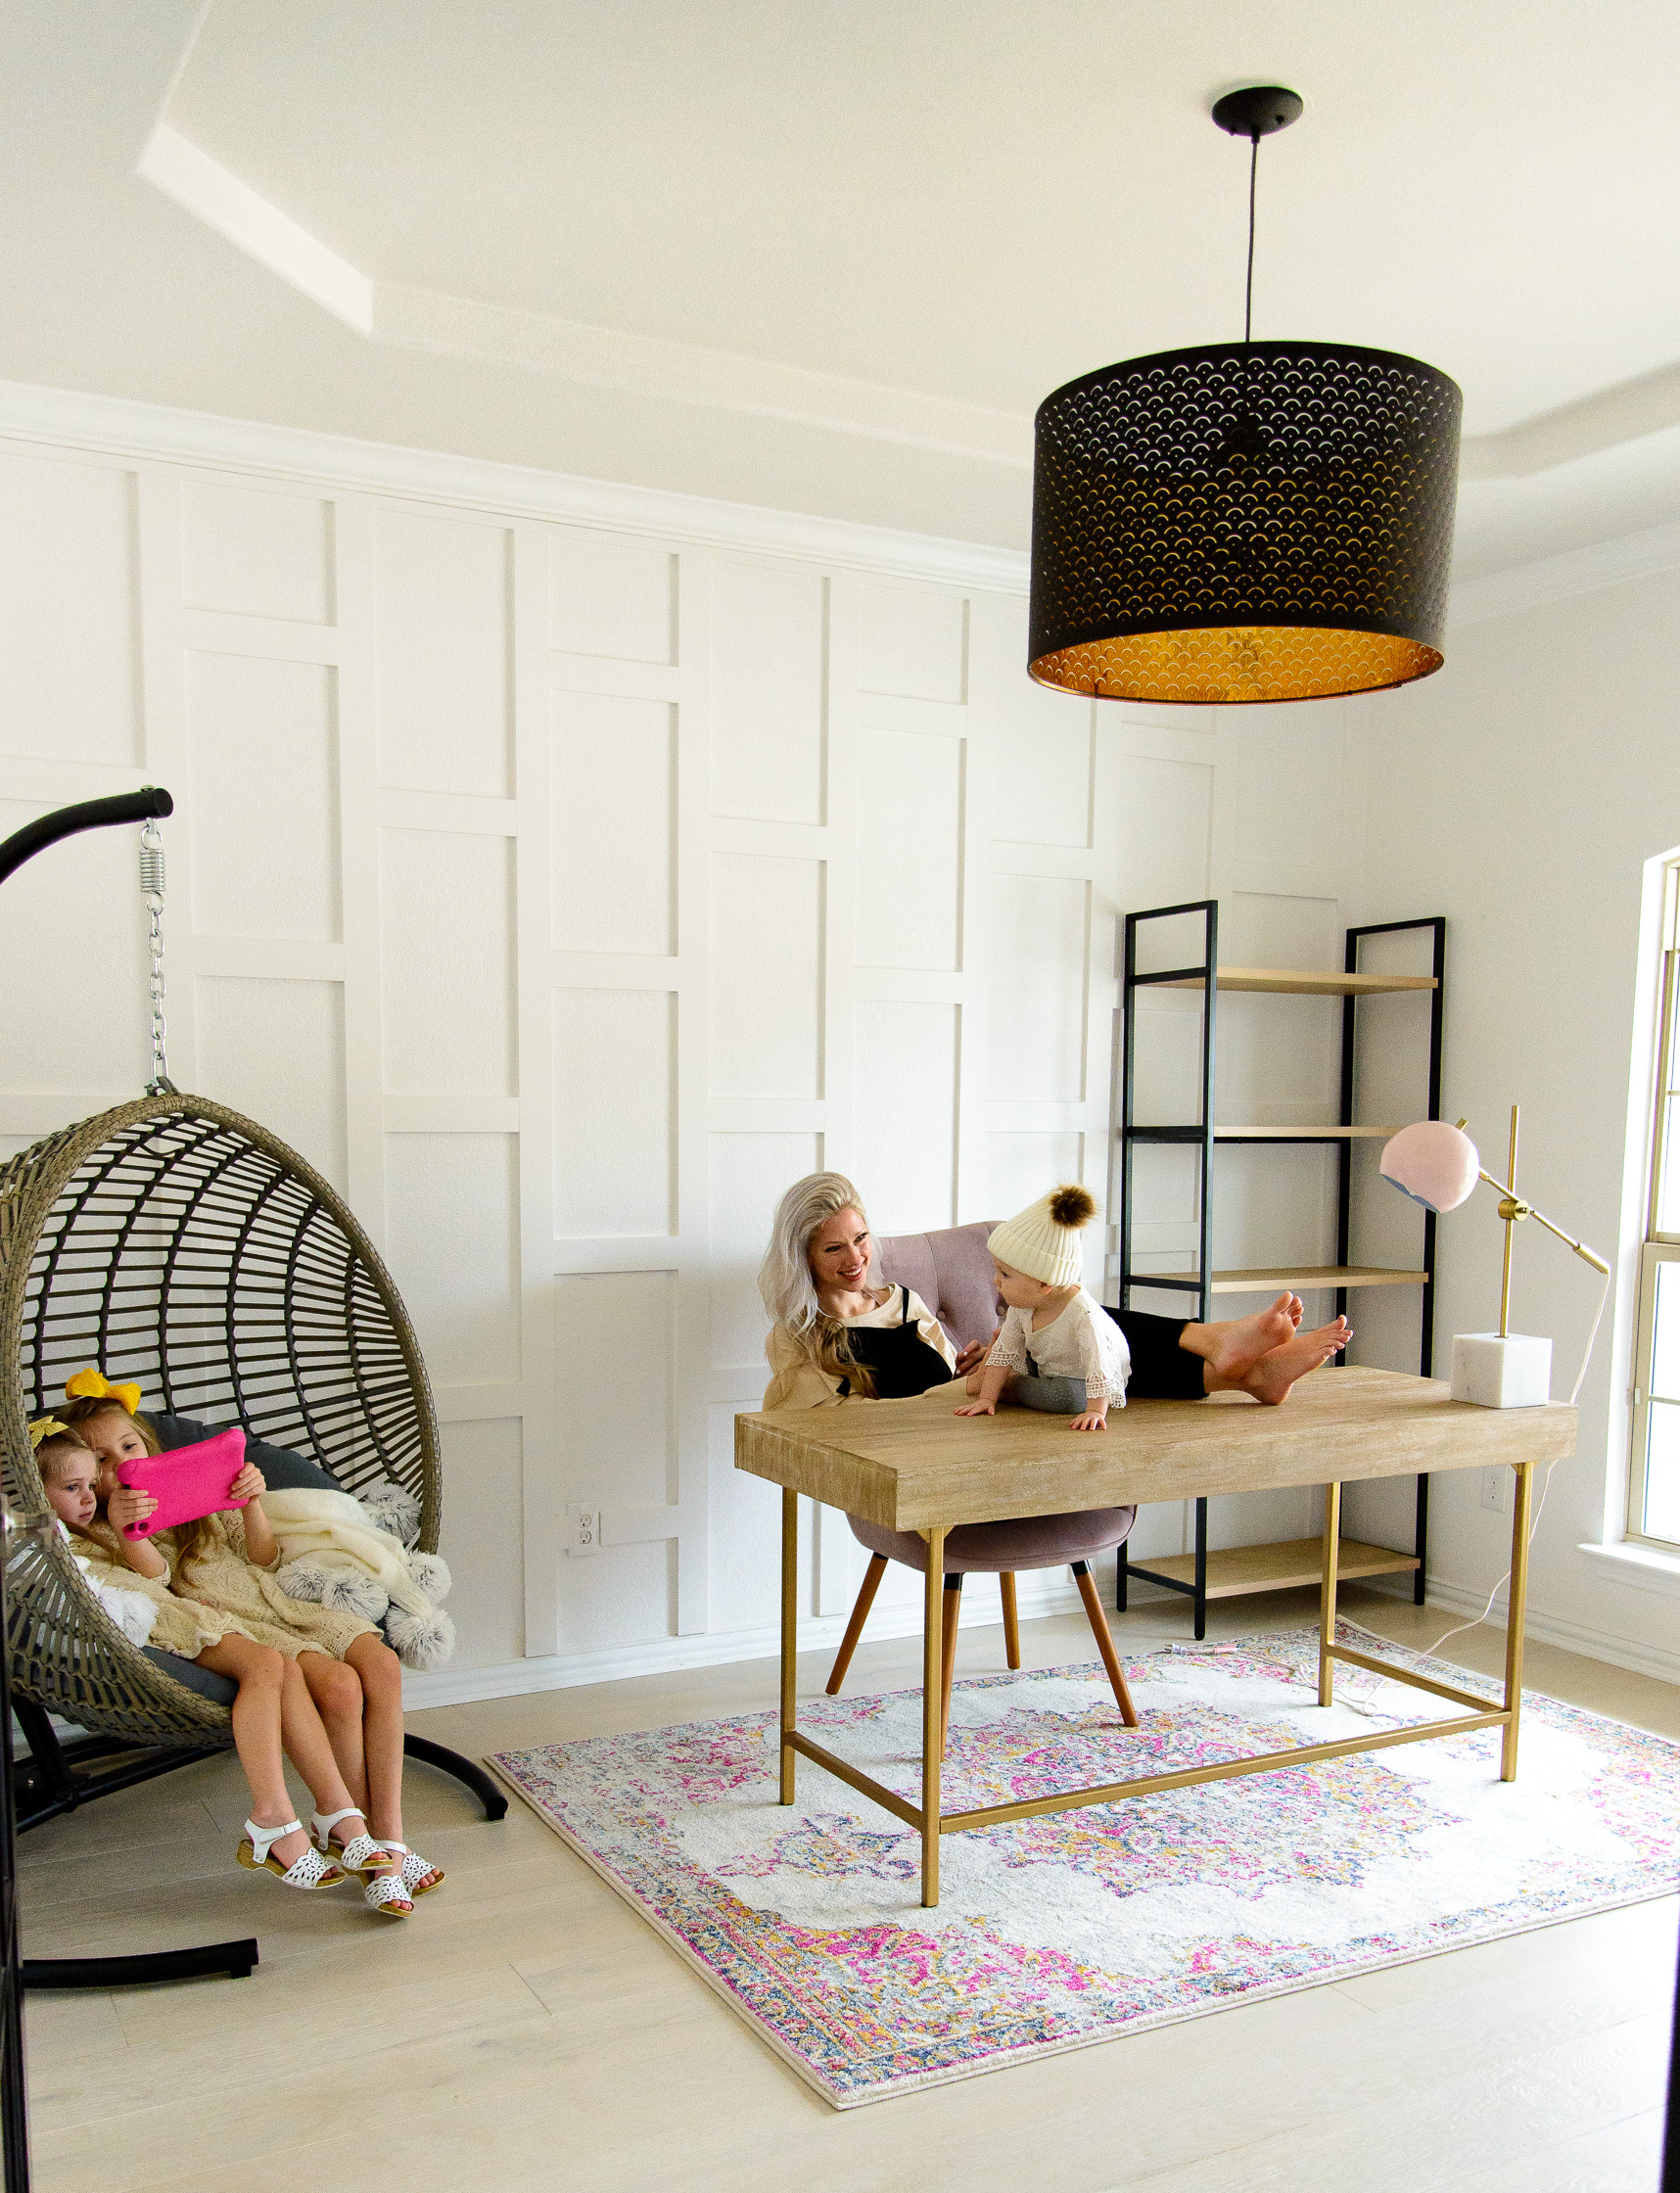
So there you have it. Janene has started on the decorating, which is gorgeous as always. I’m sure she’ll share posts to give updates on that soon. Good luck on your own project!

Wood Floor- Armstrong’s White Oak Engineered Wood
Wall Color- Nano White by Behr in satin (Painted by Five Star Painting)
Desk- World Market or Zulily
Chair- Amazon
Swinging Chair- Hayneedle or Serena & Lily
Lamp (sold out-linked others!)- Target or Anthropologie
Pom Pom Throw Blanket- Apollo Box
Faux Plant- Target


I saw your profile pics.. really speachless .. no words to explain how beautiful u all are.. i fallen in love with each pics of u ..love u all n god bless !!
About to do the same in my home office, but was wondering if the wall has texture or it is flat? Did you have to do anything to make it flat before starting to add the 3/4 inch plywood..Thanks
Author
Hey Sofia! Yes, we have texture on the walls and we didn’t do anything before adding the plywood!