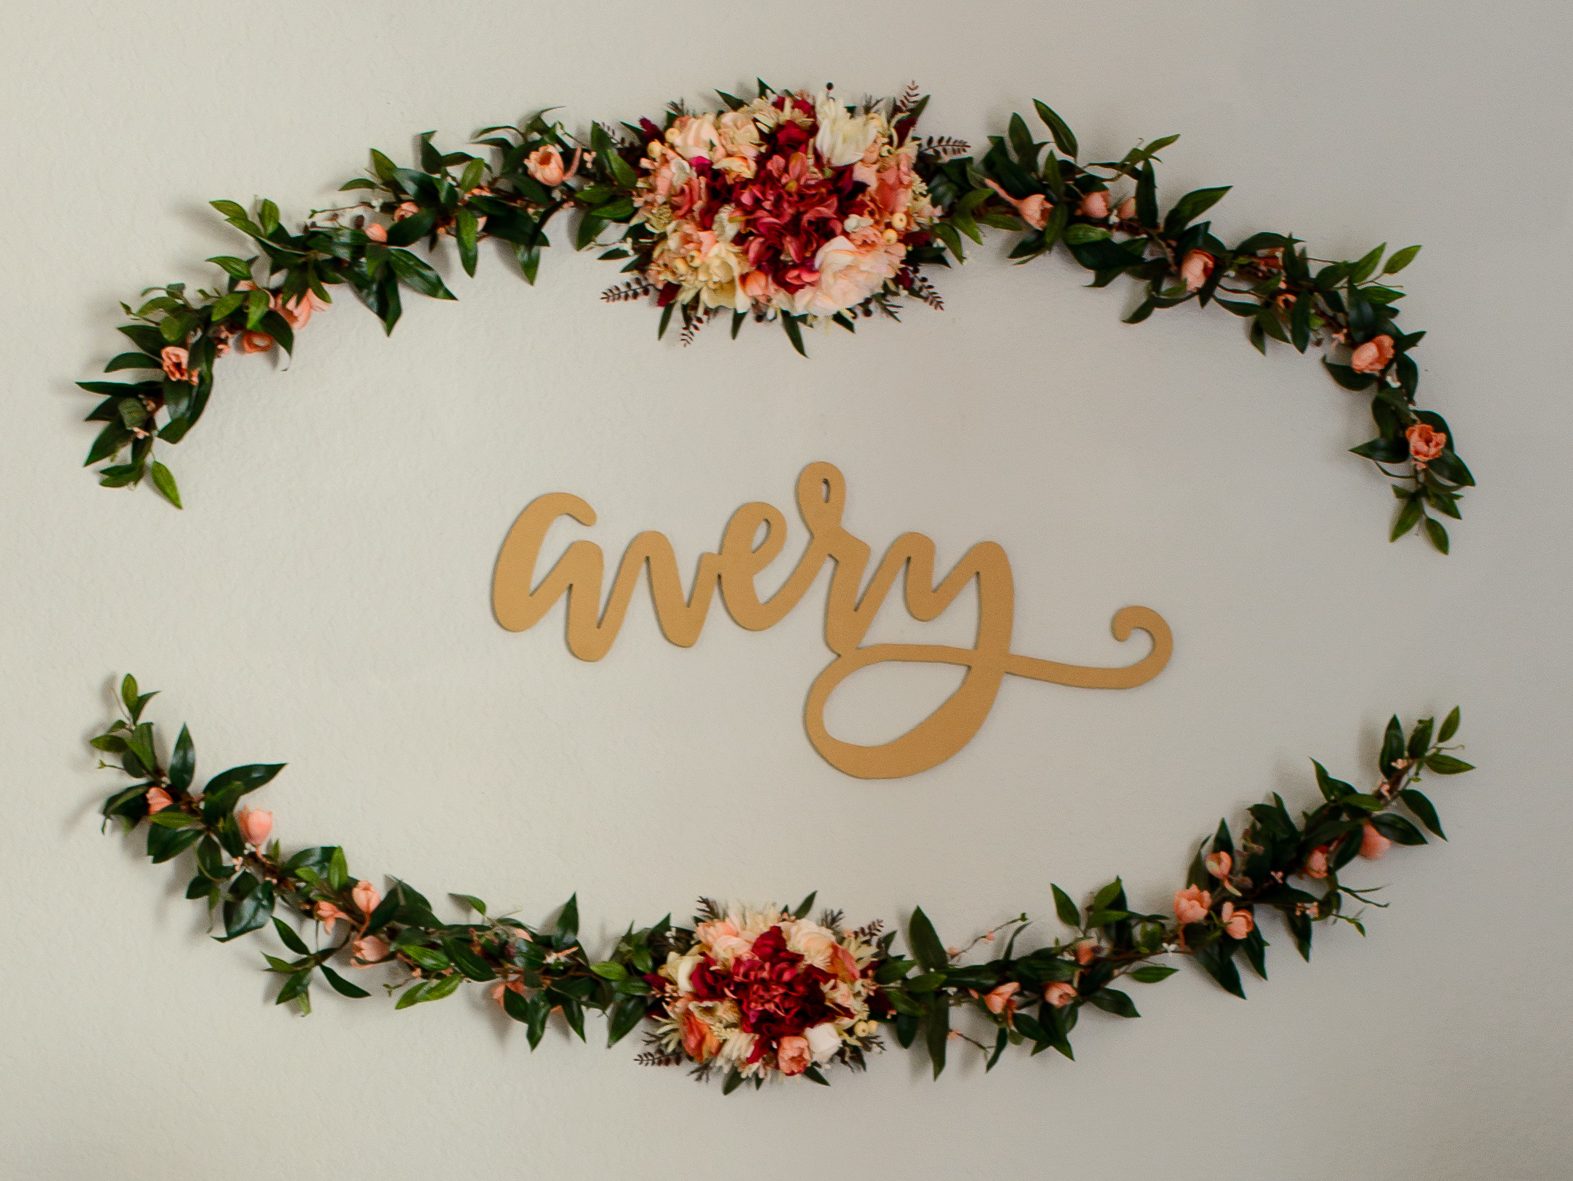
HERE IT IS!!! This free tutorial is for the 100’s of y’all who flooded our inbox’s asking where this gorgeous floral arrangement was purchased. Unfortunately, it’s 1 of a kind and as you read through this tutorial.. you’ll see why <wink wink>.
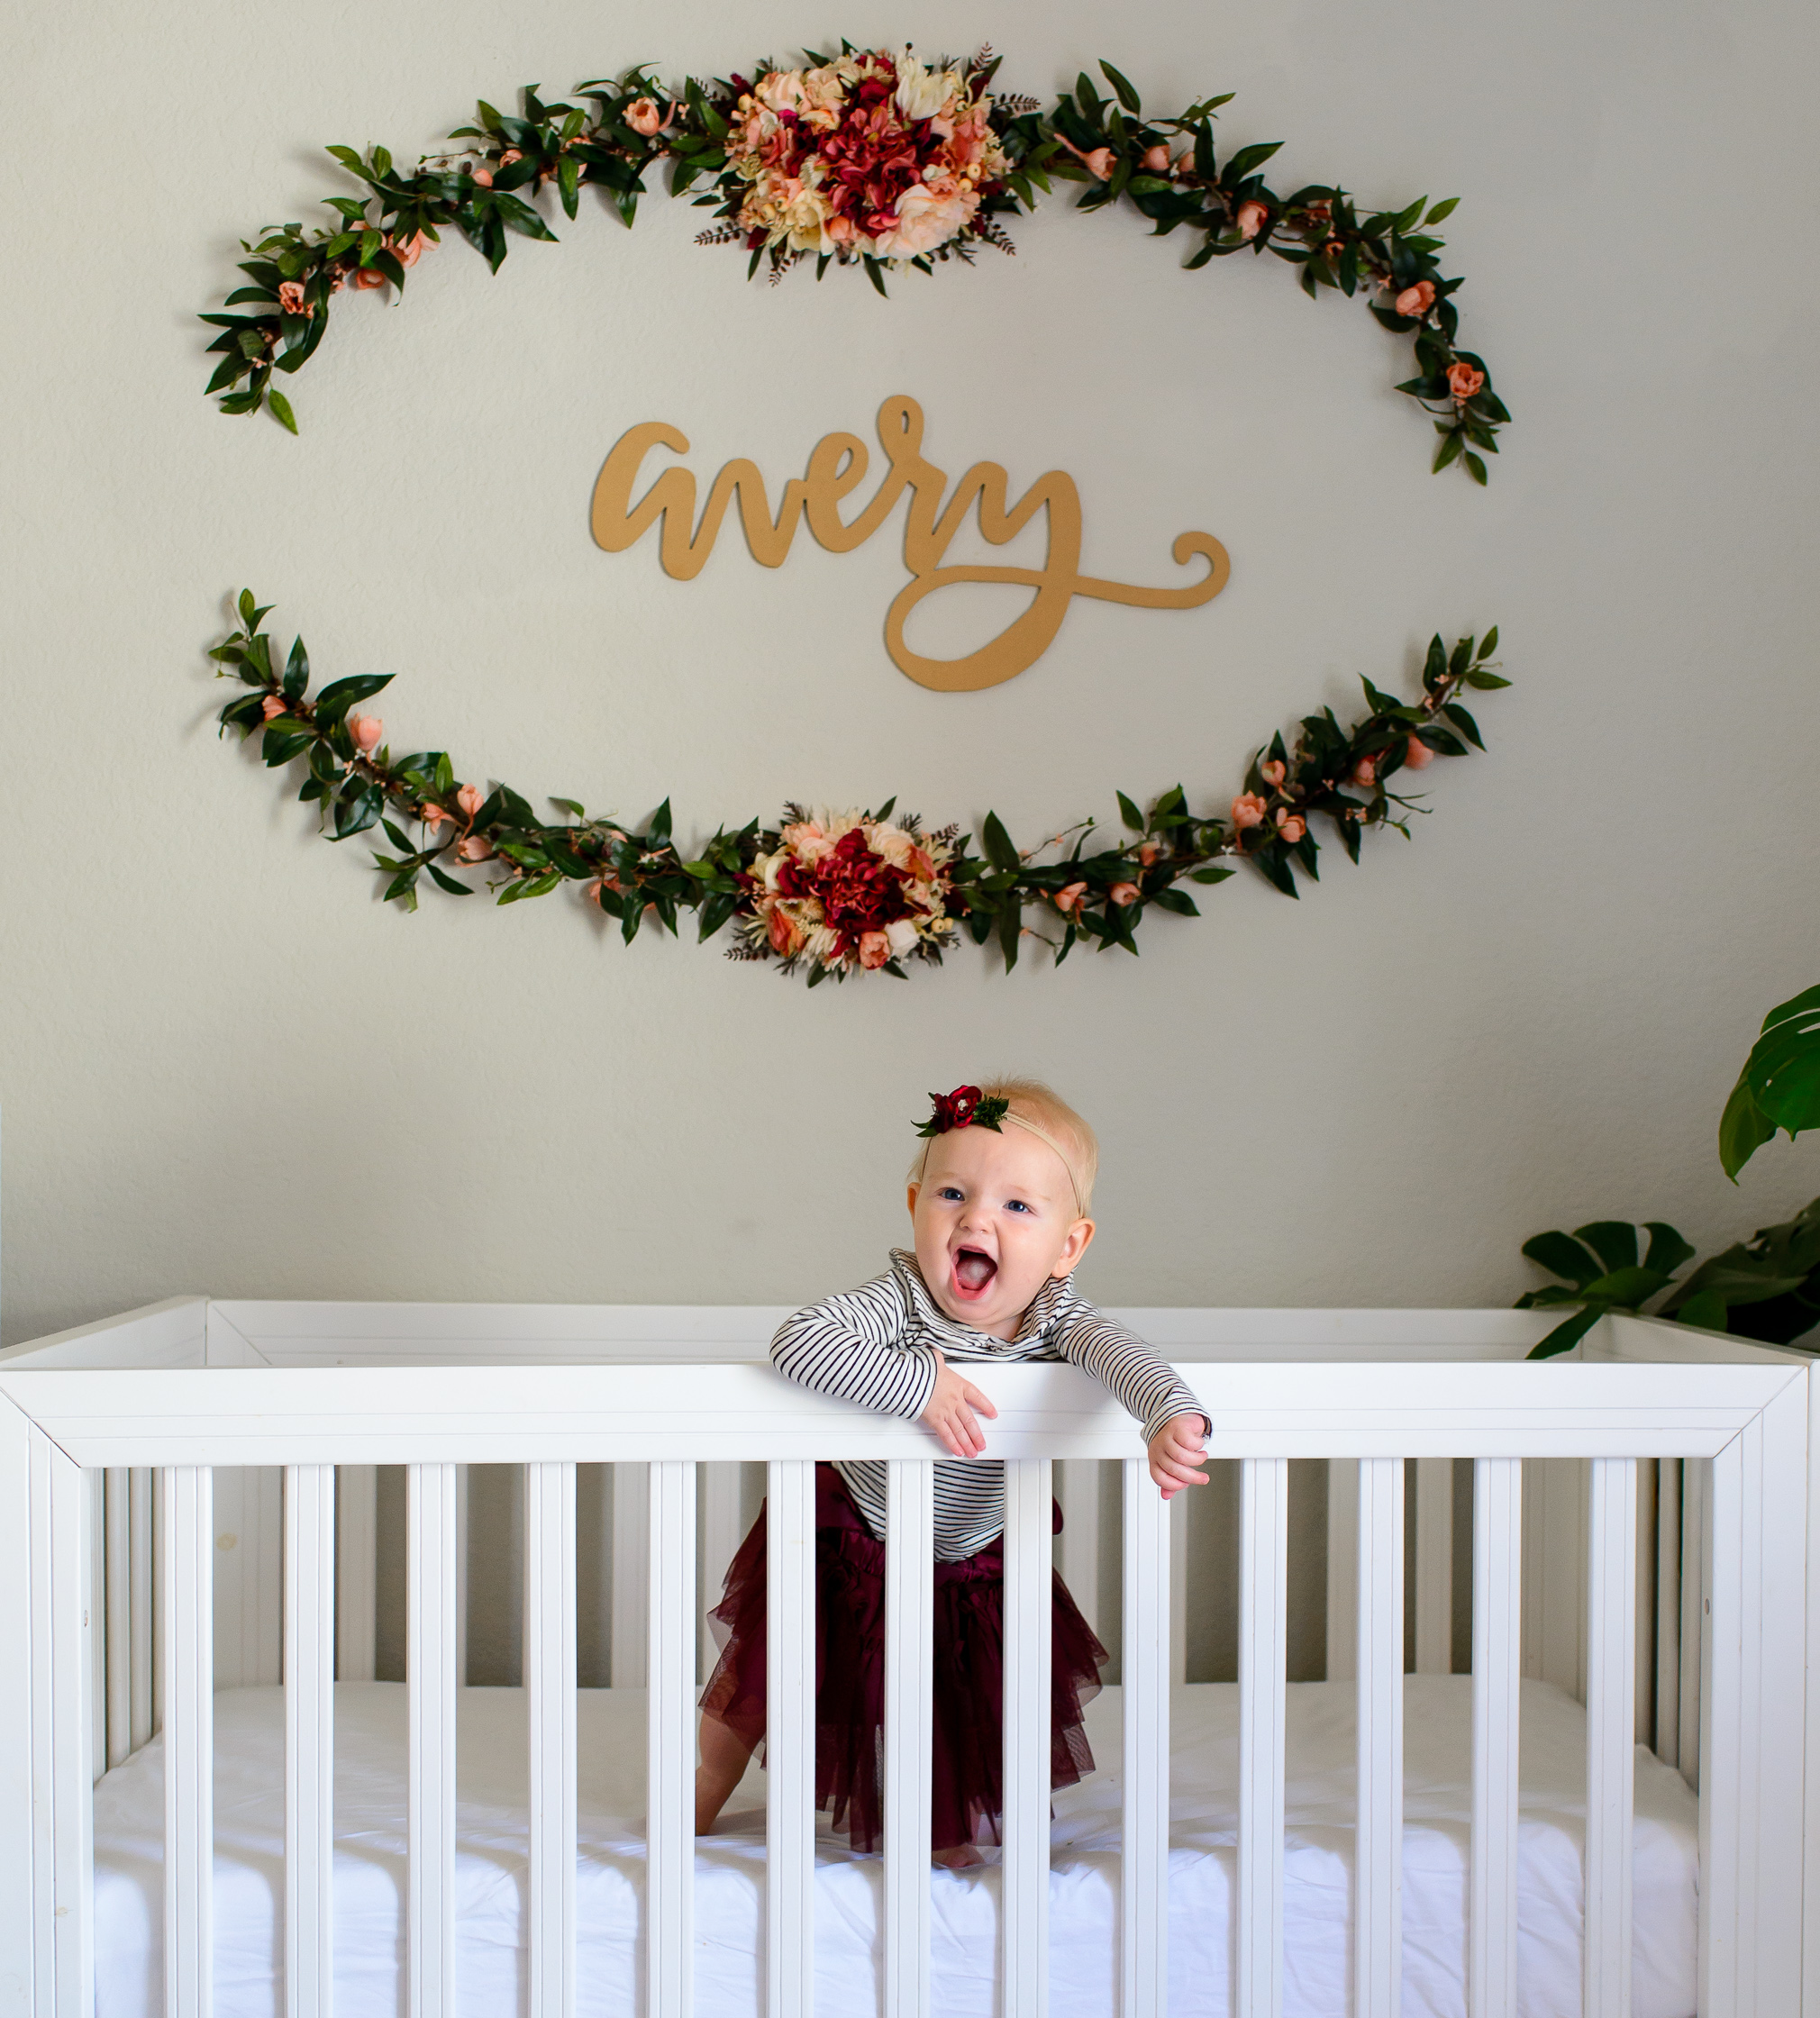
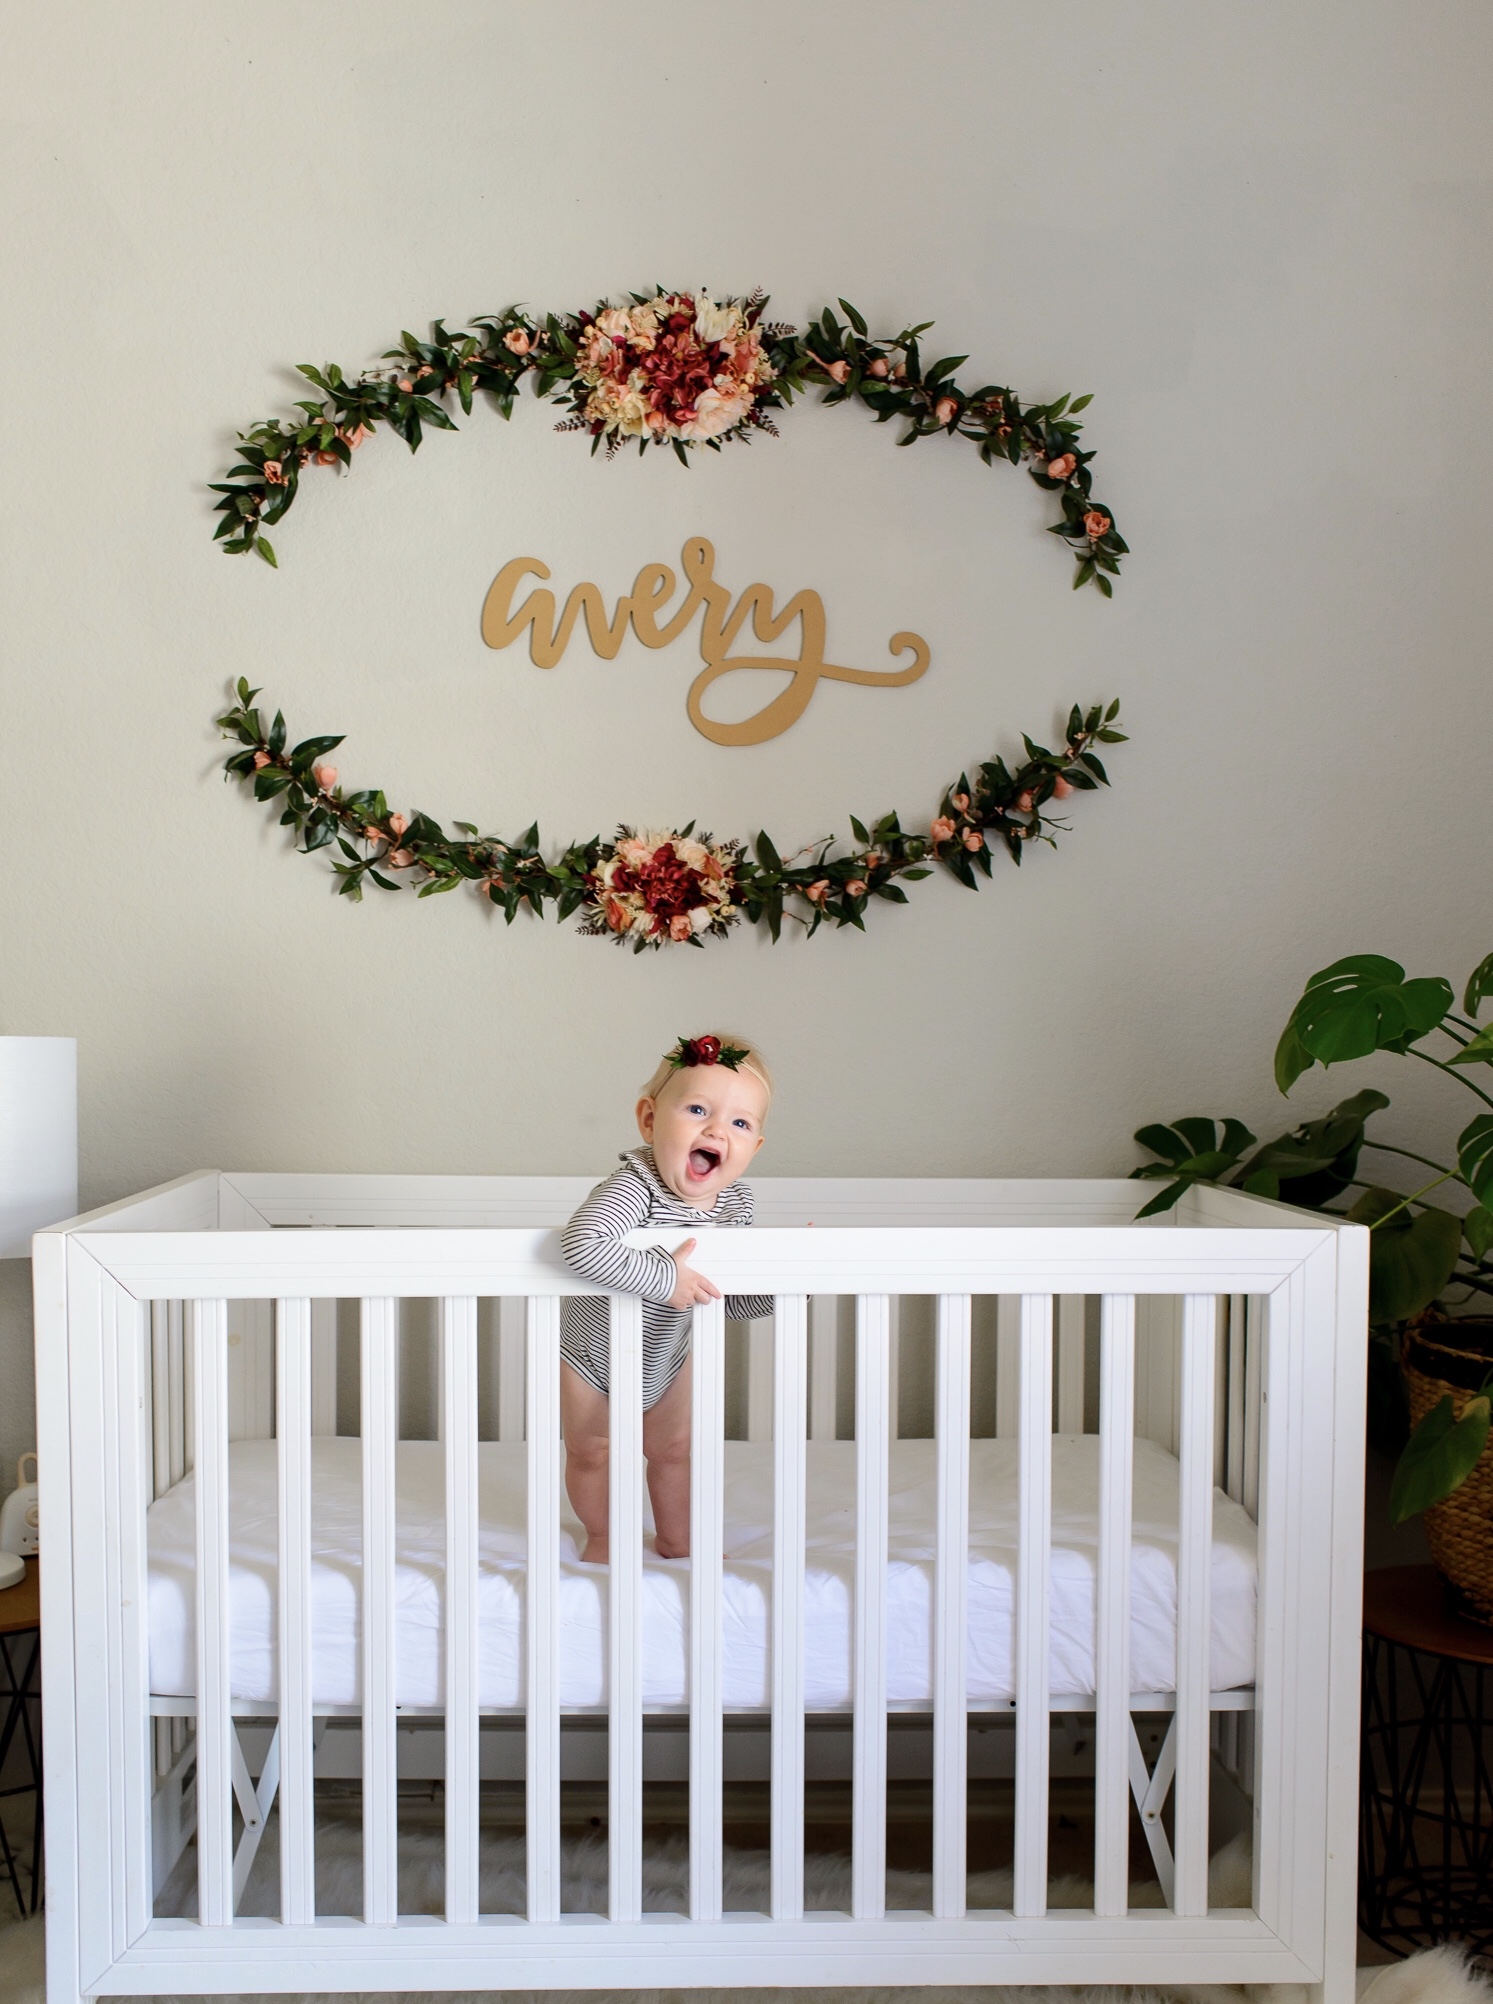
This hanging floral piece was the inspiration behind Avery Rose’s nursery. And it’s 200% prettier in person, pictures don’t do it justice. The brilliant hands behind the project are Emily’s, talented creator of Olive Rae Handmade, She has written up a DIY tutorial with detailed steps, along with photos AND where she purchased the products! The flowers in the tutorial below are a replica to the one pictured above in Avery’s room. You’ll see slight differences. Differences that shaved off 15+ hours. haha. So thank you Emily for sharing this beautiful piece! If any of you make this project, we wanna know! This would be beautiful in a living or dining room! Possibilities are endless. Can’t wait to see your creations!
Hanging Floral Tutorial
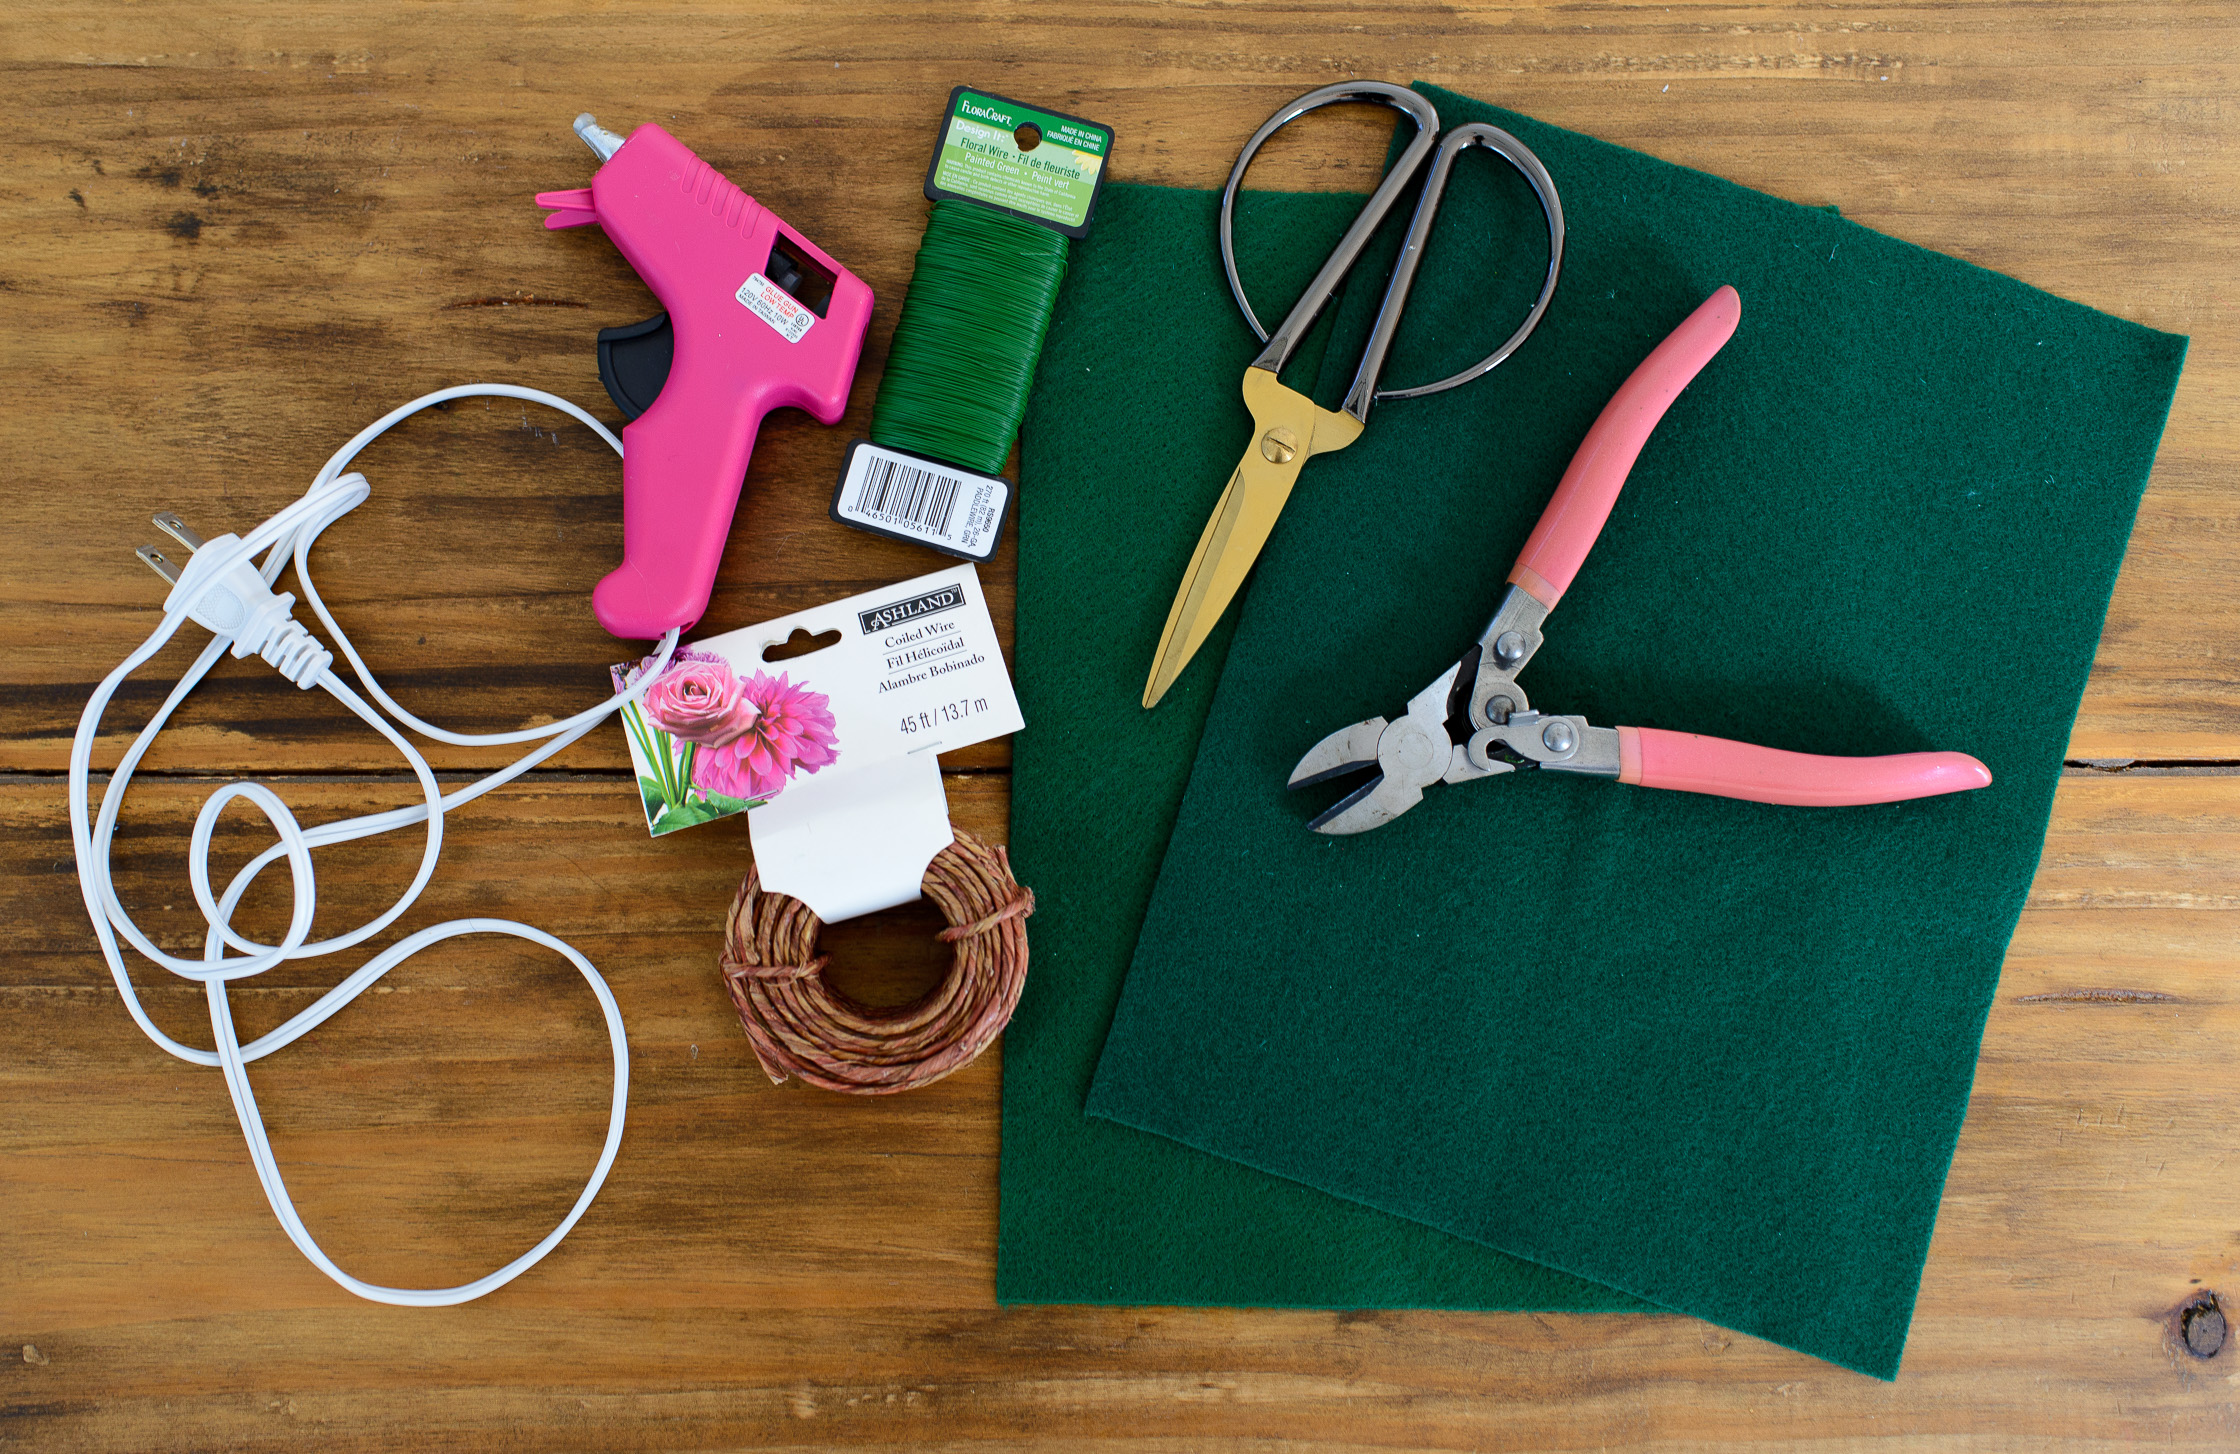
What You’ll Need:
- Thick covered floral wire (around 18 gauge or thicker)
- Skinny floral wire (around 26 gauge)
- Wire cutters
- Scissors
- 2 8 x 10” or larger pieces of felt
- Glue gun
- Hot glue
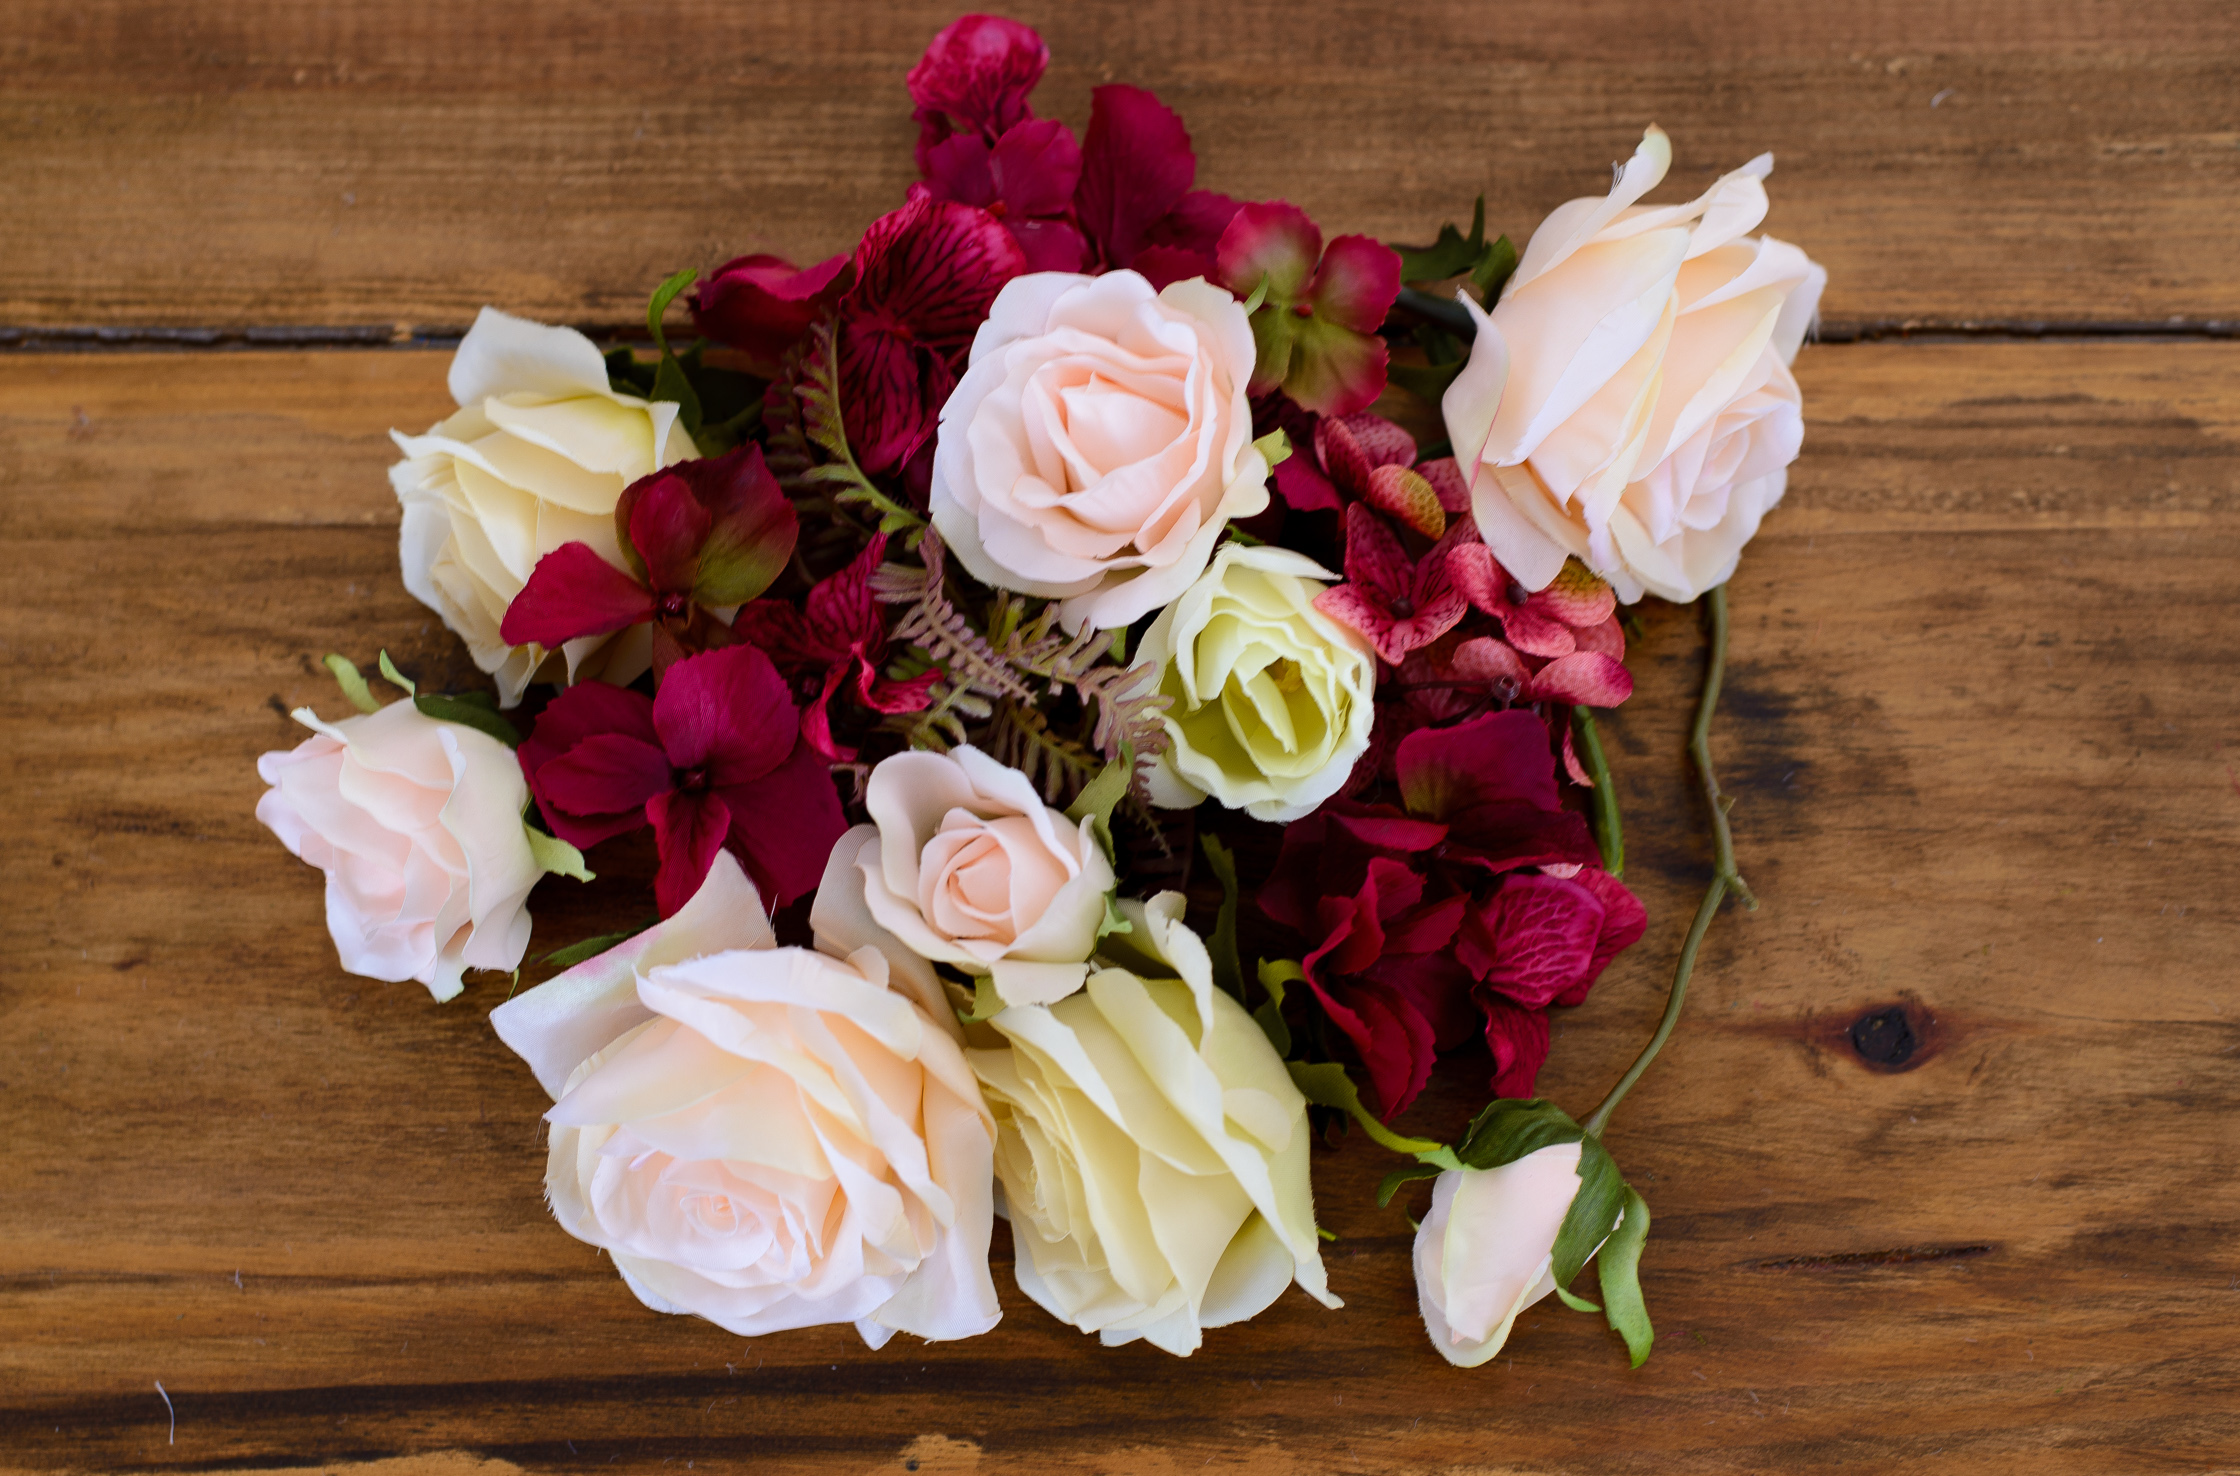
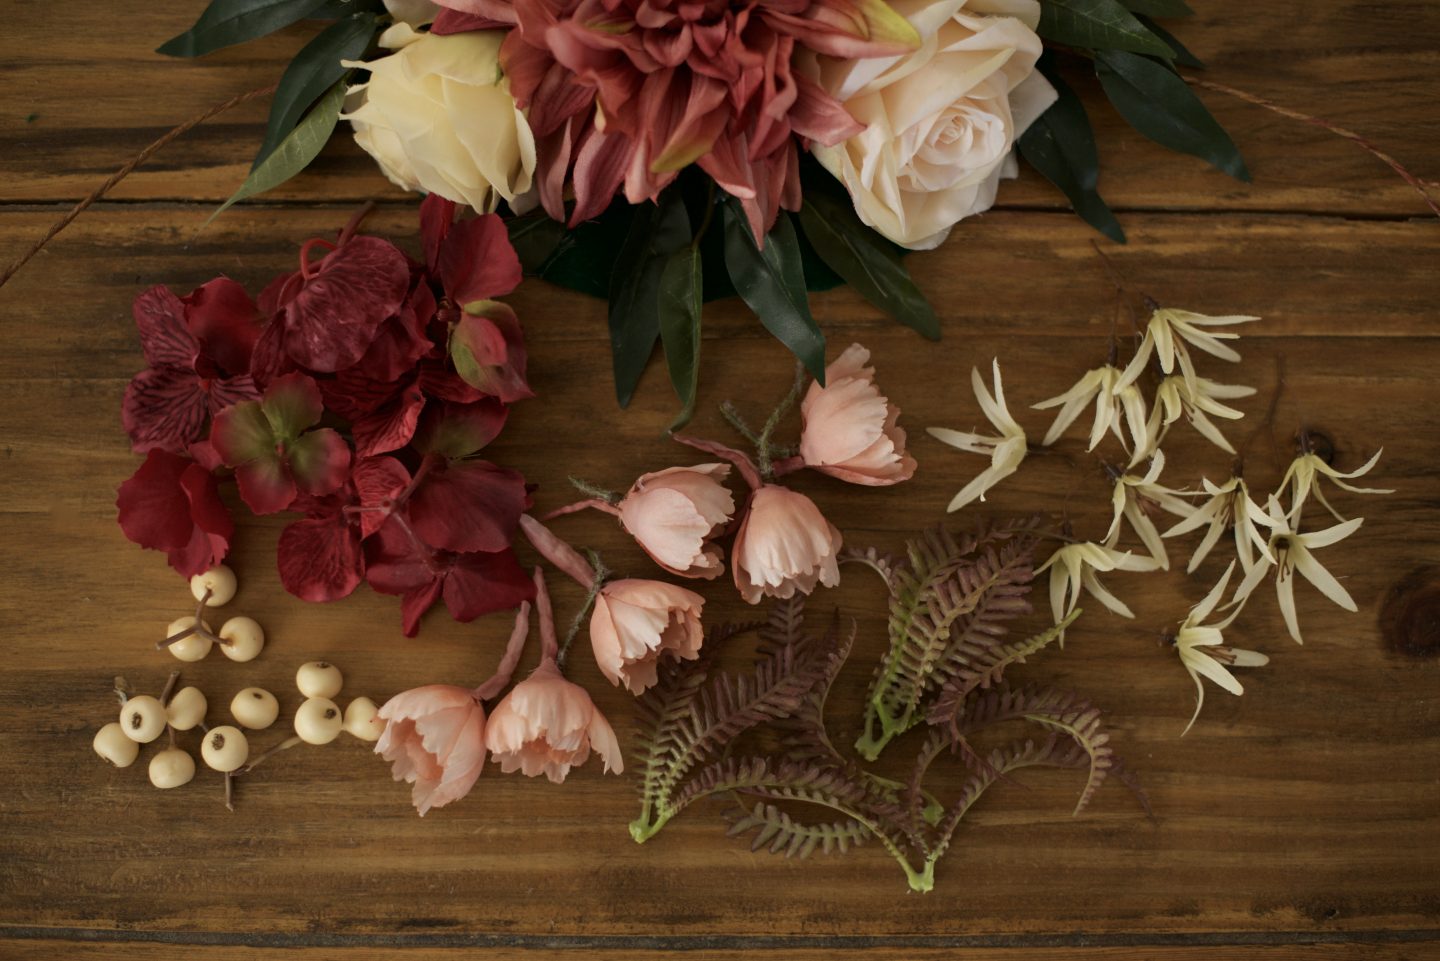
- Large and small flowers for the center
- Berries or other Fillers
- Small flowers or fillers for the leaves
- Hanging bush or Garland

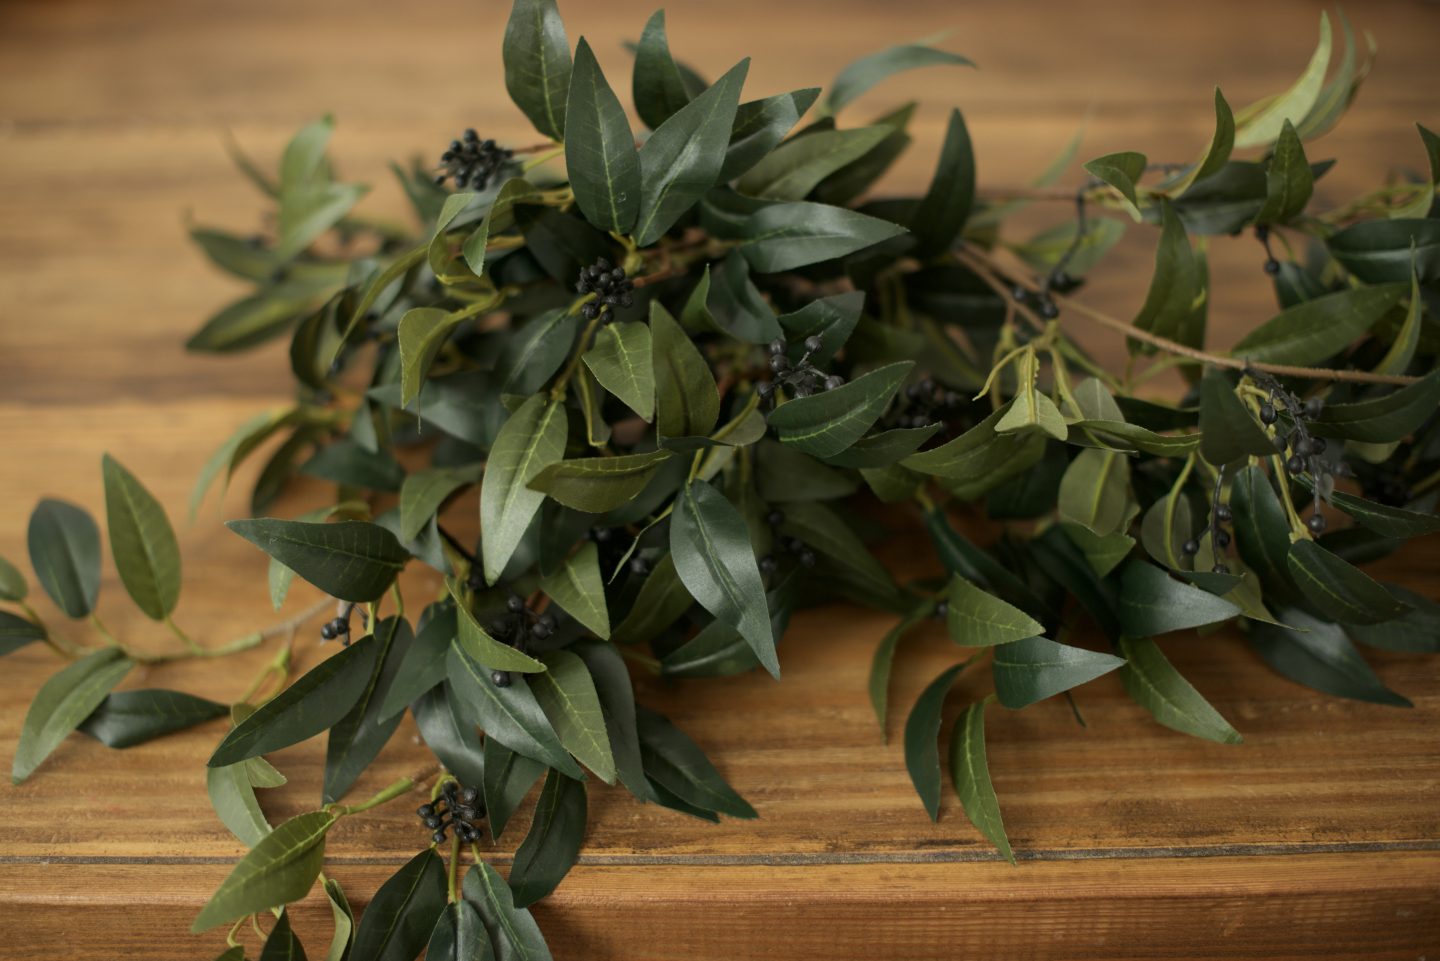 *If you want to make this exact version, at the end of the tutorial are links to most of the supplies, all the ones currently available. If you want to make something similar, or different, and want to make it as easy as possible, you can buy garland and cut it to fit, and buy a bouquet of flowers/fillers to take apart and use. Afloral.com and Saveoncrafts.com are good online places to look for bouquets or garland at decent prices. To find leaves with a similar look and shape, look for Laurel or Ruscus leaves. The shape is usually similar. The bottom piece can be smaller than the top like this one, the same size, or there could be just greenery on the bottom.
*Hanging was a pain the first time, so I added more loops for hanging on this version, but it did make it more complicated to make. If you prefer to make it a little harder to hang but easier to make, ignore all the loops, except the ones at each end, and you can probably use command strips on the middle pieces, and use nails underneath the wire at various points to get it to hang in the shape you want, and where you want.
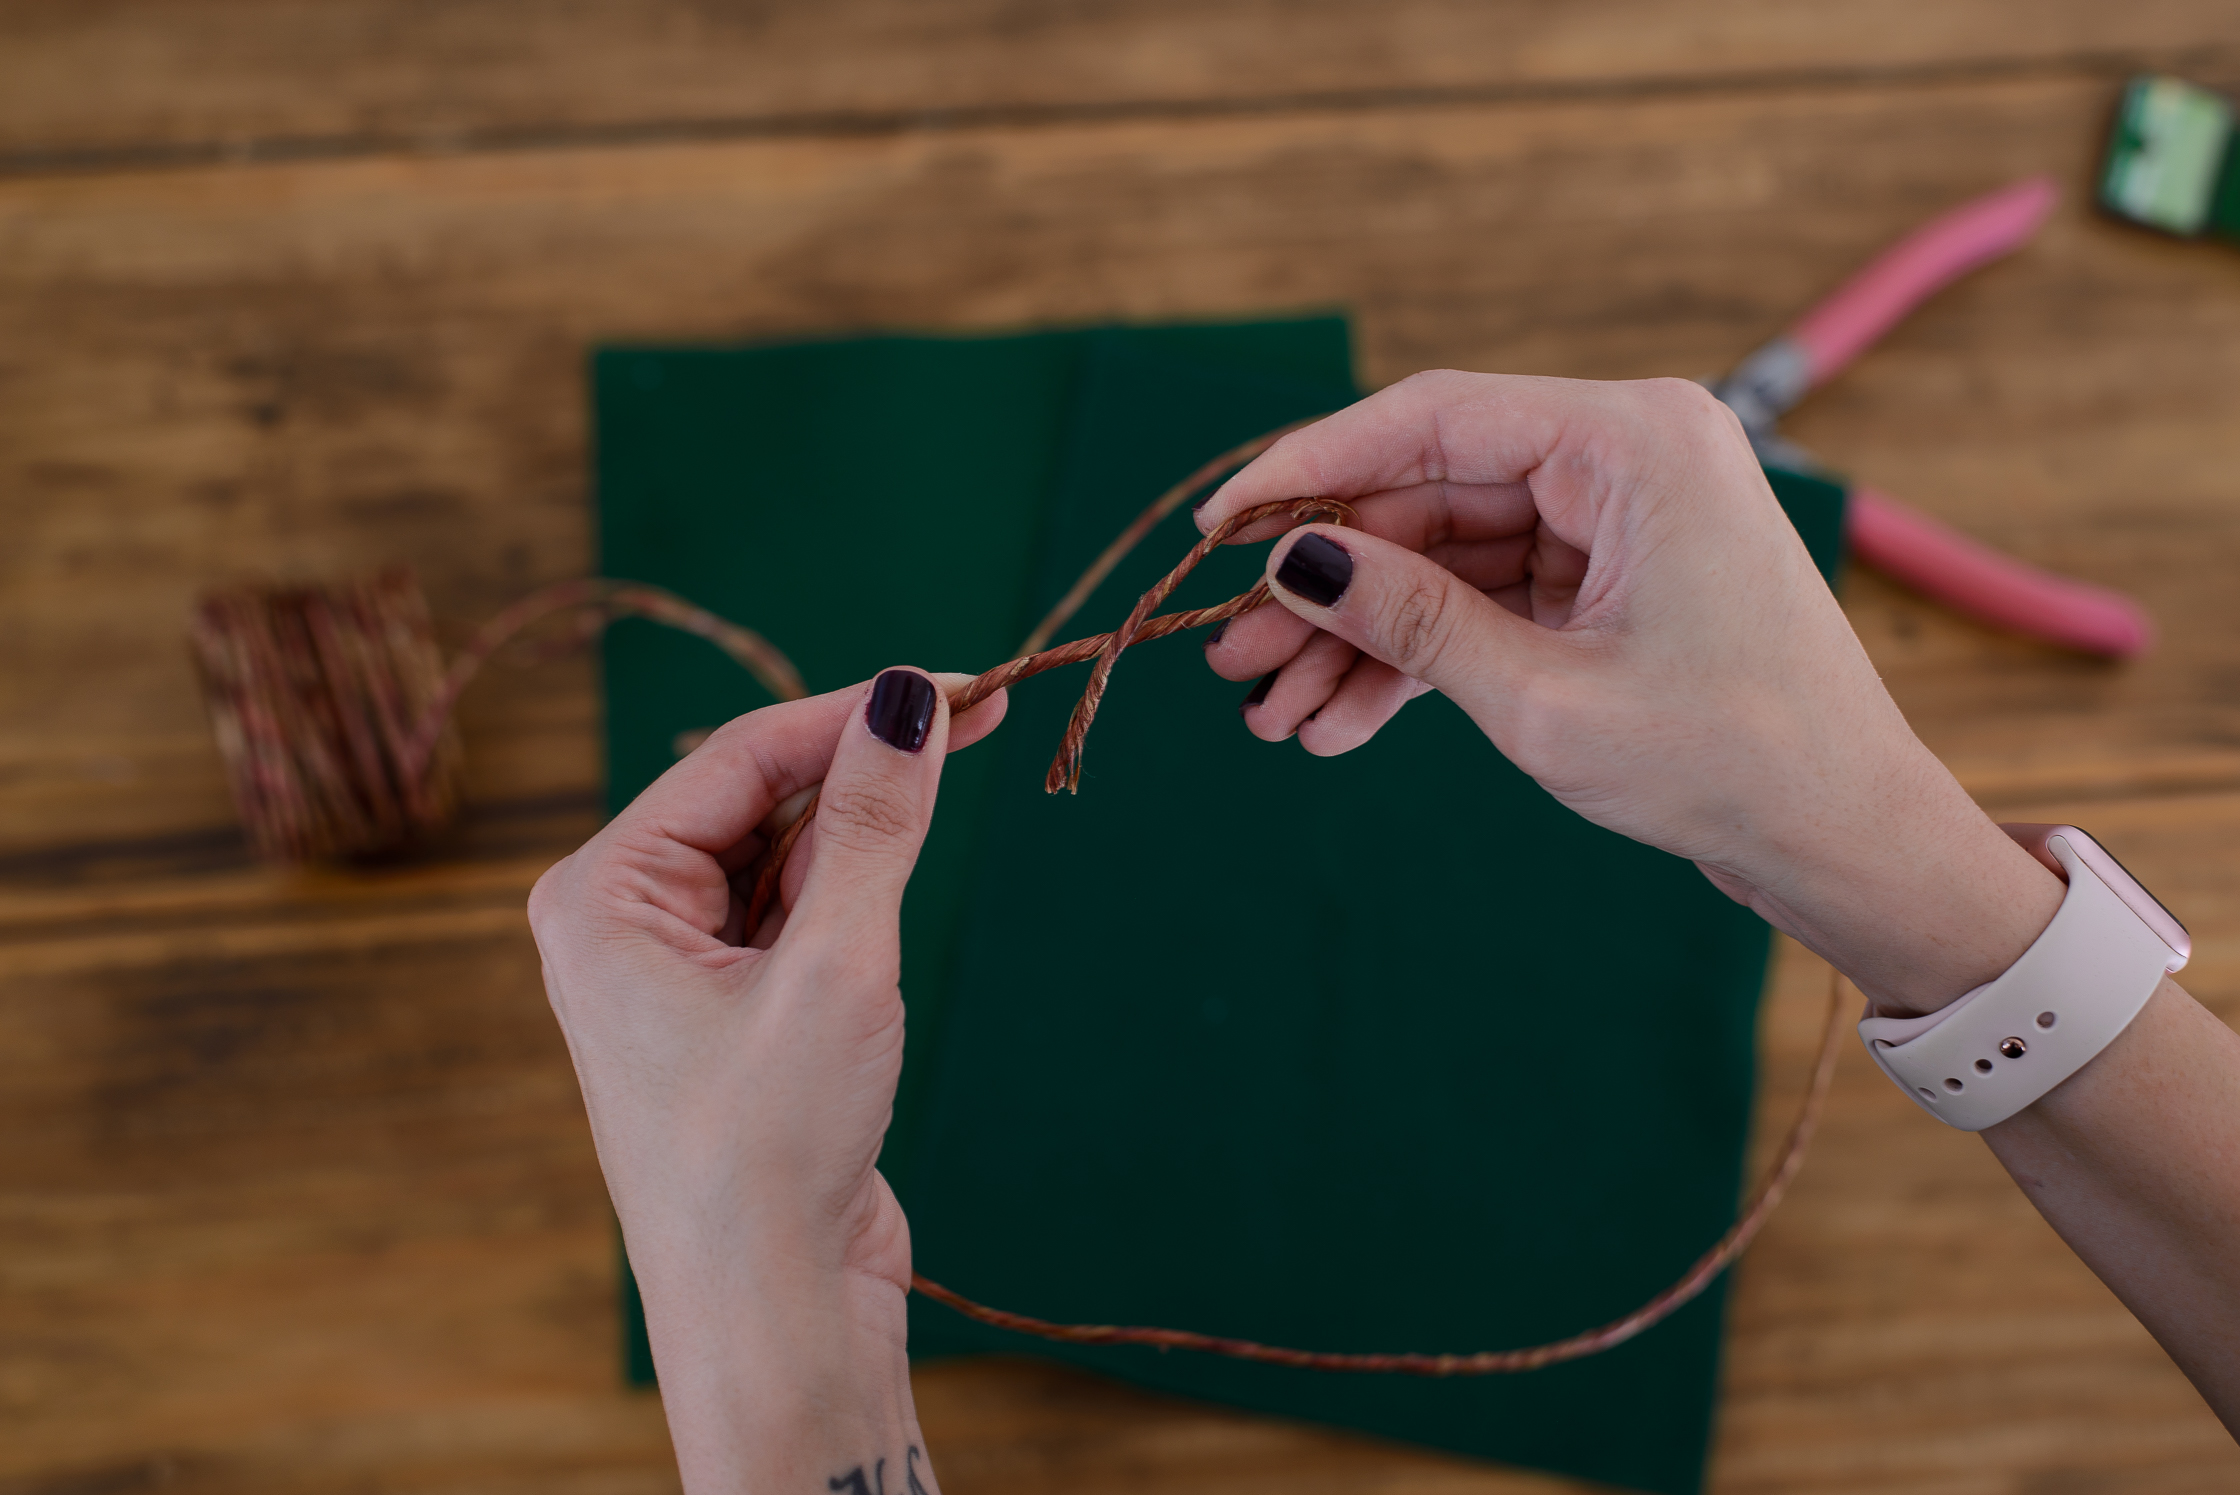
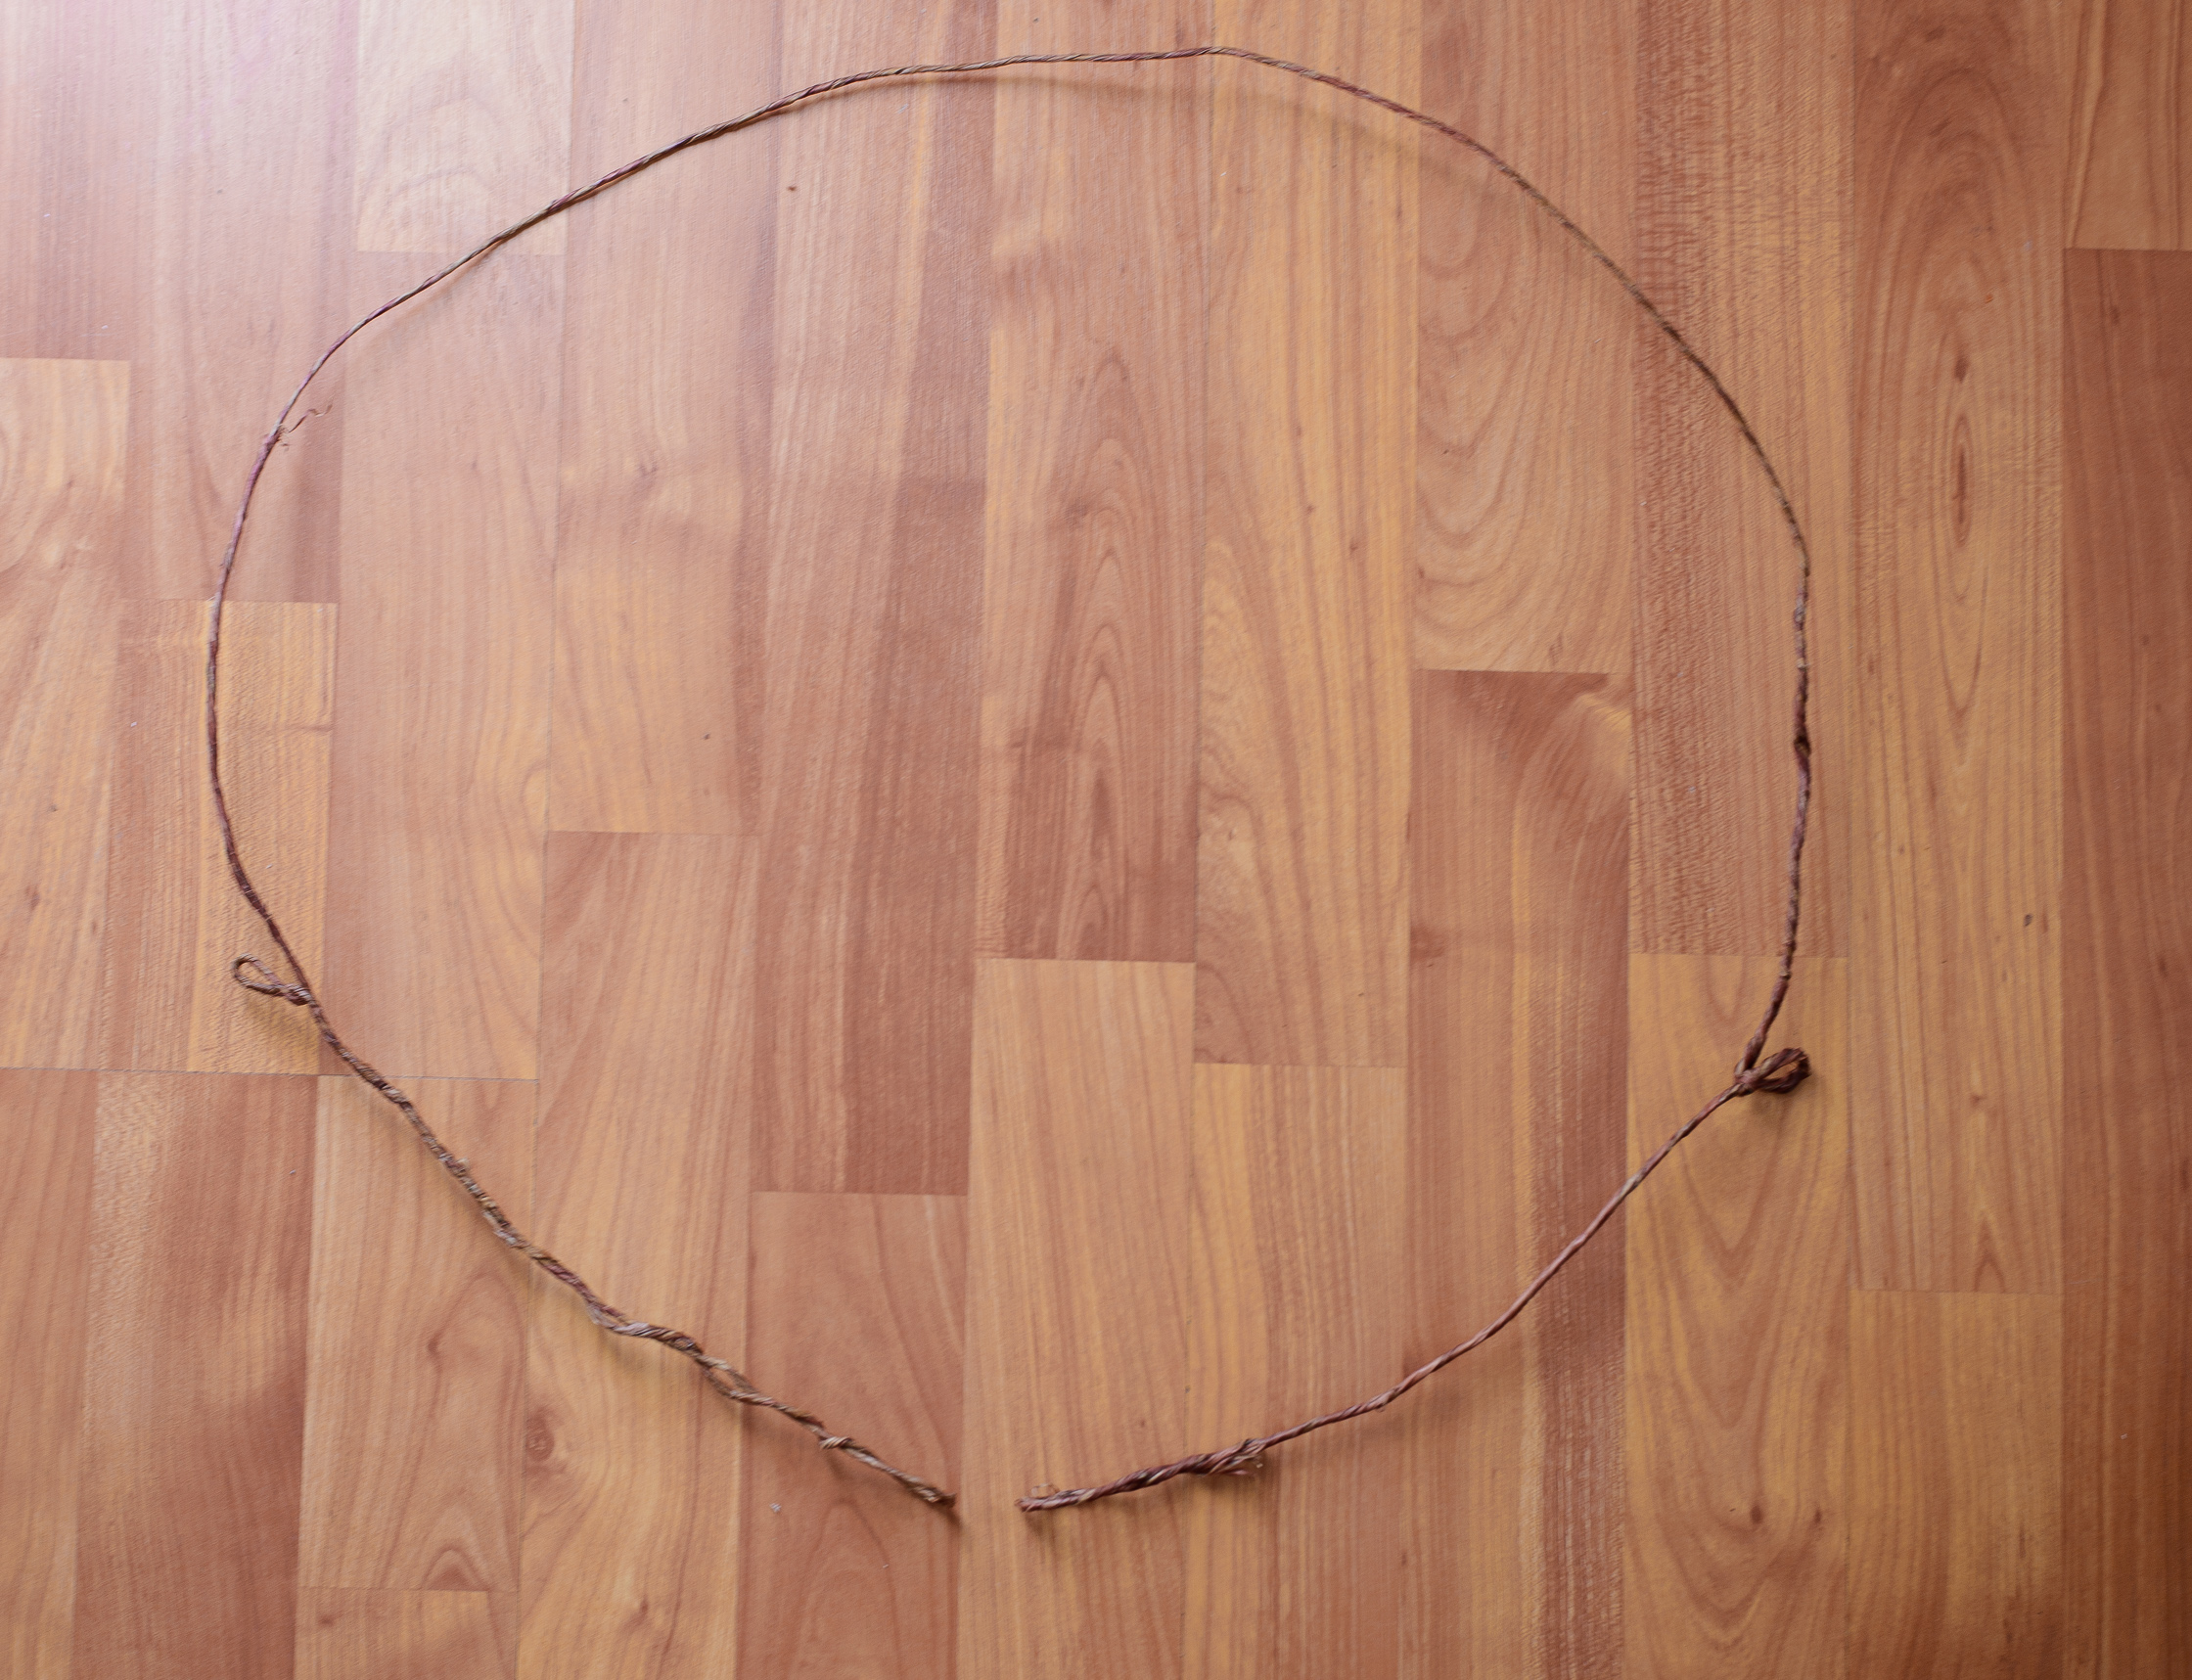
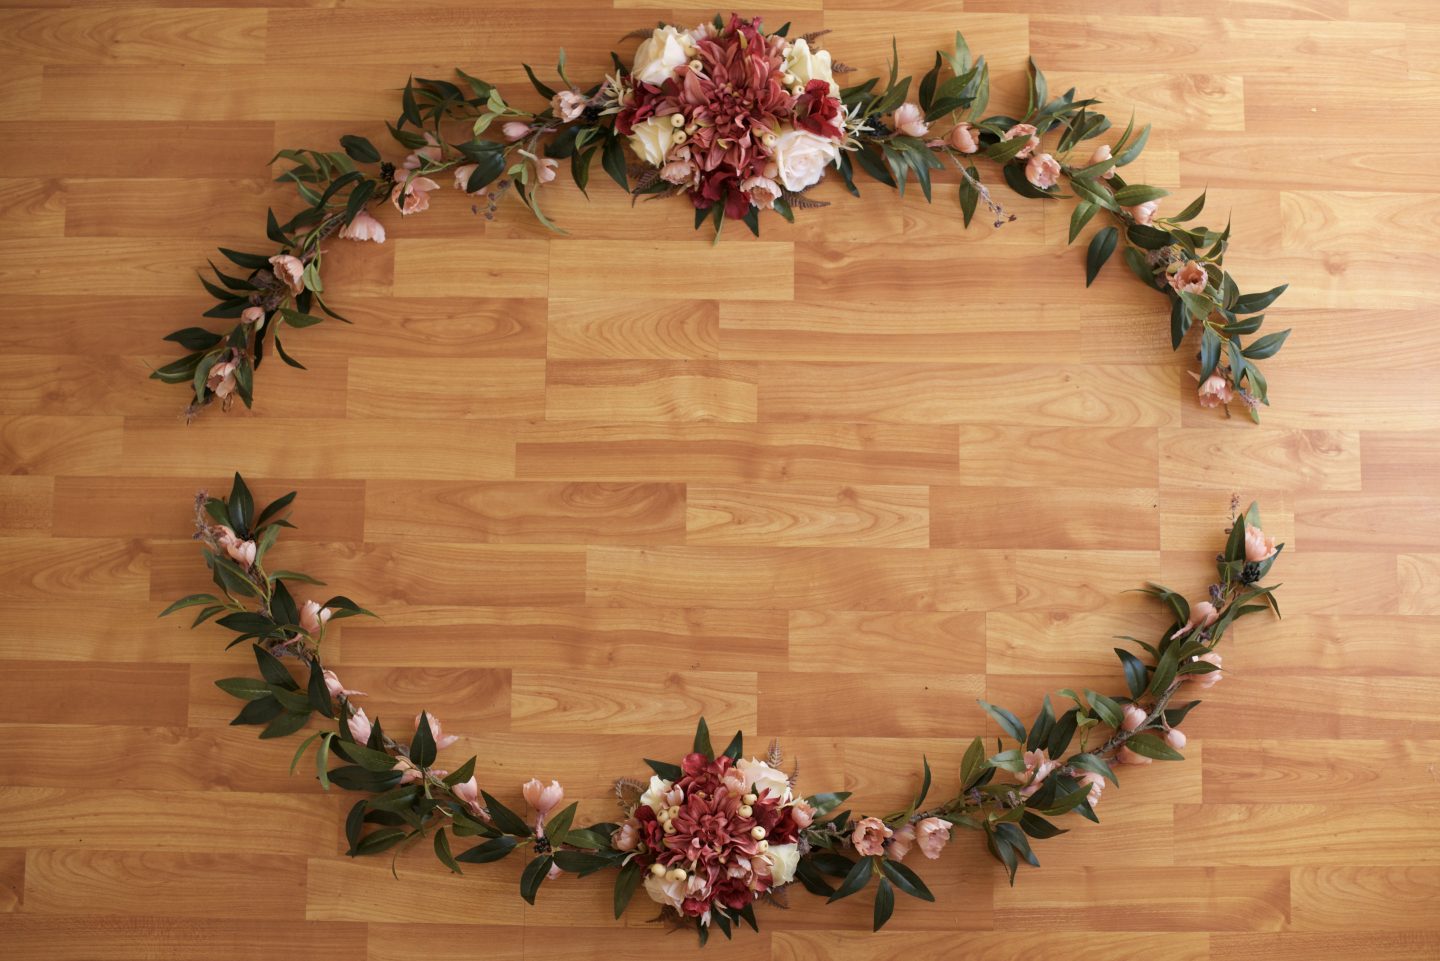
STEP 1: Making the Base
First the base needs to be made for both the top and the bottom.
The name sign that we used was around 24” Long, and we based the size around that. I will give you all the measurements we used as a guideline.
Both the top wire, and bottom wire were 56” long.
With the wire still attached to the roll, make a loop and twist the wire around to secure it.
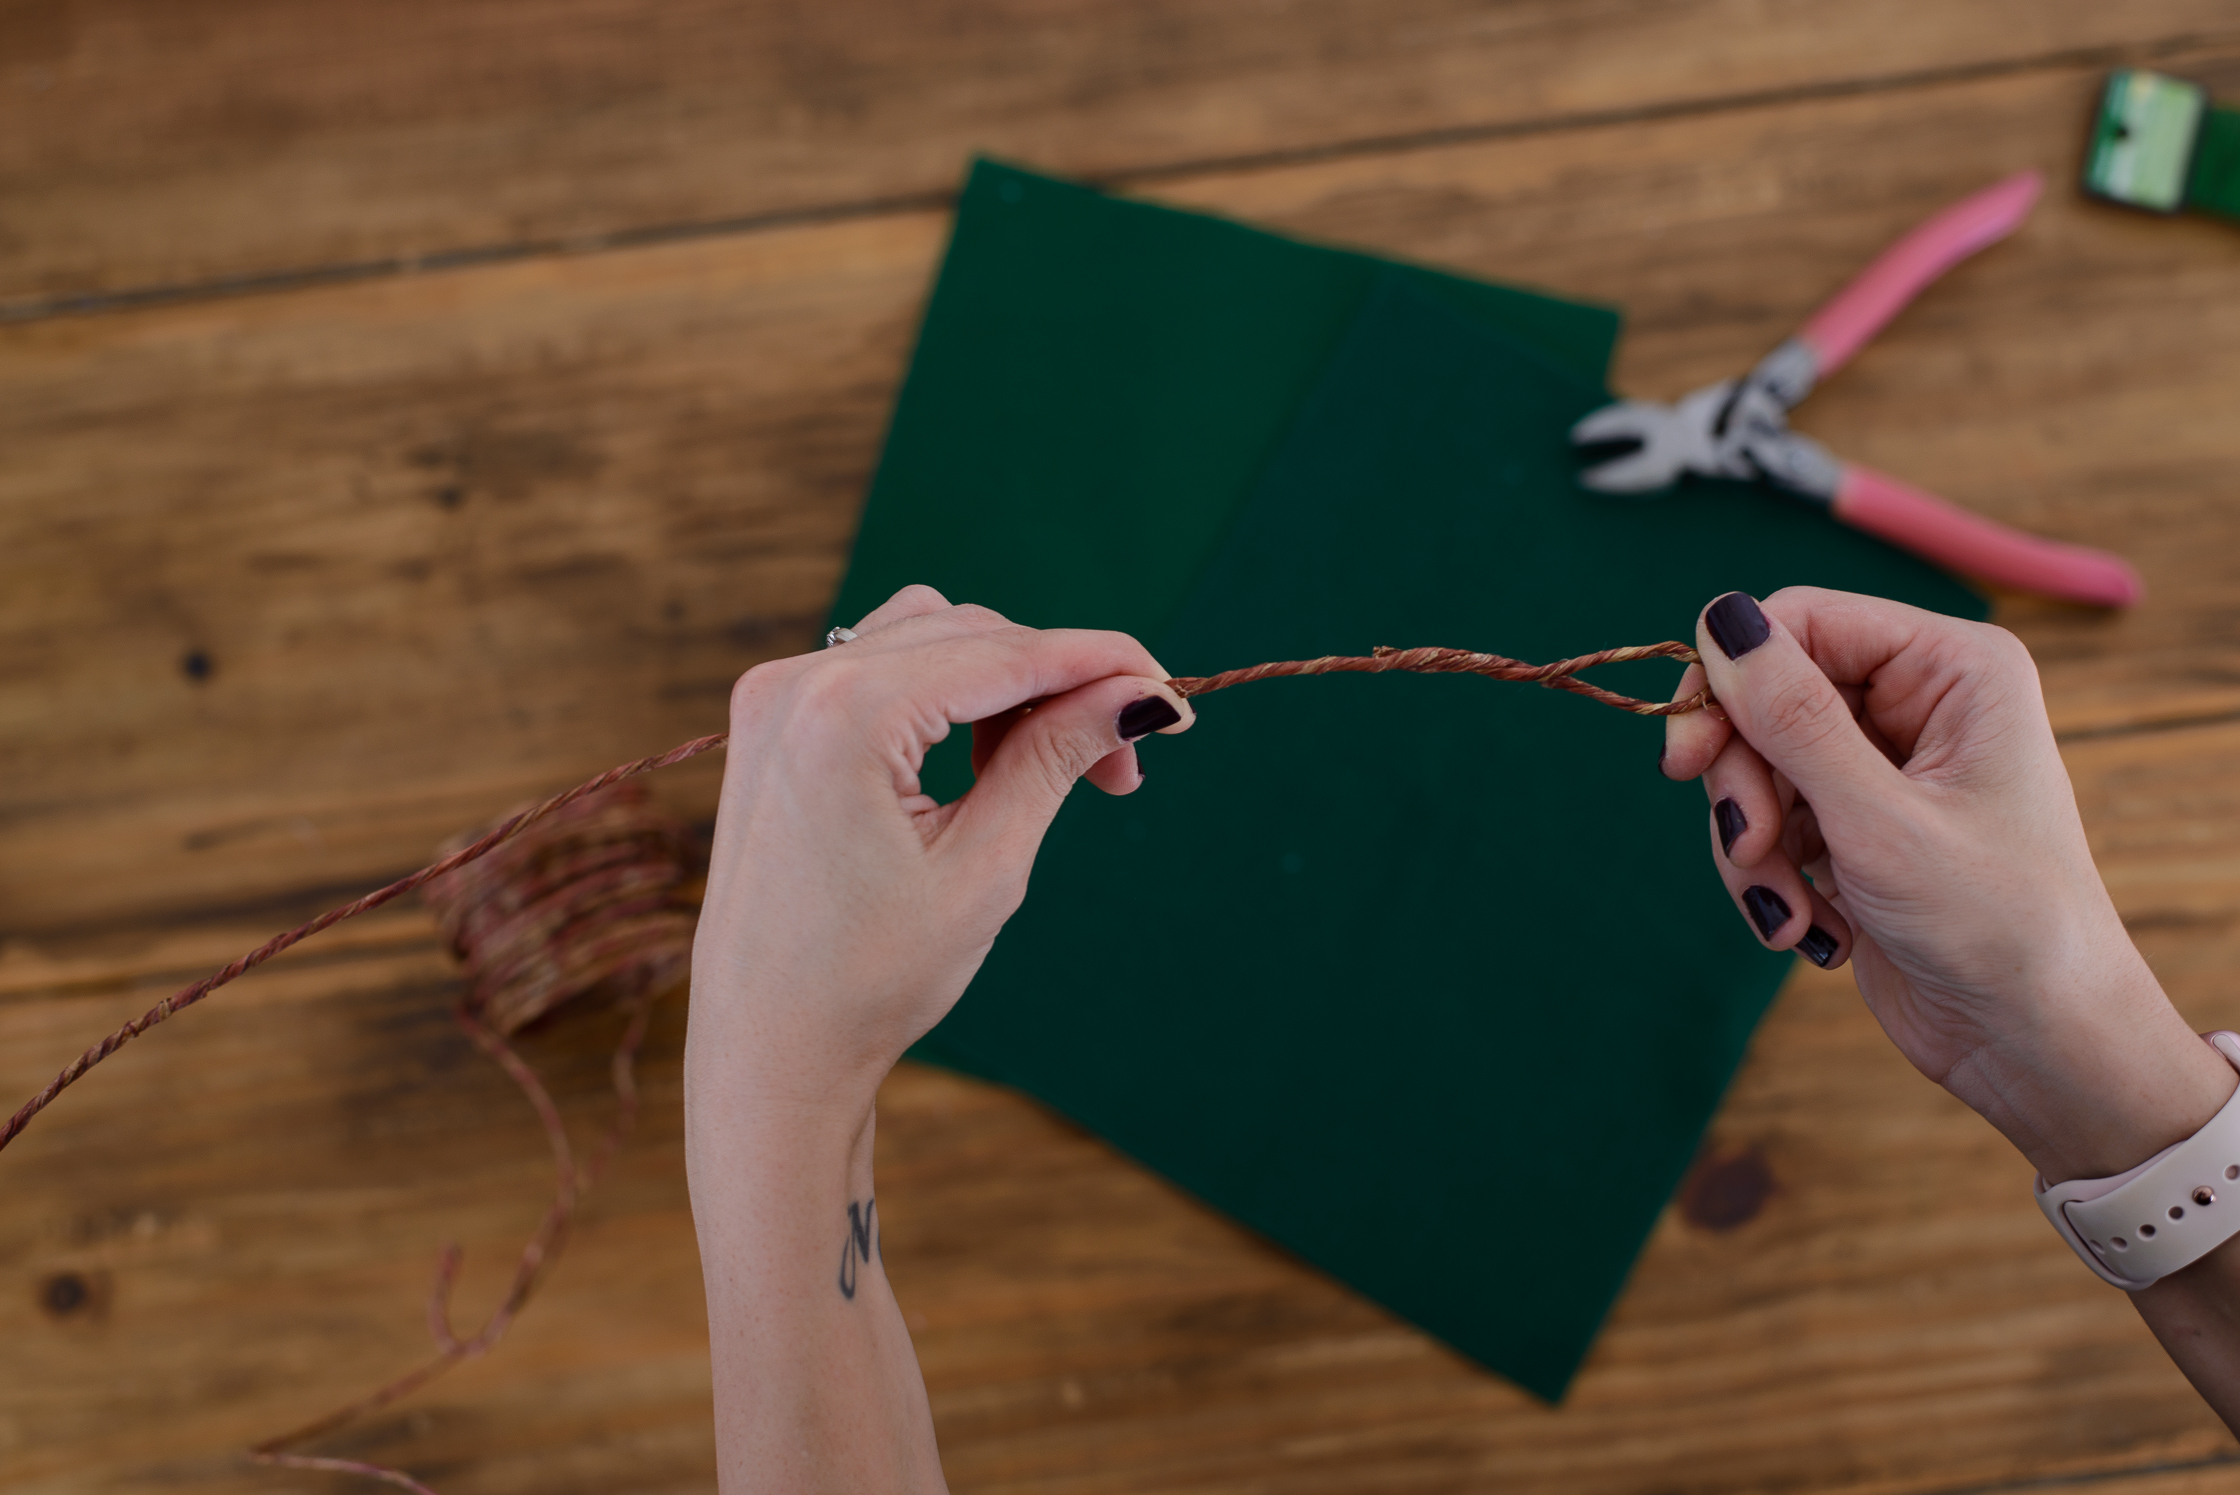
For additional hanging support, you can add another loop halfway through what will be one side. For this one, the center was 10”, which subtracted from the full length left 46”, which made each side of the center 23”. I wanted to find something close to the center of each of those sides, so 11” in, and 11” from the end (or 45” in) I made additional loops to help it hang easier.
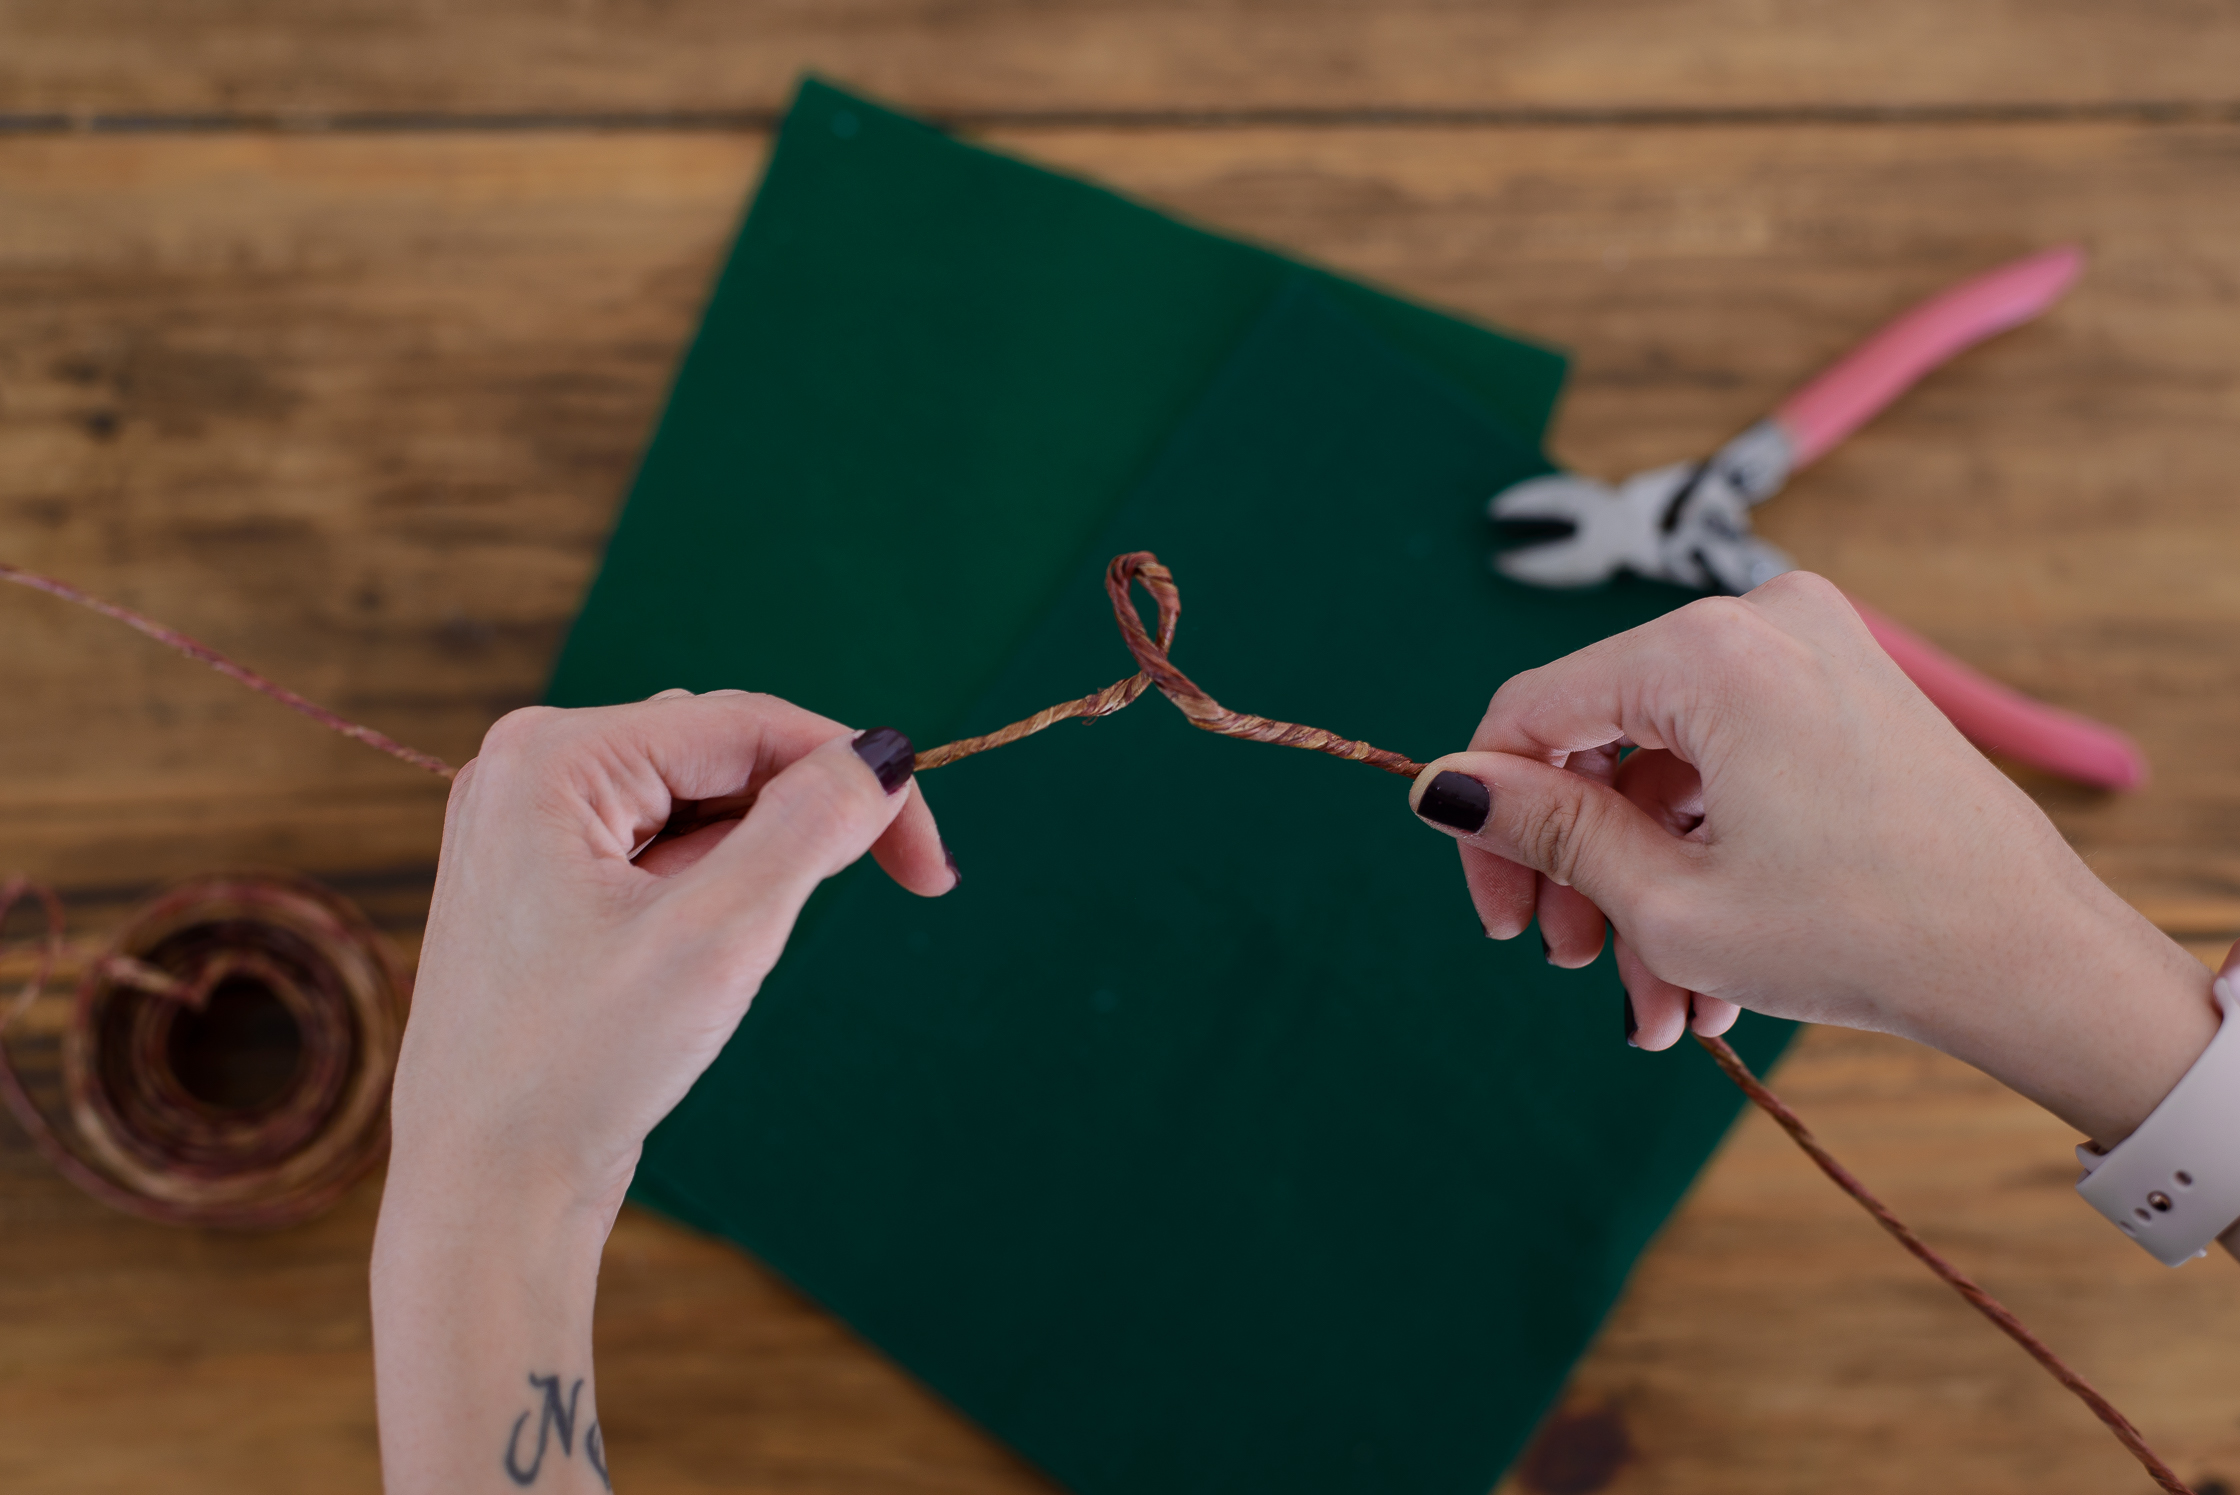
So for these dimensions, it started with a loop, had another loop 11” in, another at 43” and at 56” there was a final loop similar to the first one at the end
The second piece is exactly the same. I used the first piece to measure out the second piece, including loops.
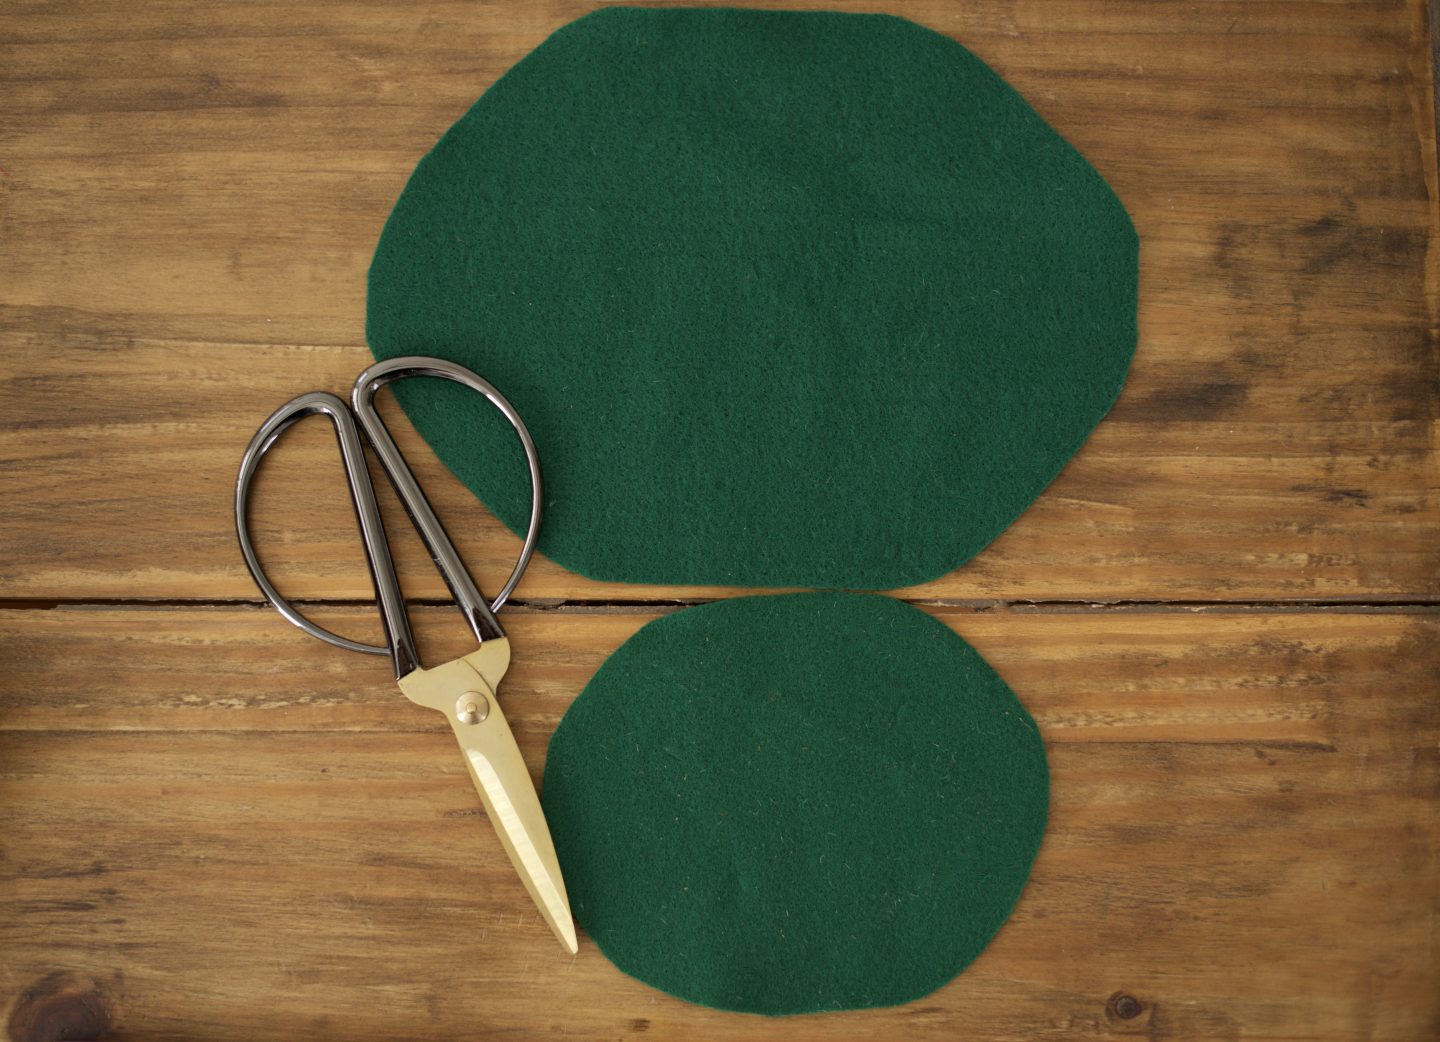
STEP 2: Attaching the Felt
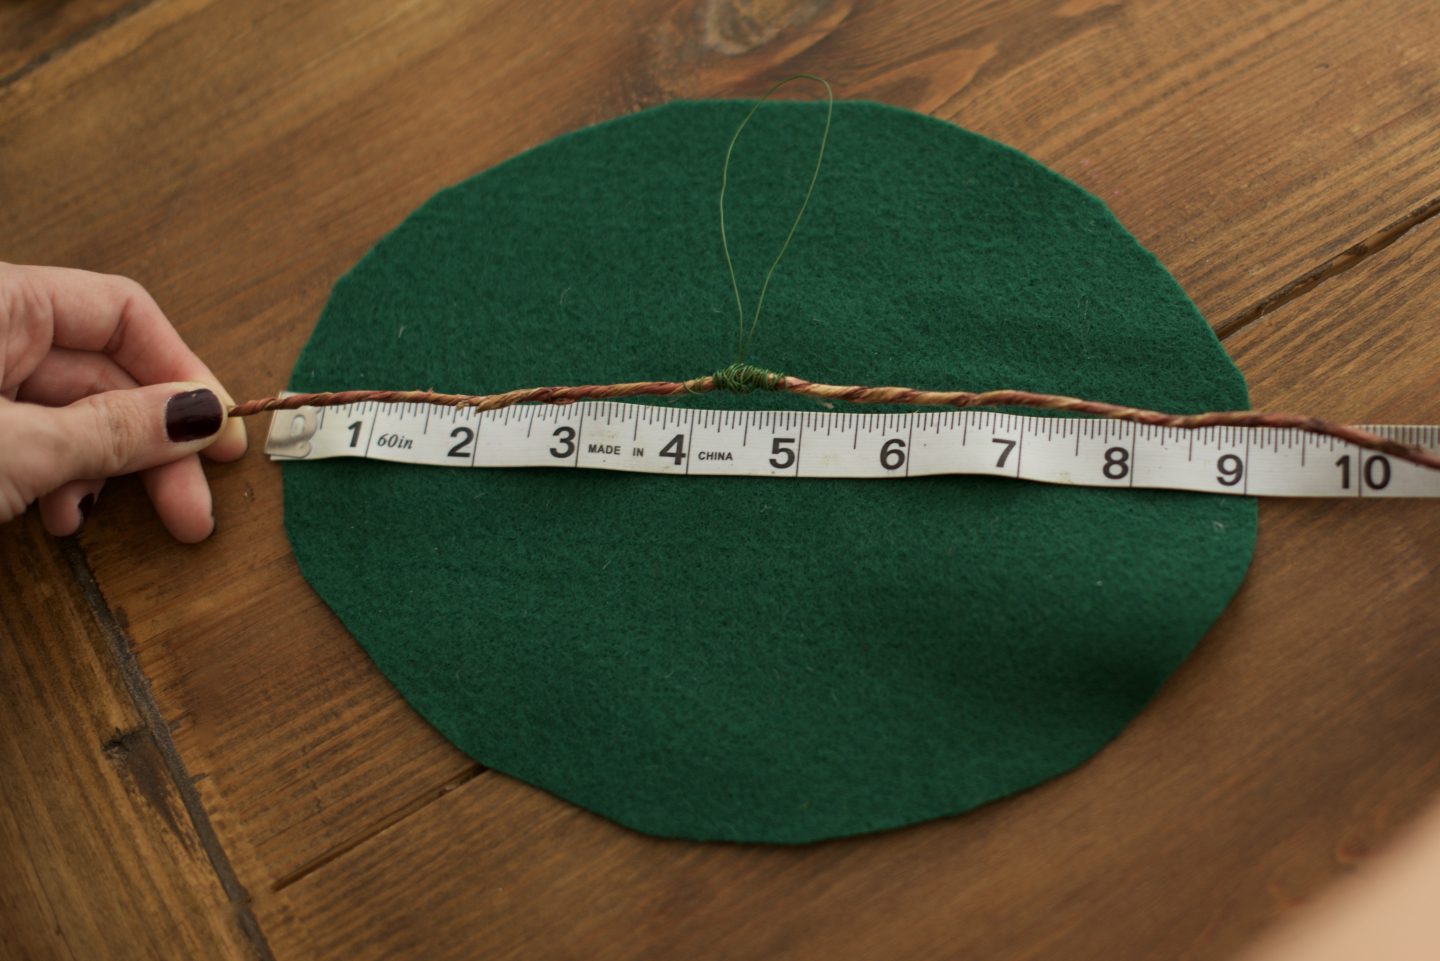
Cut the felt into the size and shape that you want the center to be, but subtract around one inch. For this one, the total size of the top center was 10” by 8” and the bottom was 6” by 8”. So the felt was cut into 9 x 7” and 5 x 7” pieces in the shape of an oval. You don’t want the felt to be visible at the end, so by cutting it an inch or so smaller on each end, the flowers and leaves will stick out beyond the felt, but can still be glued to the felt.
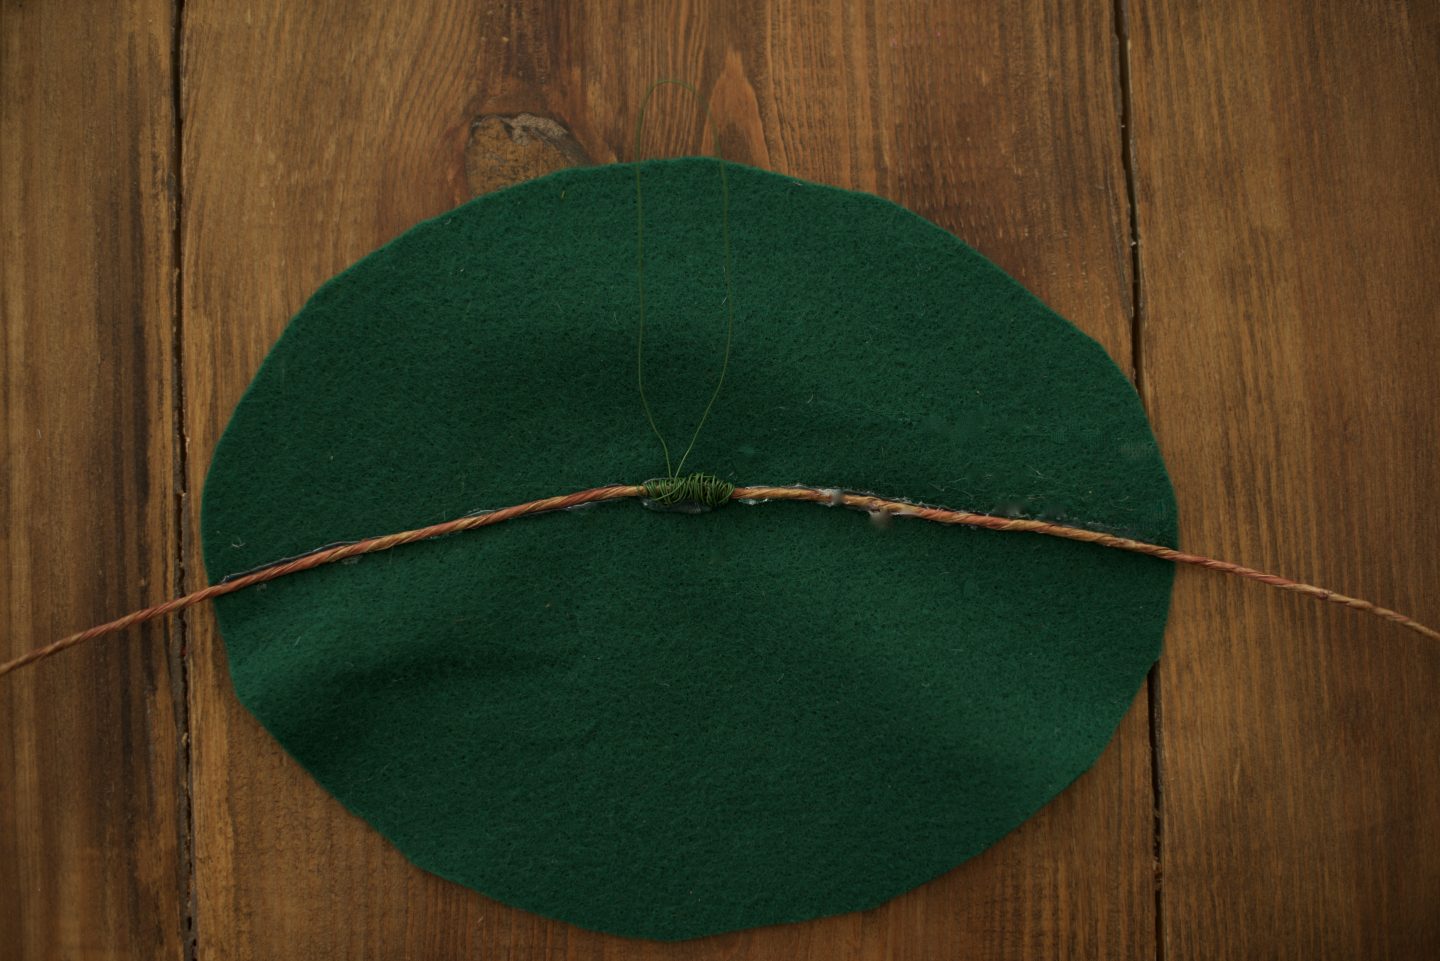
Next, find the center of each piece. It can be found easily by folding it in half. Once you find the center, wrap skinny wire around until it is secure, then make a loop that will stick up about a half inch above your felt. This will provide a way to hang/support the middle of each piece. For this one, the loop was 3 1/2” on the top piece, and around 2 1/2”.
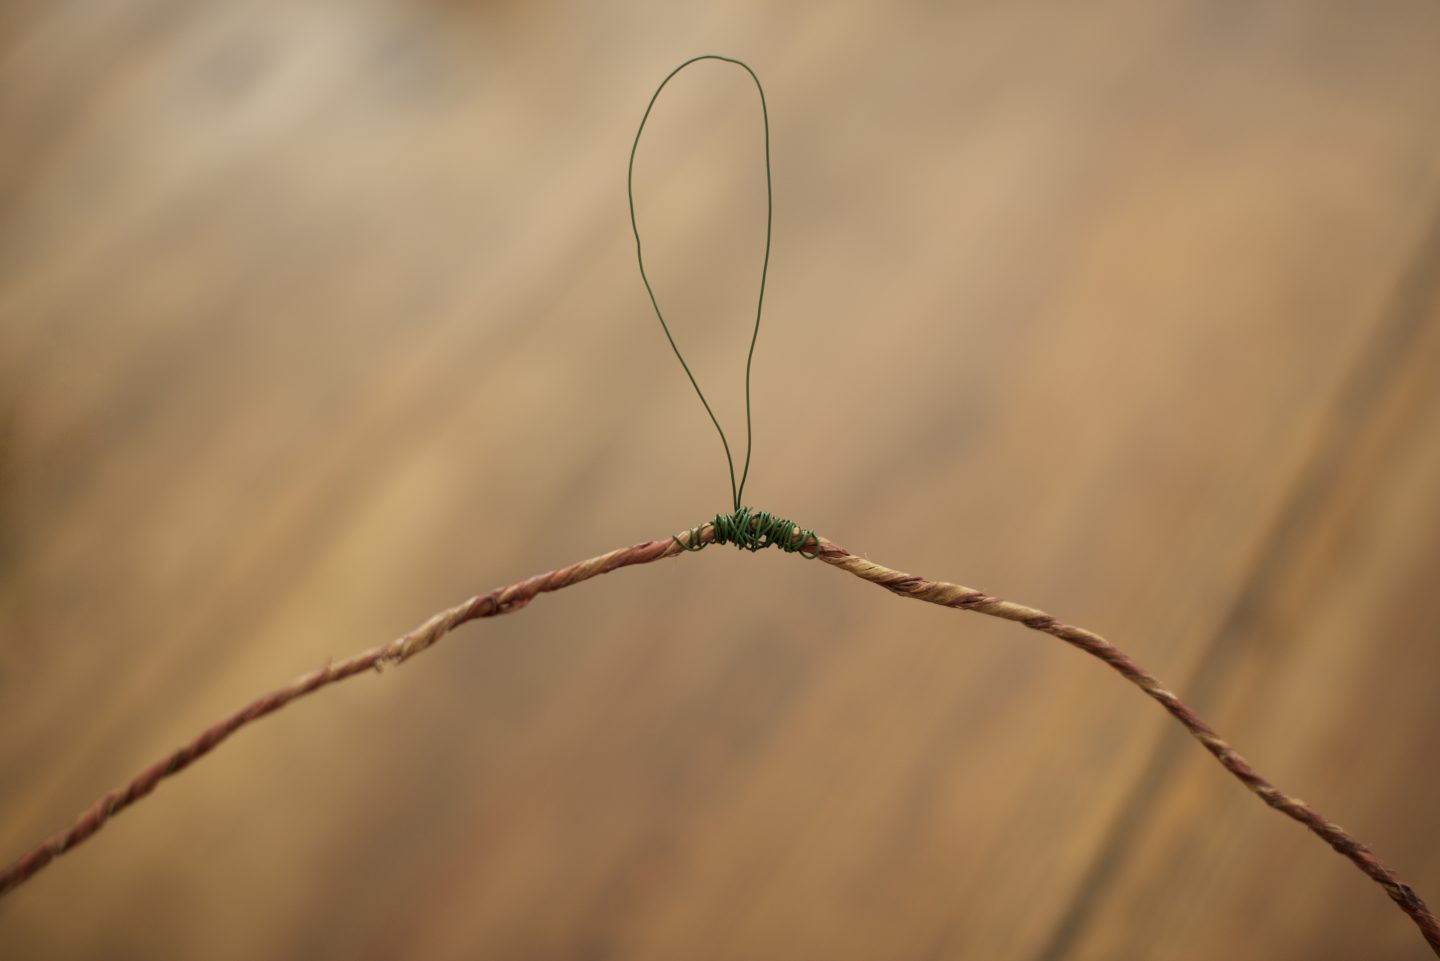
Next, place the felt under the wire and line it up so that the wire, and base of the loop is in the center of the felt. Then glue the wire to the felt. Make sure to use the piece with the larger loop for the top, and smaller loop for the bottom piece. You may want to mark where the center of the loop will go so that you can move it out of the way to put the glue down without loosing your spot. Glue both pieces.
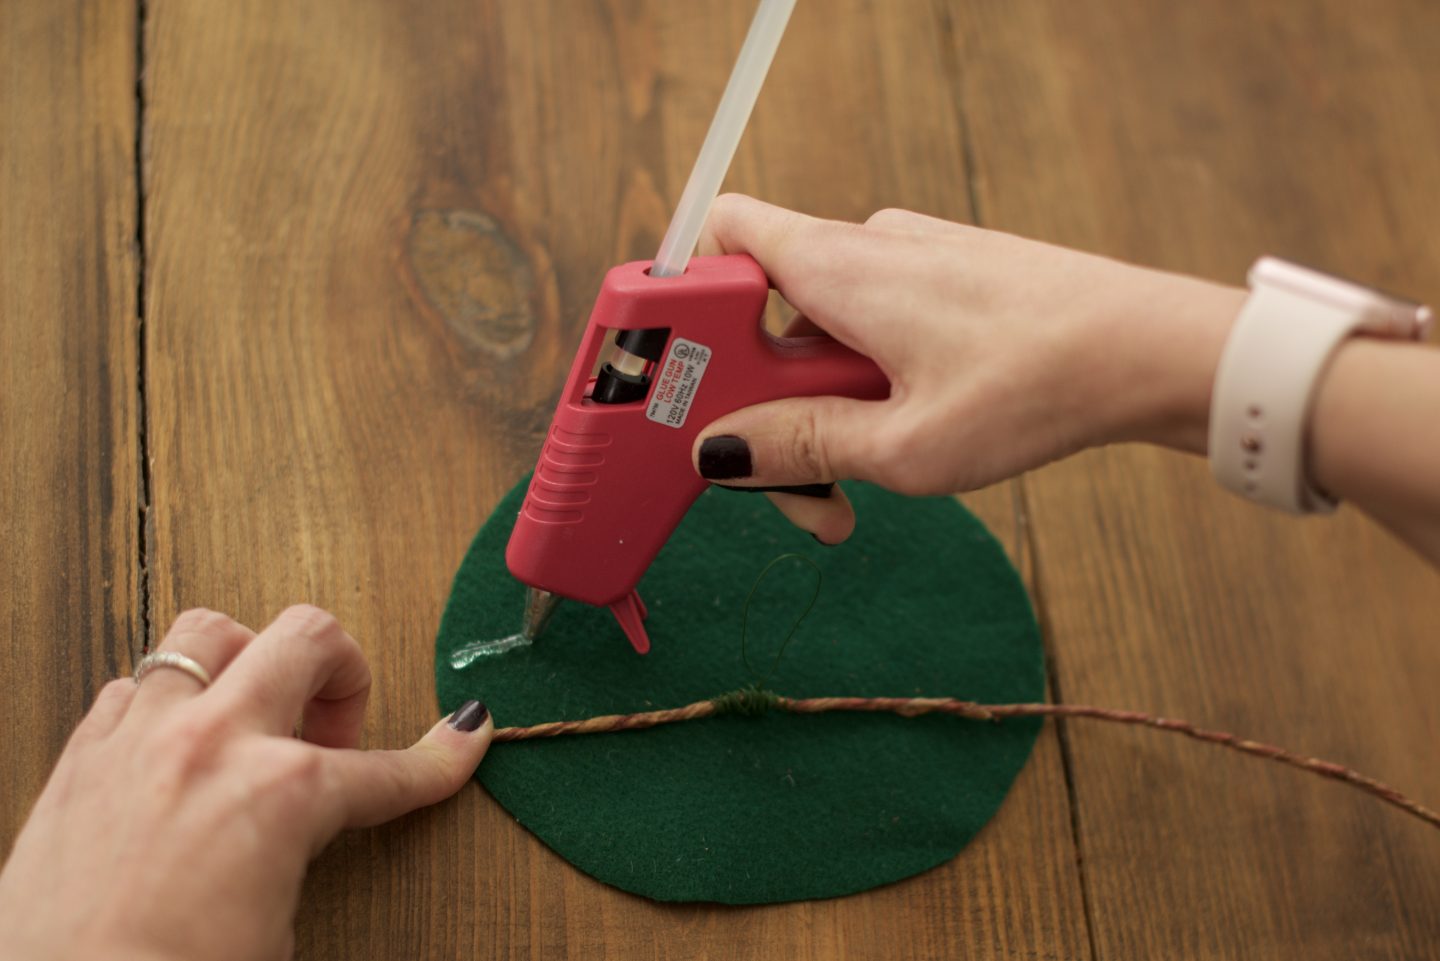
When you are done, the loop should stick out about 1/2” past the felt.
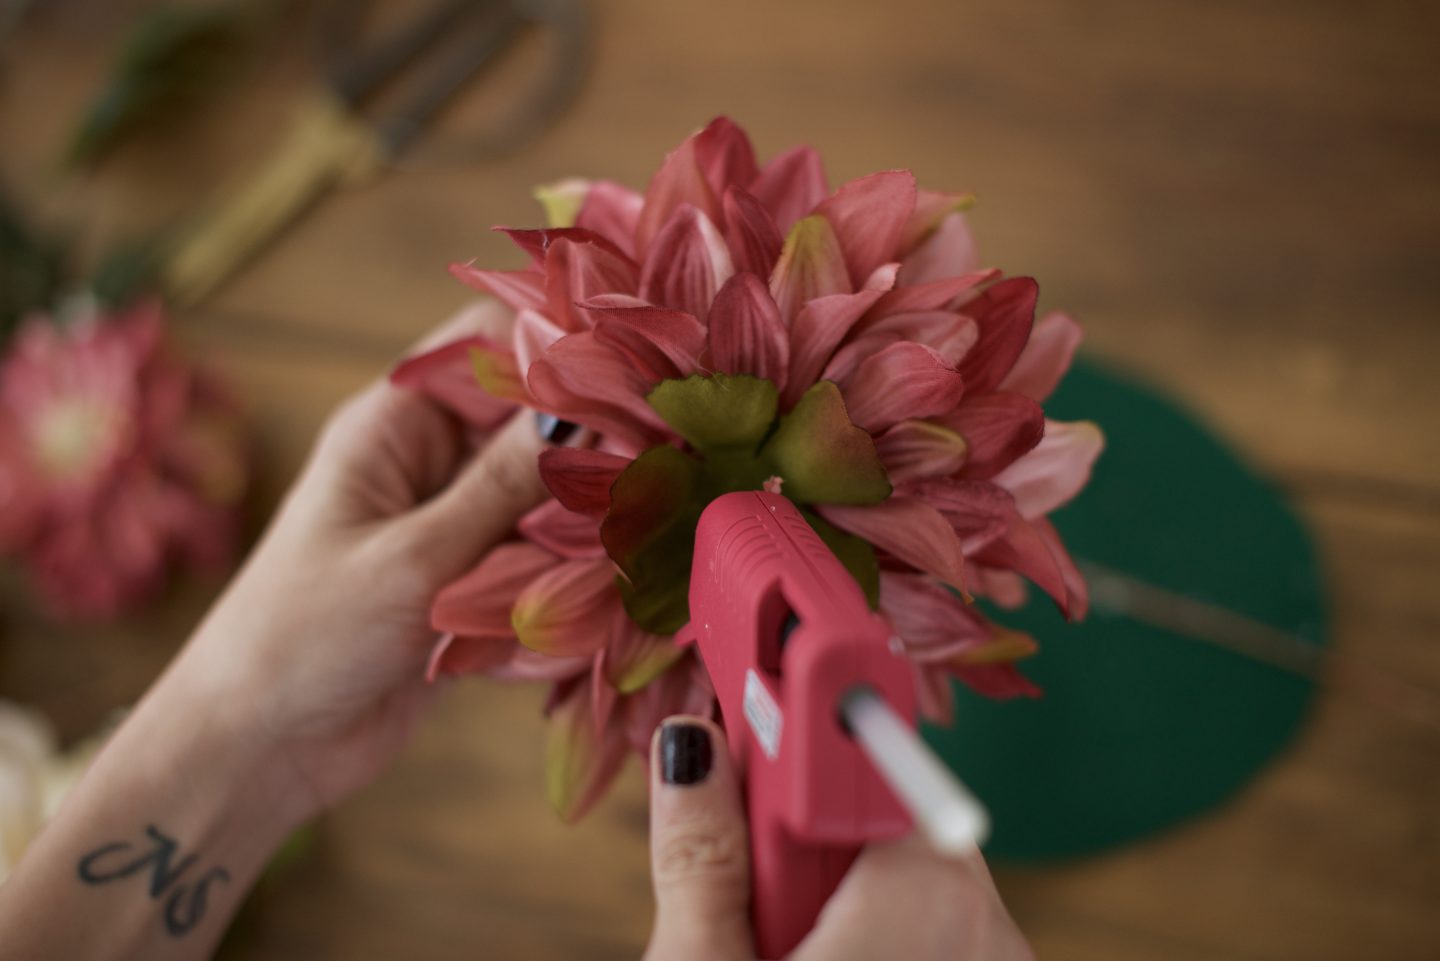
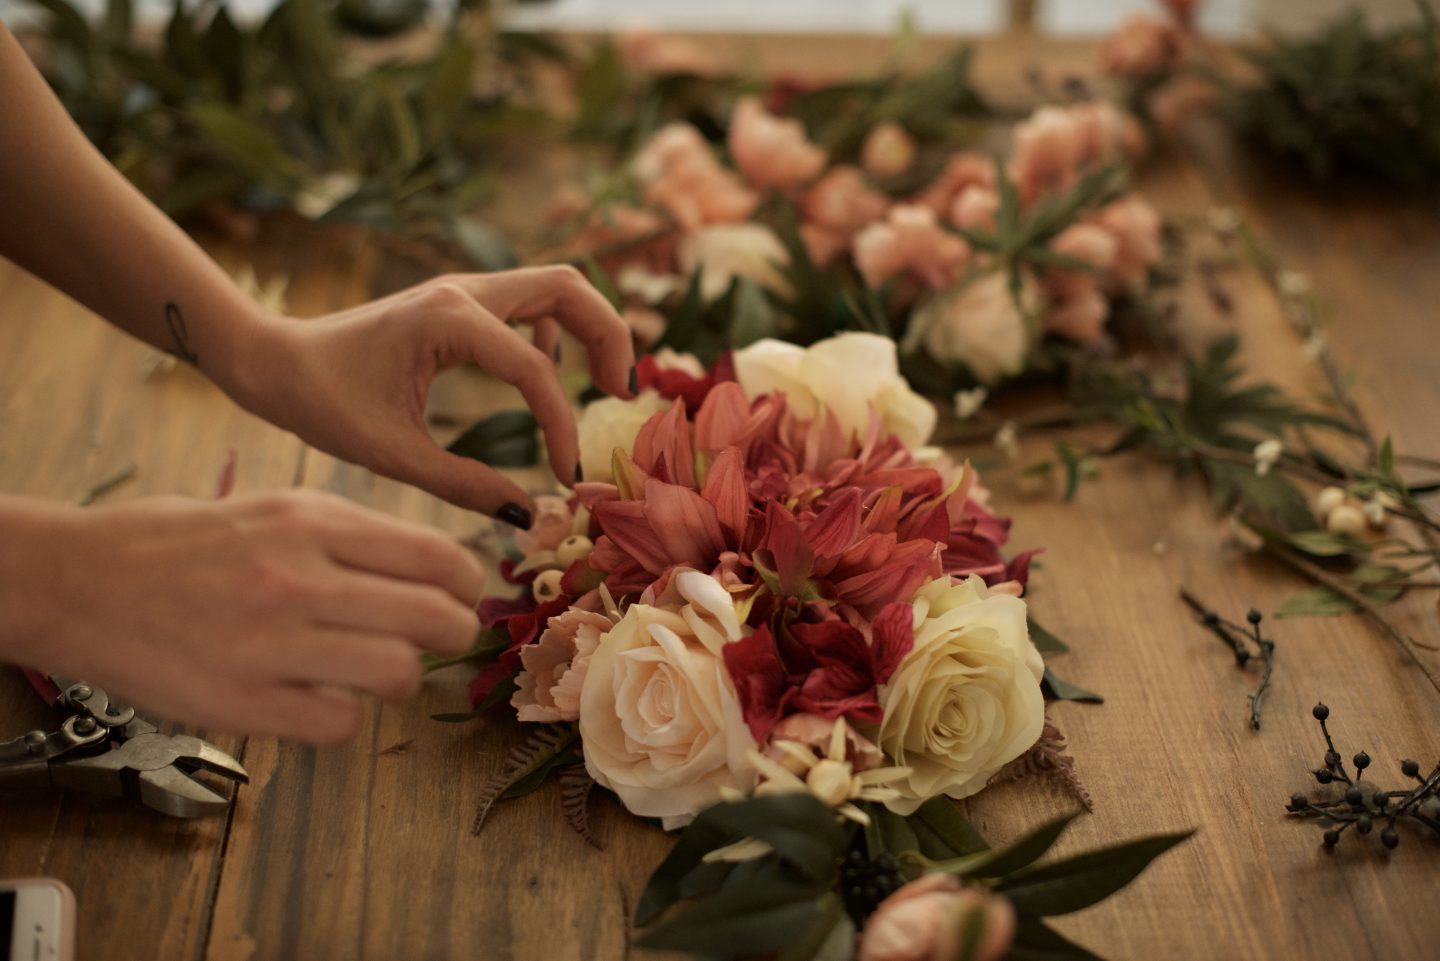
STEP 3: Making the Centers
The flowers for the centers will be glued. While the glue gun is heating up, use the wire cutters to cut any stems that may be on flowers so that you are left with just the flower heads. Then but a good amount of glue on the bottom of the center flower. Glue the larger one onto the center of the top piece. Then glue the other larger flowers around it next.
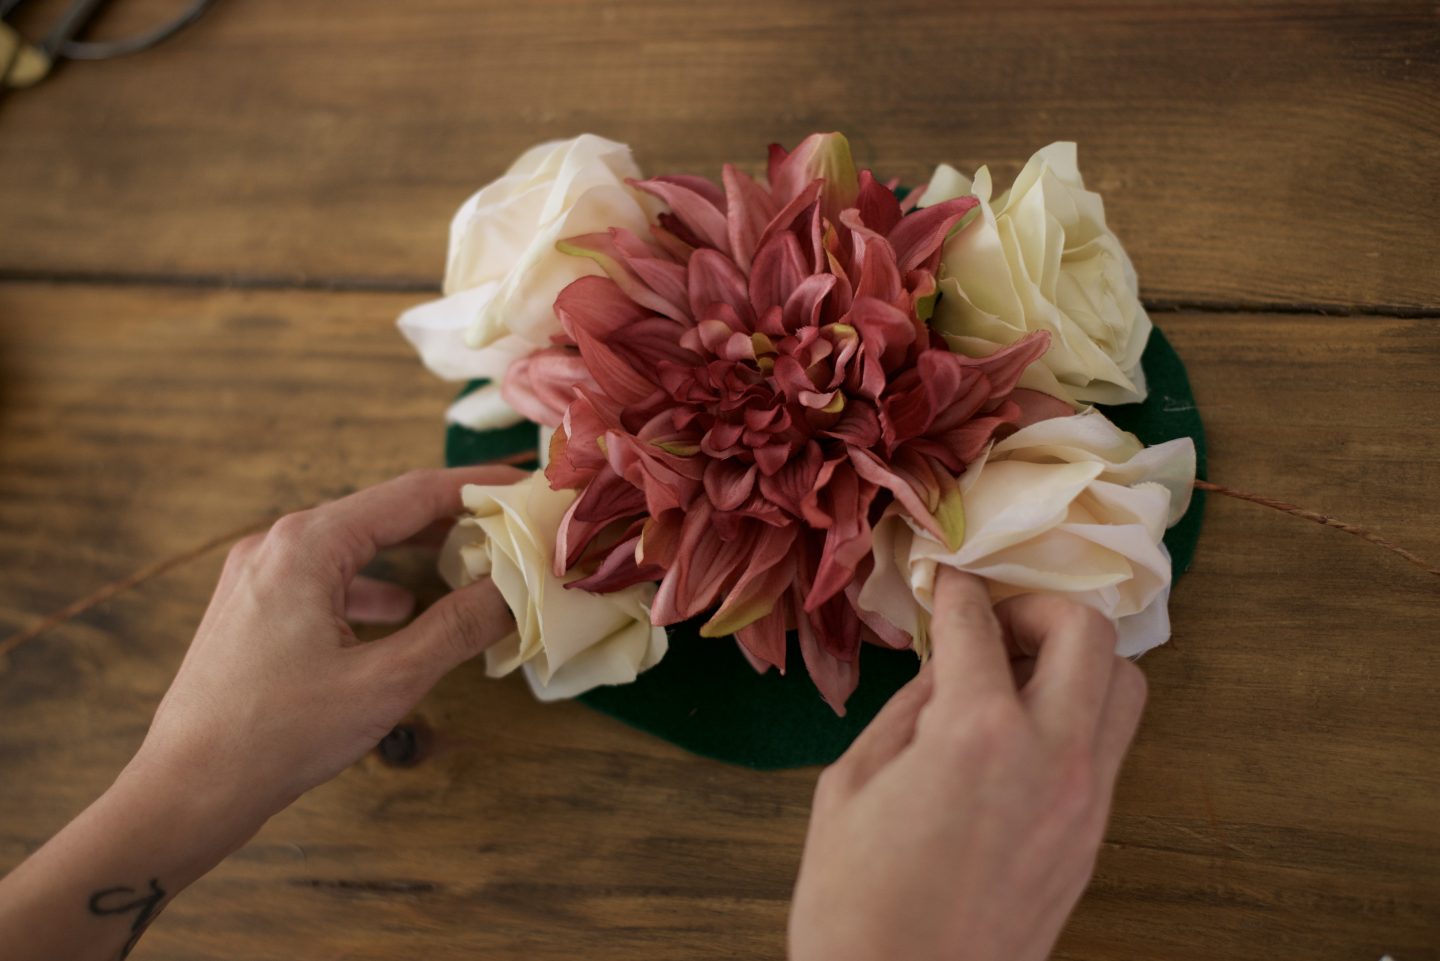
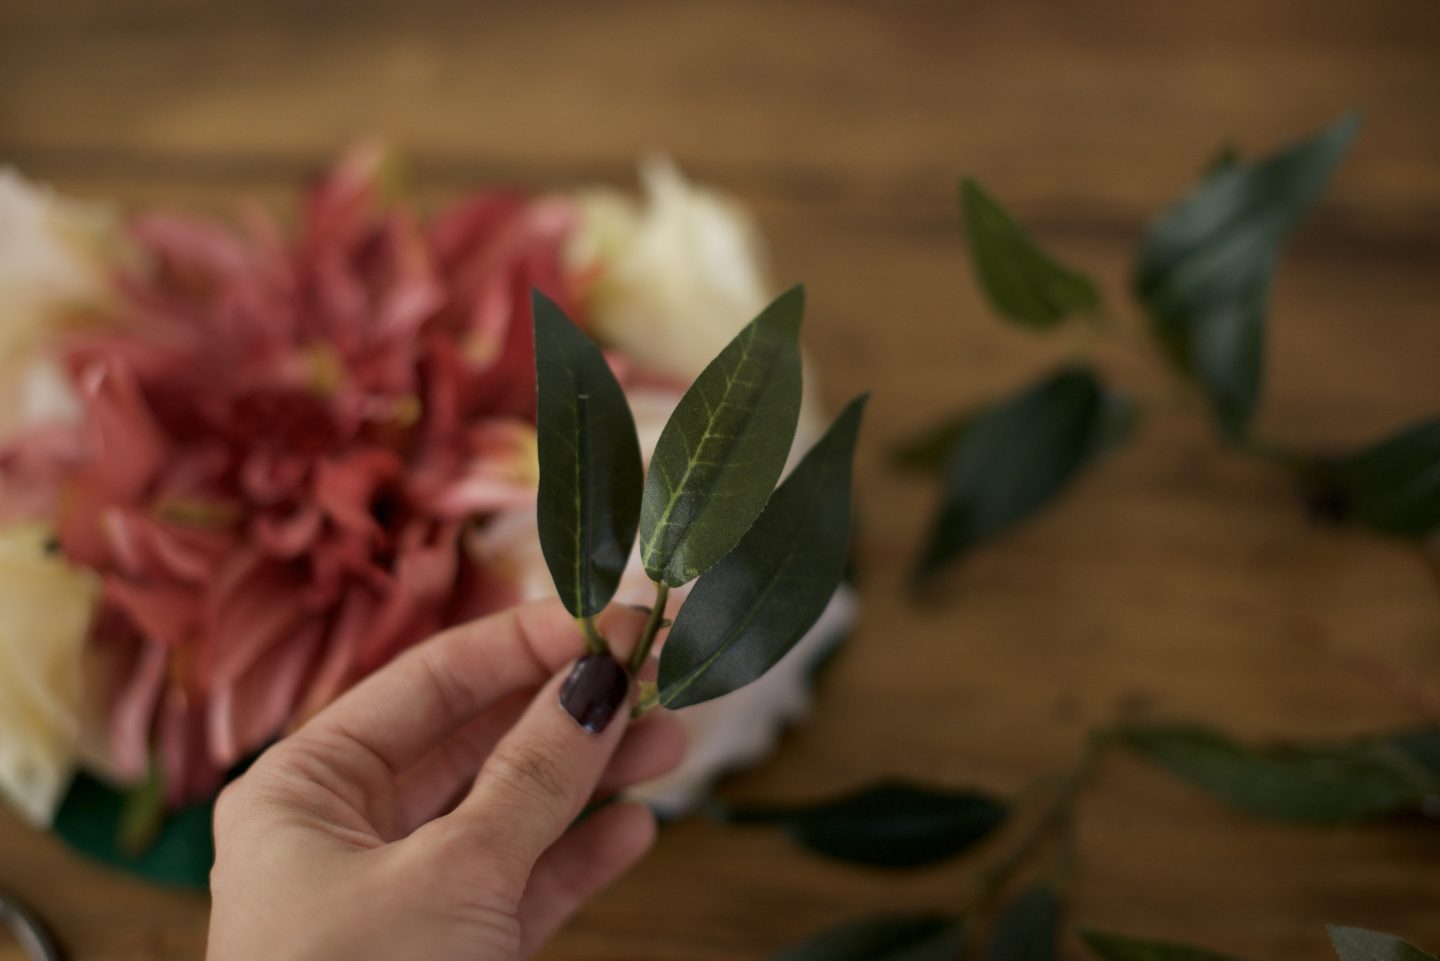
Next, take some extra leaves (you probably want to have the leaves you will already be using pulled aside if you are using a hanging bush to make sure you have symmetrical pieces to use later. Glue the leaves where the felt is still visible. I lined up the leaves in the top centers to cover the exposed wire from the front, while leaving it accessible through the back.
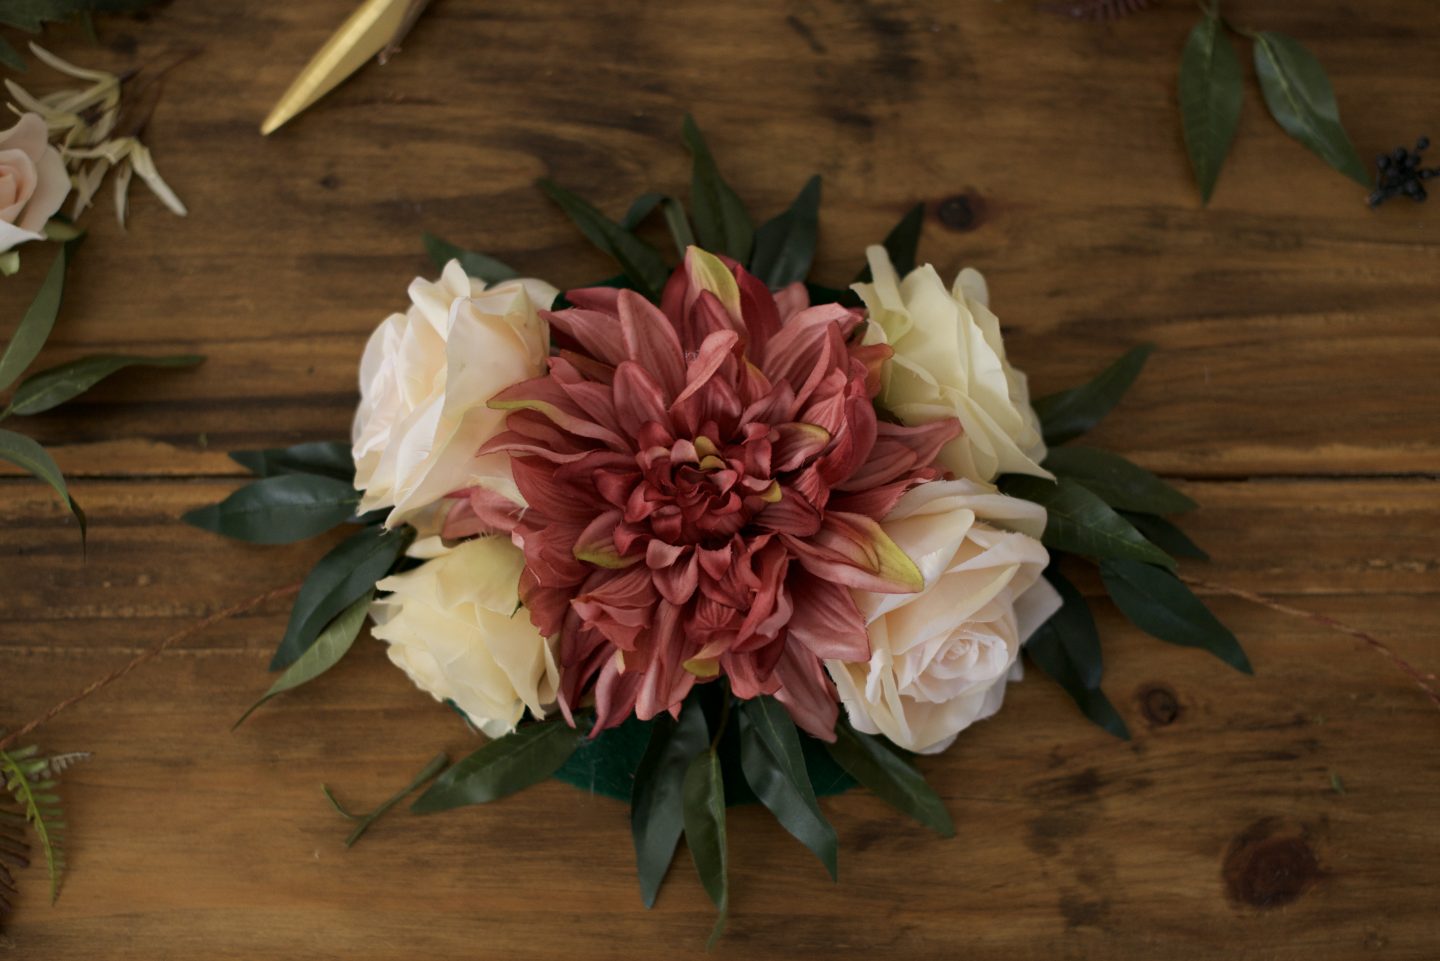
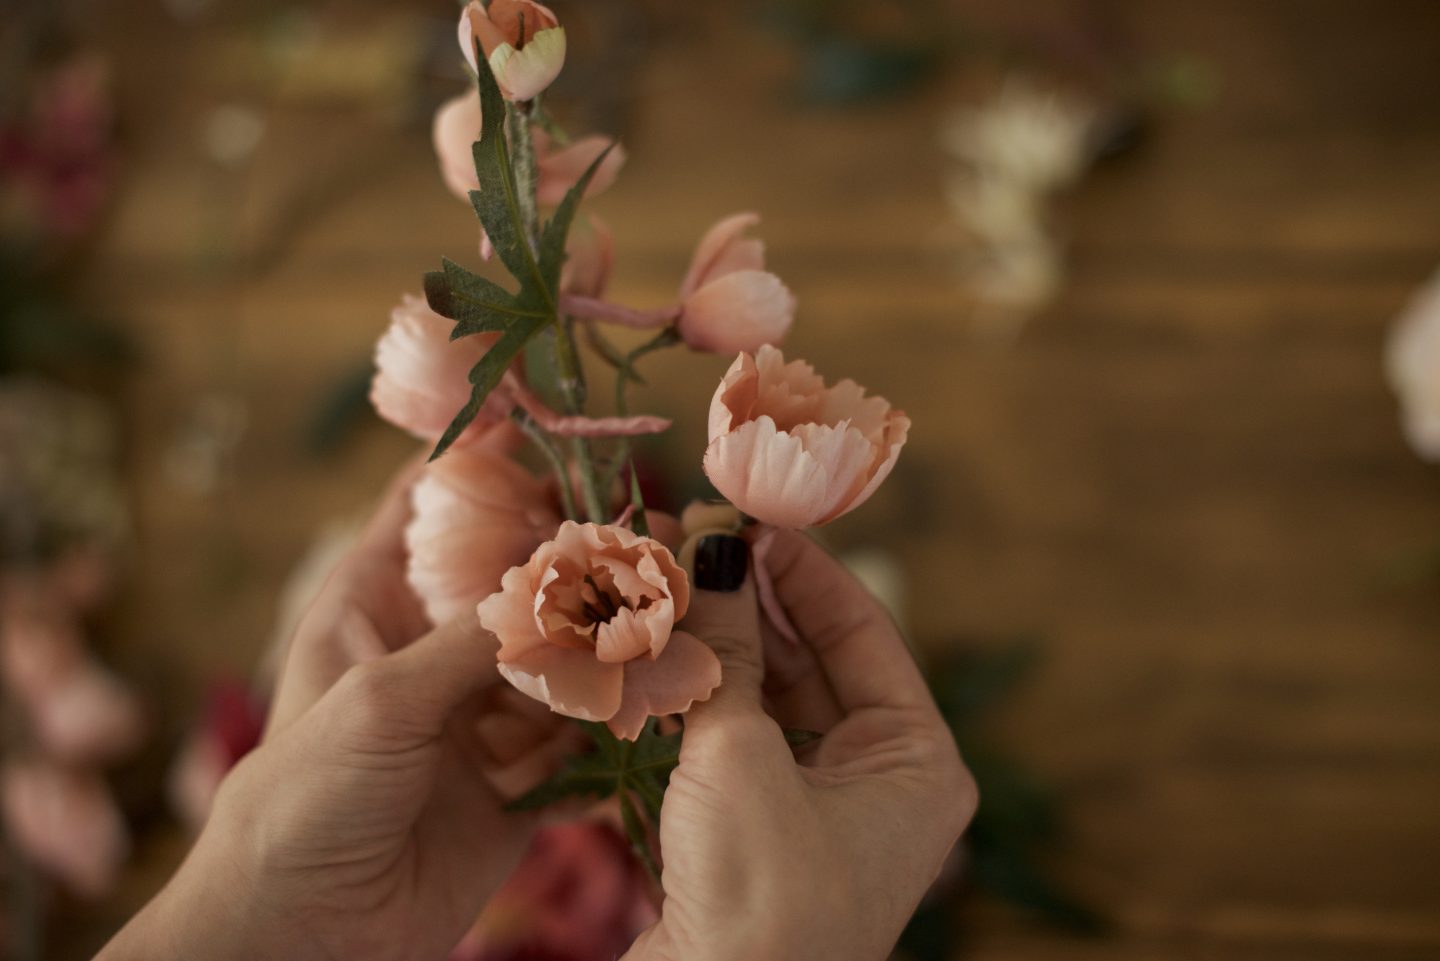
Once the largest flowers and extra leaves are glued on, fill in the gaps with small flowers and fillers. I used a variety of shapes, with varying shades of cream, blush, rose and burgundy, and vintage pinks. I wanted to use some of the pink flowers from the delphinium spray, so I removed flowers where they were more dense. Glue the smaller flowers around the big ones, covering the based of the leaves that were just added.
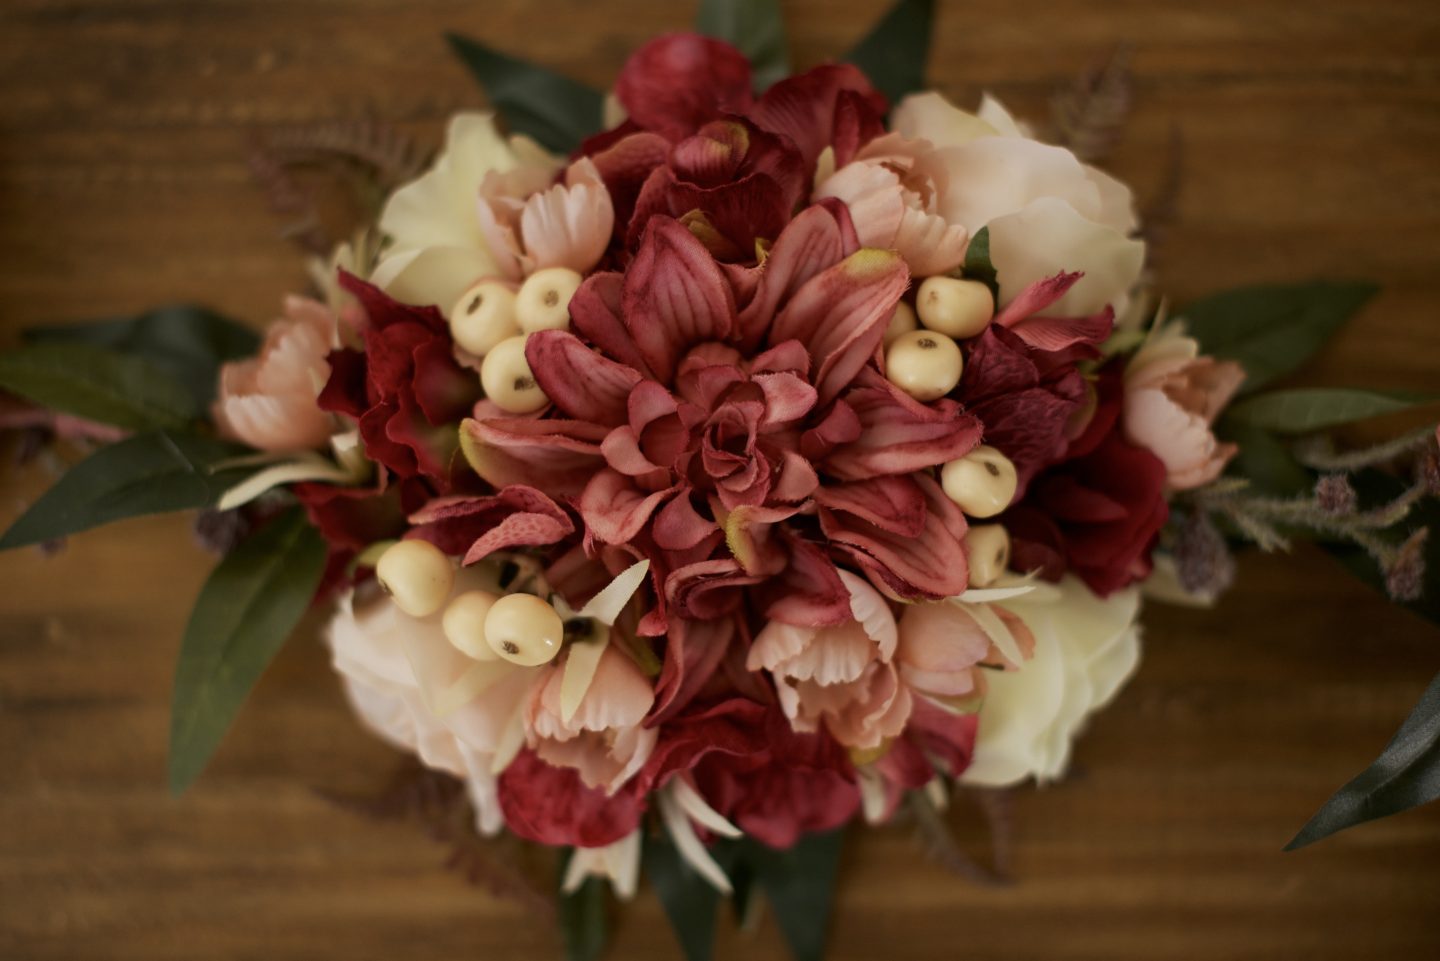
Next, repeat the same steps on the bottom piece. If you want a similar look to this one, use the same flowers on a smaller scale, or at least the same color pattern.
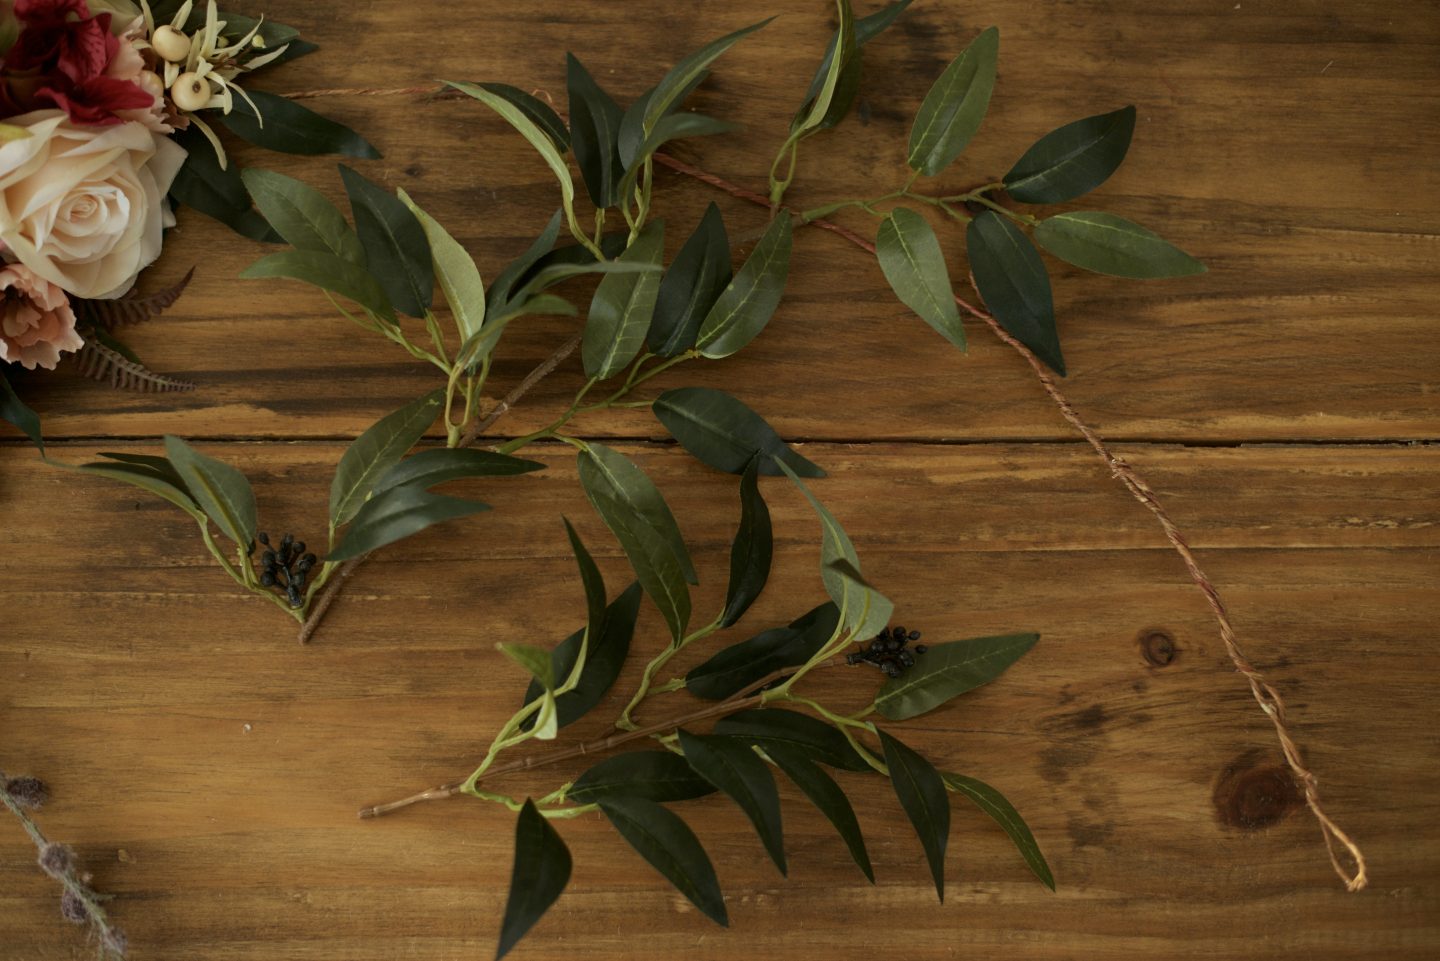
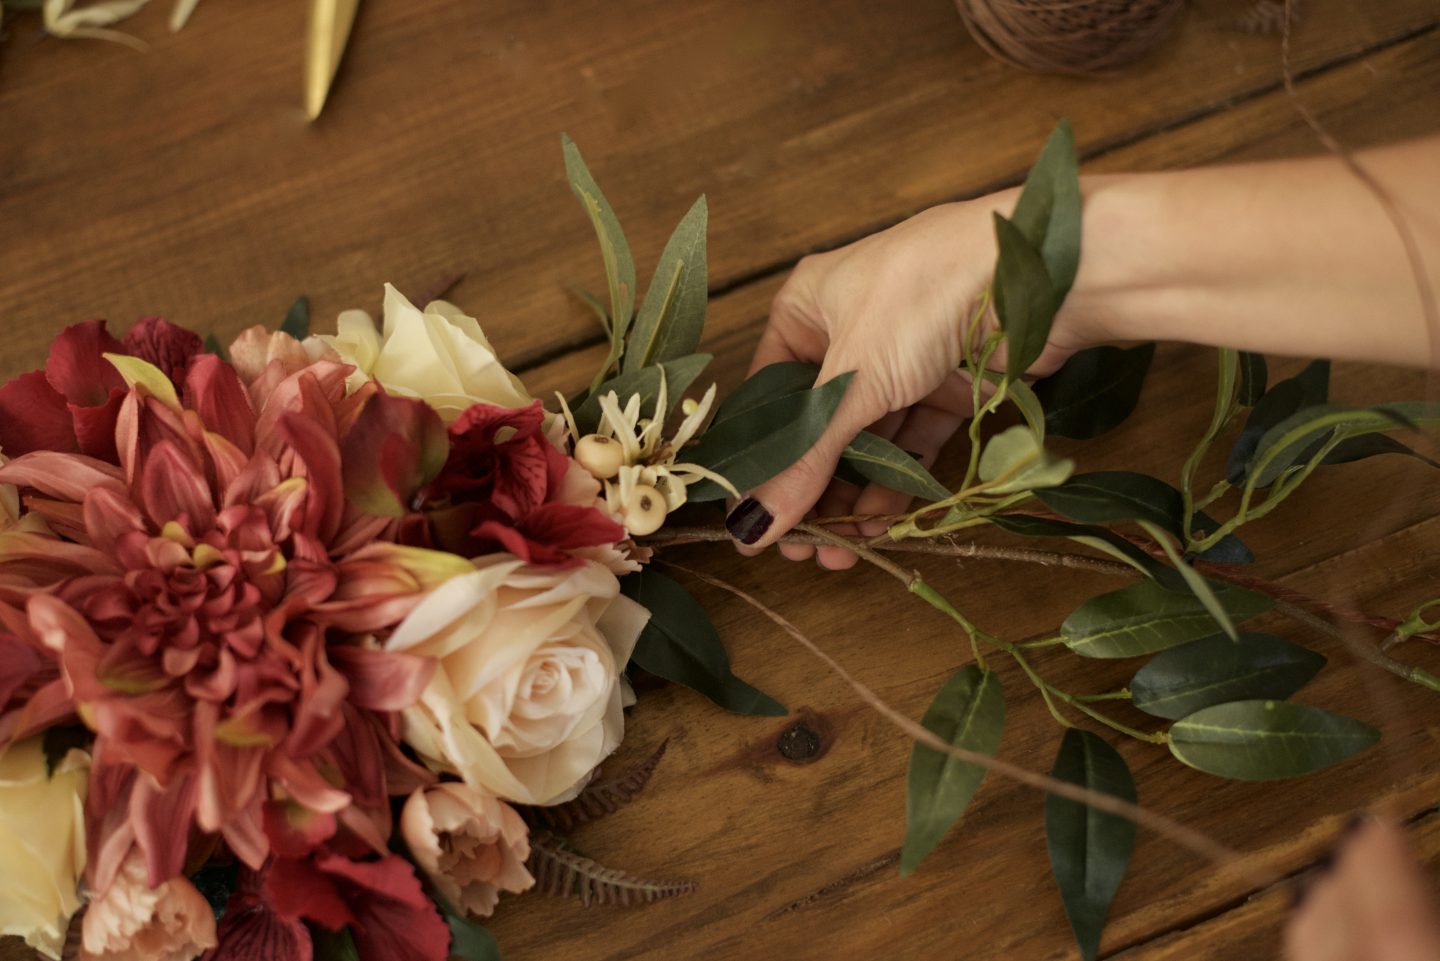
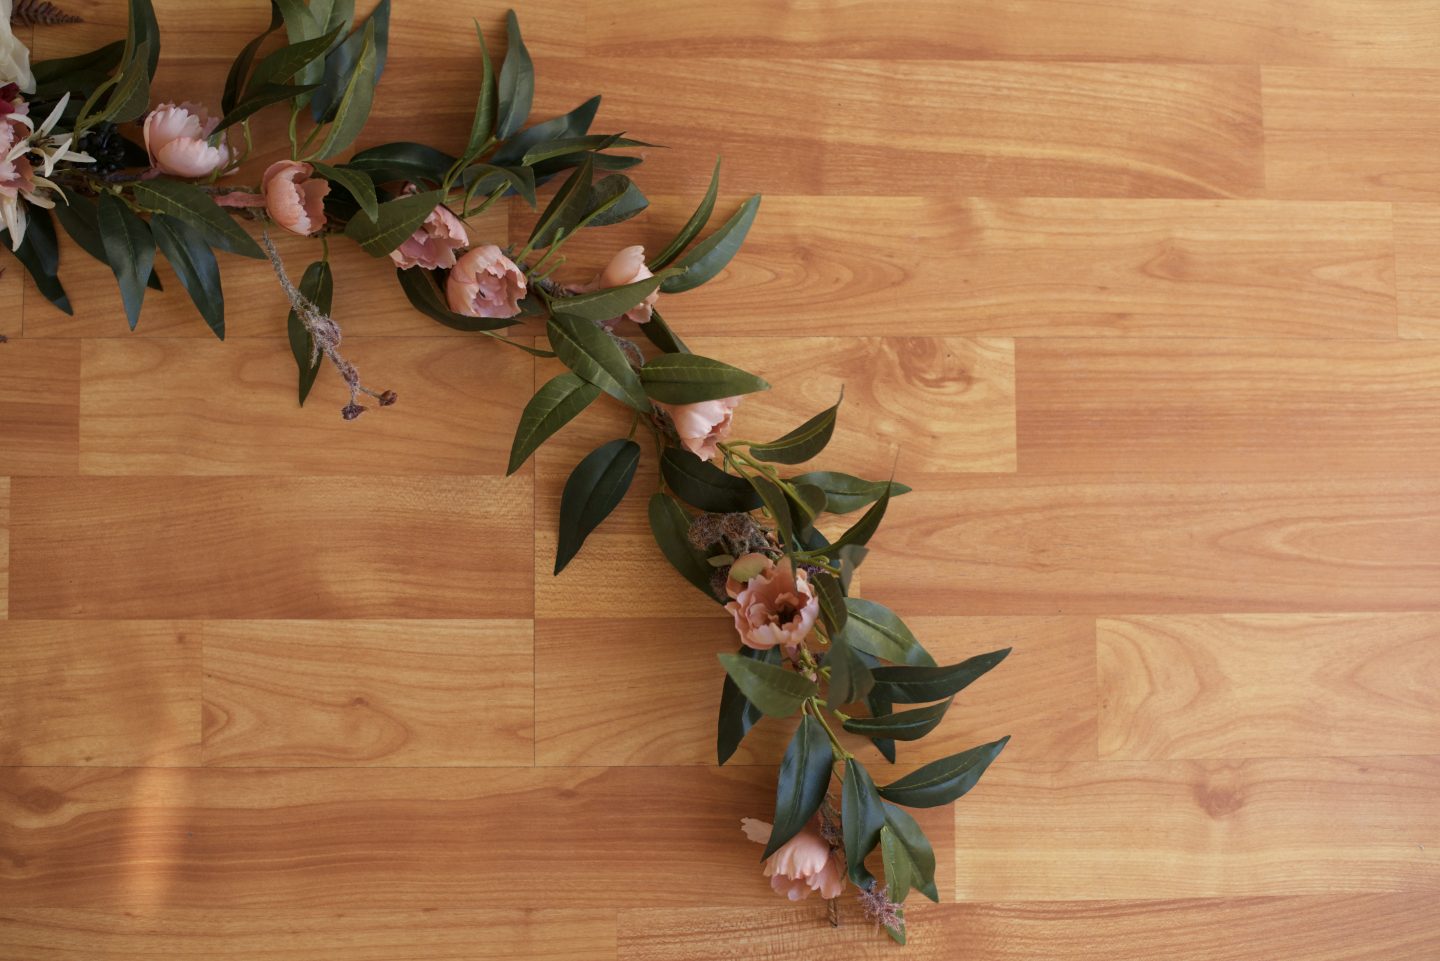
STEP 4: Wiring the Leaves
If you used a hanging bush, cut the base of each stem. There should be varying lengths of stems. Lay out the lengths of the stems for each side to see what fits well. All four sides she be basically the same. For both this hanging bush, and the one I used previously, It fit perfectly to use one large piece coming from the center, followed by one smaller piece.
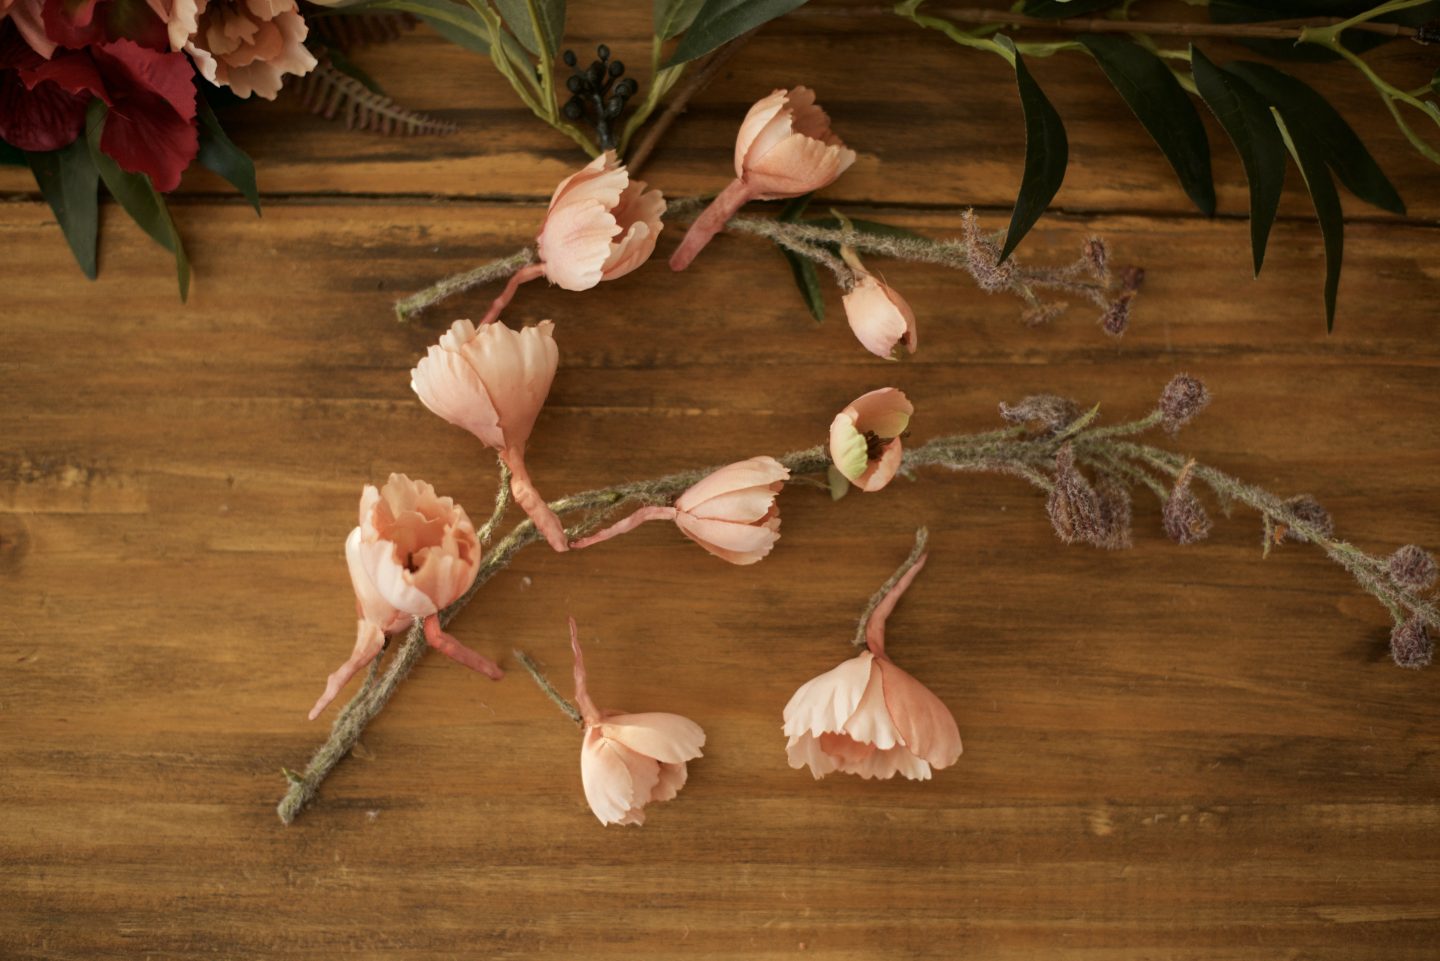
Next, cut the delphinium stems into separate pieces, and remove individual flowers where they are dense. I found that for this size, one long stem, one medium steam, and a few spare flowers world good to fill the space.
Next, get out the skinny floral wire. (For this, I used a paper wrapped floral wire because it has a more finished look, and I have it on hand. It only comes in a big roll (linked below), so if you don’t want to buy a big roll, but want a more finished look, you can always wrap over the wire with floral tape. You probably couldn’t see what you used either way anyways though, so either should work great. Turn the middle over, so that the felt is facing front. Wrap the skinny wire around as close to the felt as possible to secure it.
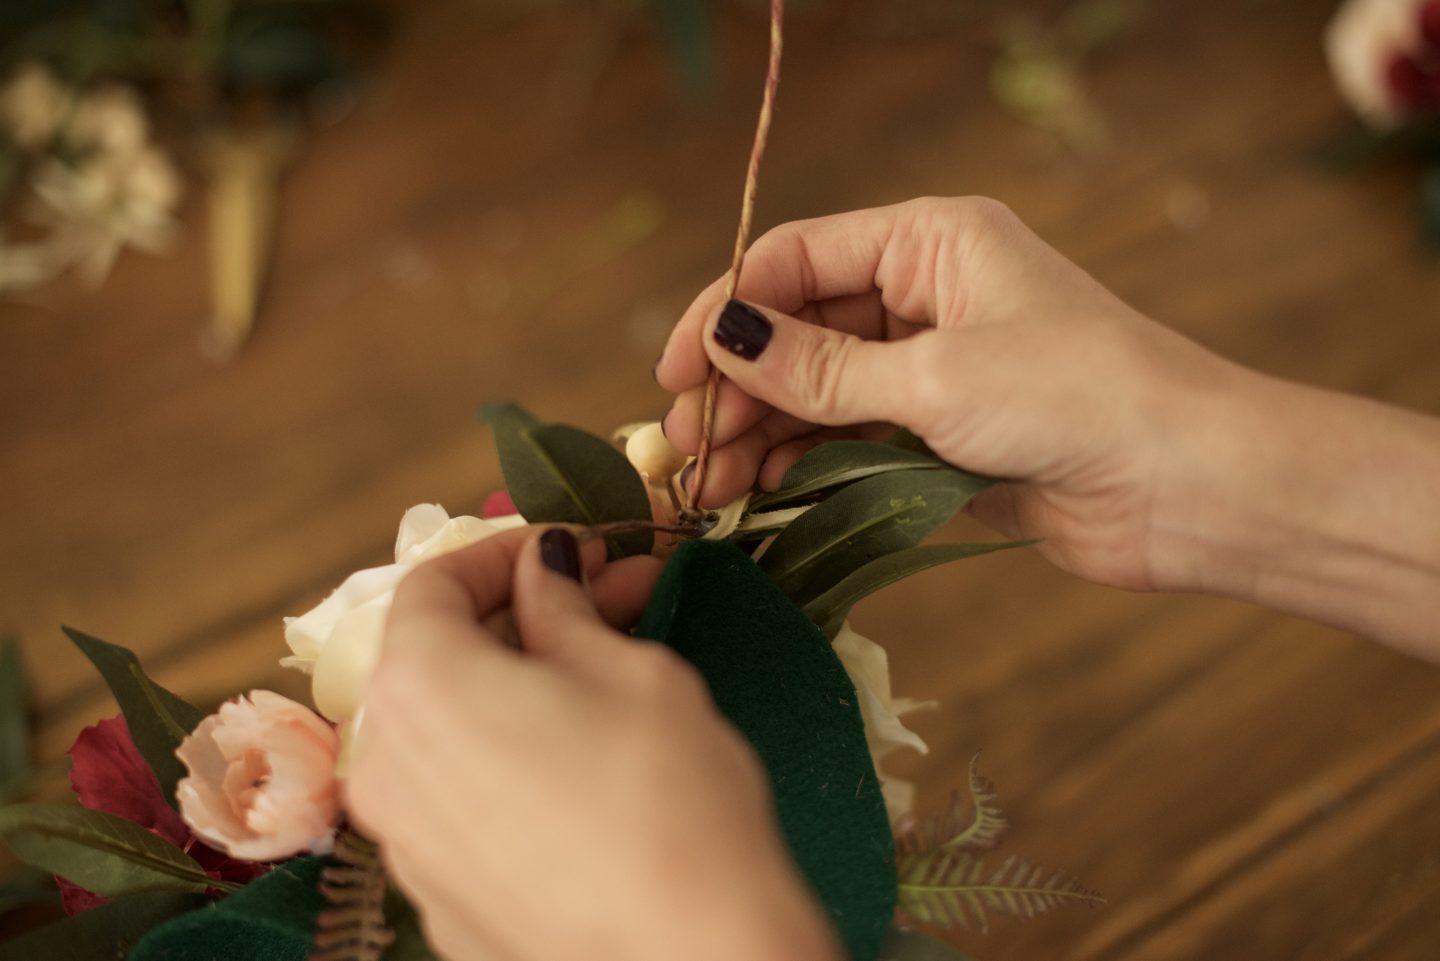
Once it’s secure, line up the leaves and flowers, and began to weave the wire in and out around the leaves and flowers to secure them into place. Continue until you reach the end of the wire, leaving the leaves just long enough to cover the loops on the end. Then wrap the wire several times tightly around the base to secure it, and cut it. Fill individual flowers in when needed to make a more even pattern. Repeat on all four sides.
Step 5: Hanging
Once the top and bottom are down. Lay them out on the floor to find the shape you want, and make sure they are symmetrical before hanging up. The wire can be molded into any shape. It is important to make sure the wire is bent how you want it be before attempting to hang it. Start by using a nail or screw to use for the middle loop (if using a nail, the larger the head of the nail the better, and if using a screw you might want to start with a nail to make sure you get the placement correct). If you can have two people help hanging, it will be much easier. Next nail the loops on the the middle of each side, and then do the outer loops. Repeat with the bottom. If there are any areas that the shape isn’t holding well, you can always add additional nails directly under the wire to help hold the shape.
Links to Supplies:
4 Pink Delphinium Sprays
(Pink flowers used throughout the center and leaves) Available at Joann online and in some store locations. They have frequent sales and usually online coupons available, so be sure to check. This was the most expensive part, but finding other flowers in this shade of pink is not easy :
http://www.joann.com/405in-princess-delphinium-spray-pink/12219184.html#q=delphinium&start=13
Hanging Bush
Available in stores and online at Hobby Lobby (Hobby lobby’s floral section is 50% off every other week, and there is always a 40% off coupon available online for one regular priced item).
Rose Dahlia Flowers
(The largest rose colored flowers)
Also from hobby lobby. In the color “rose” in both the large and smaller size
https://www.hobbylobby.com/Floral-Wedding/Flower-Stems/Rose-Dahlia-Spray/p/1650
https://www.hobbylobby.com/Floral-Wedding/Flower-Stems/Rose-Dahlia-Spray/p/1633
Paper Covered Wire:
Wire Base:
Available at michaels in store, or online
https://www.michaels.com/ashland-naturally-coiled-wire/10336518.html
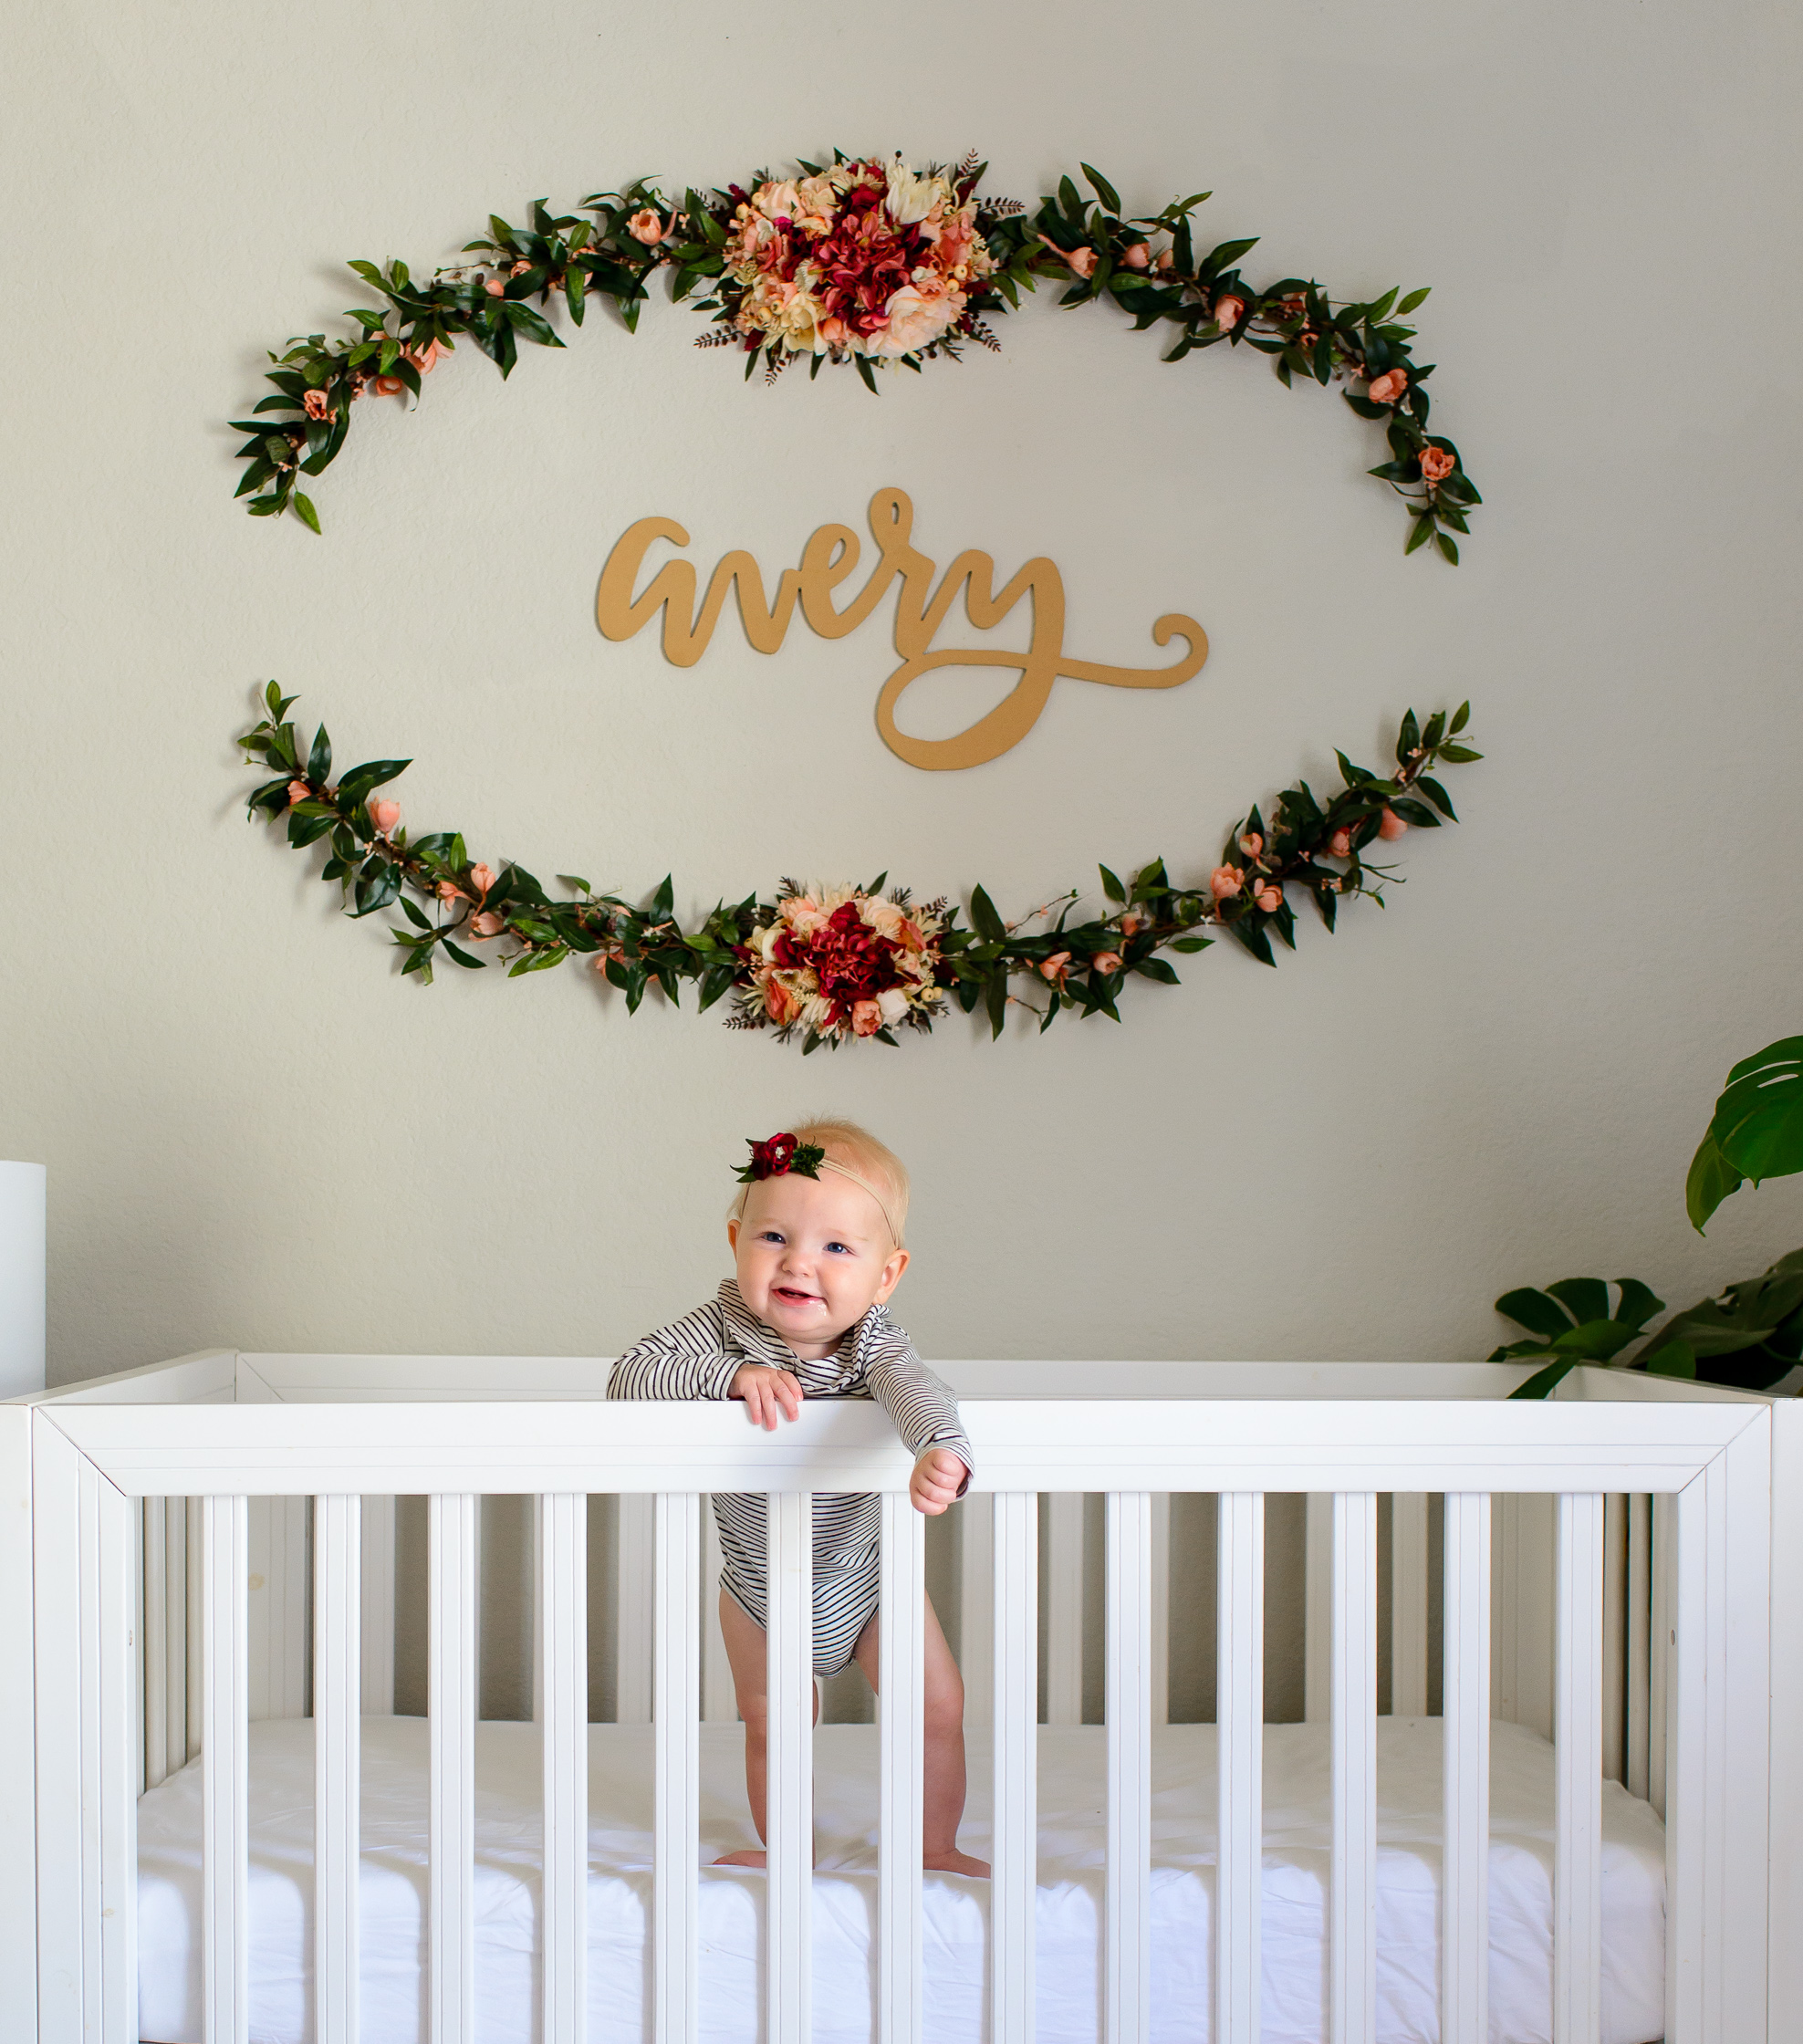
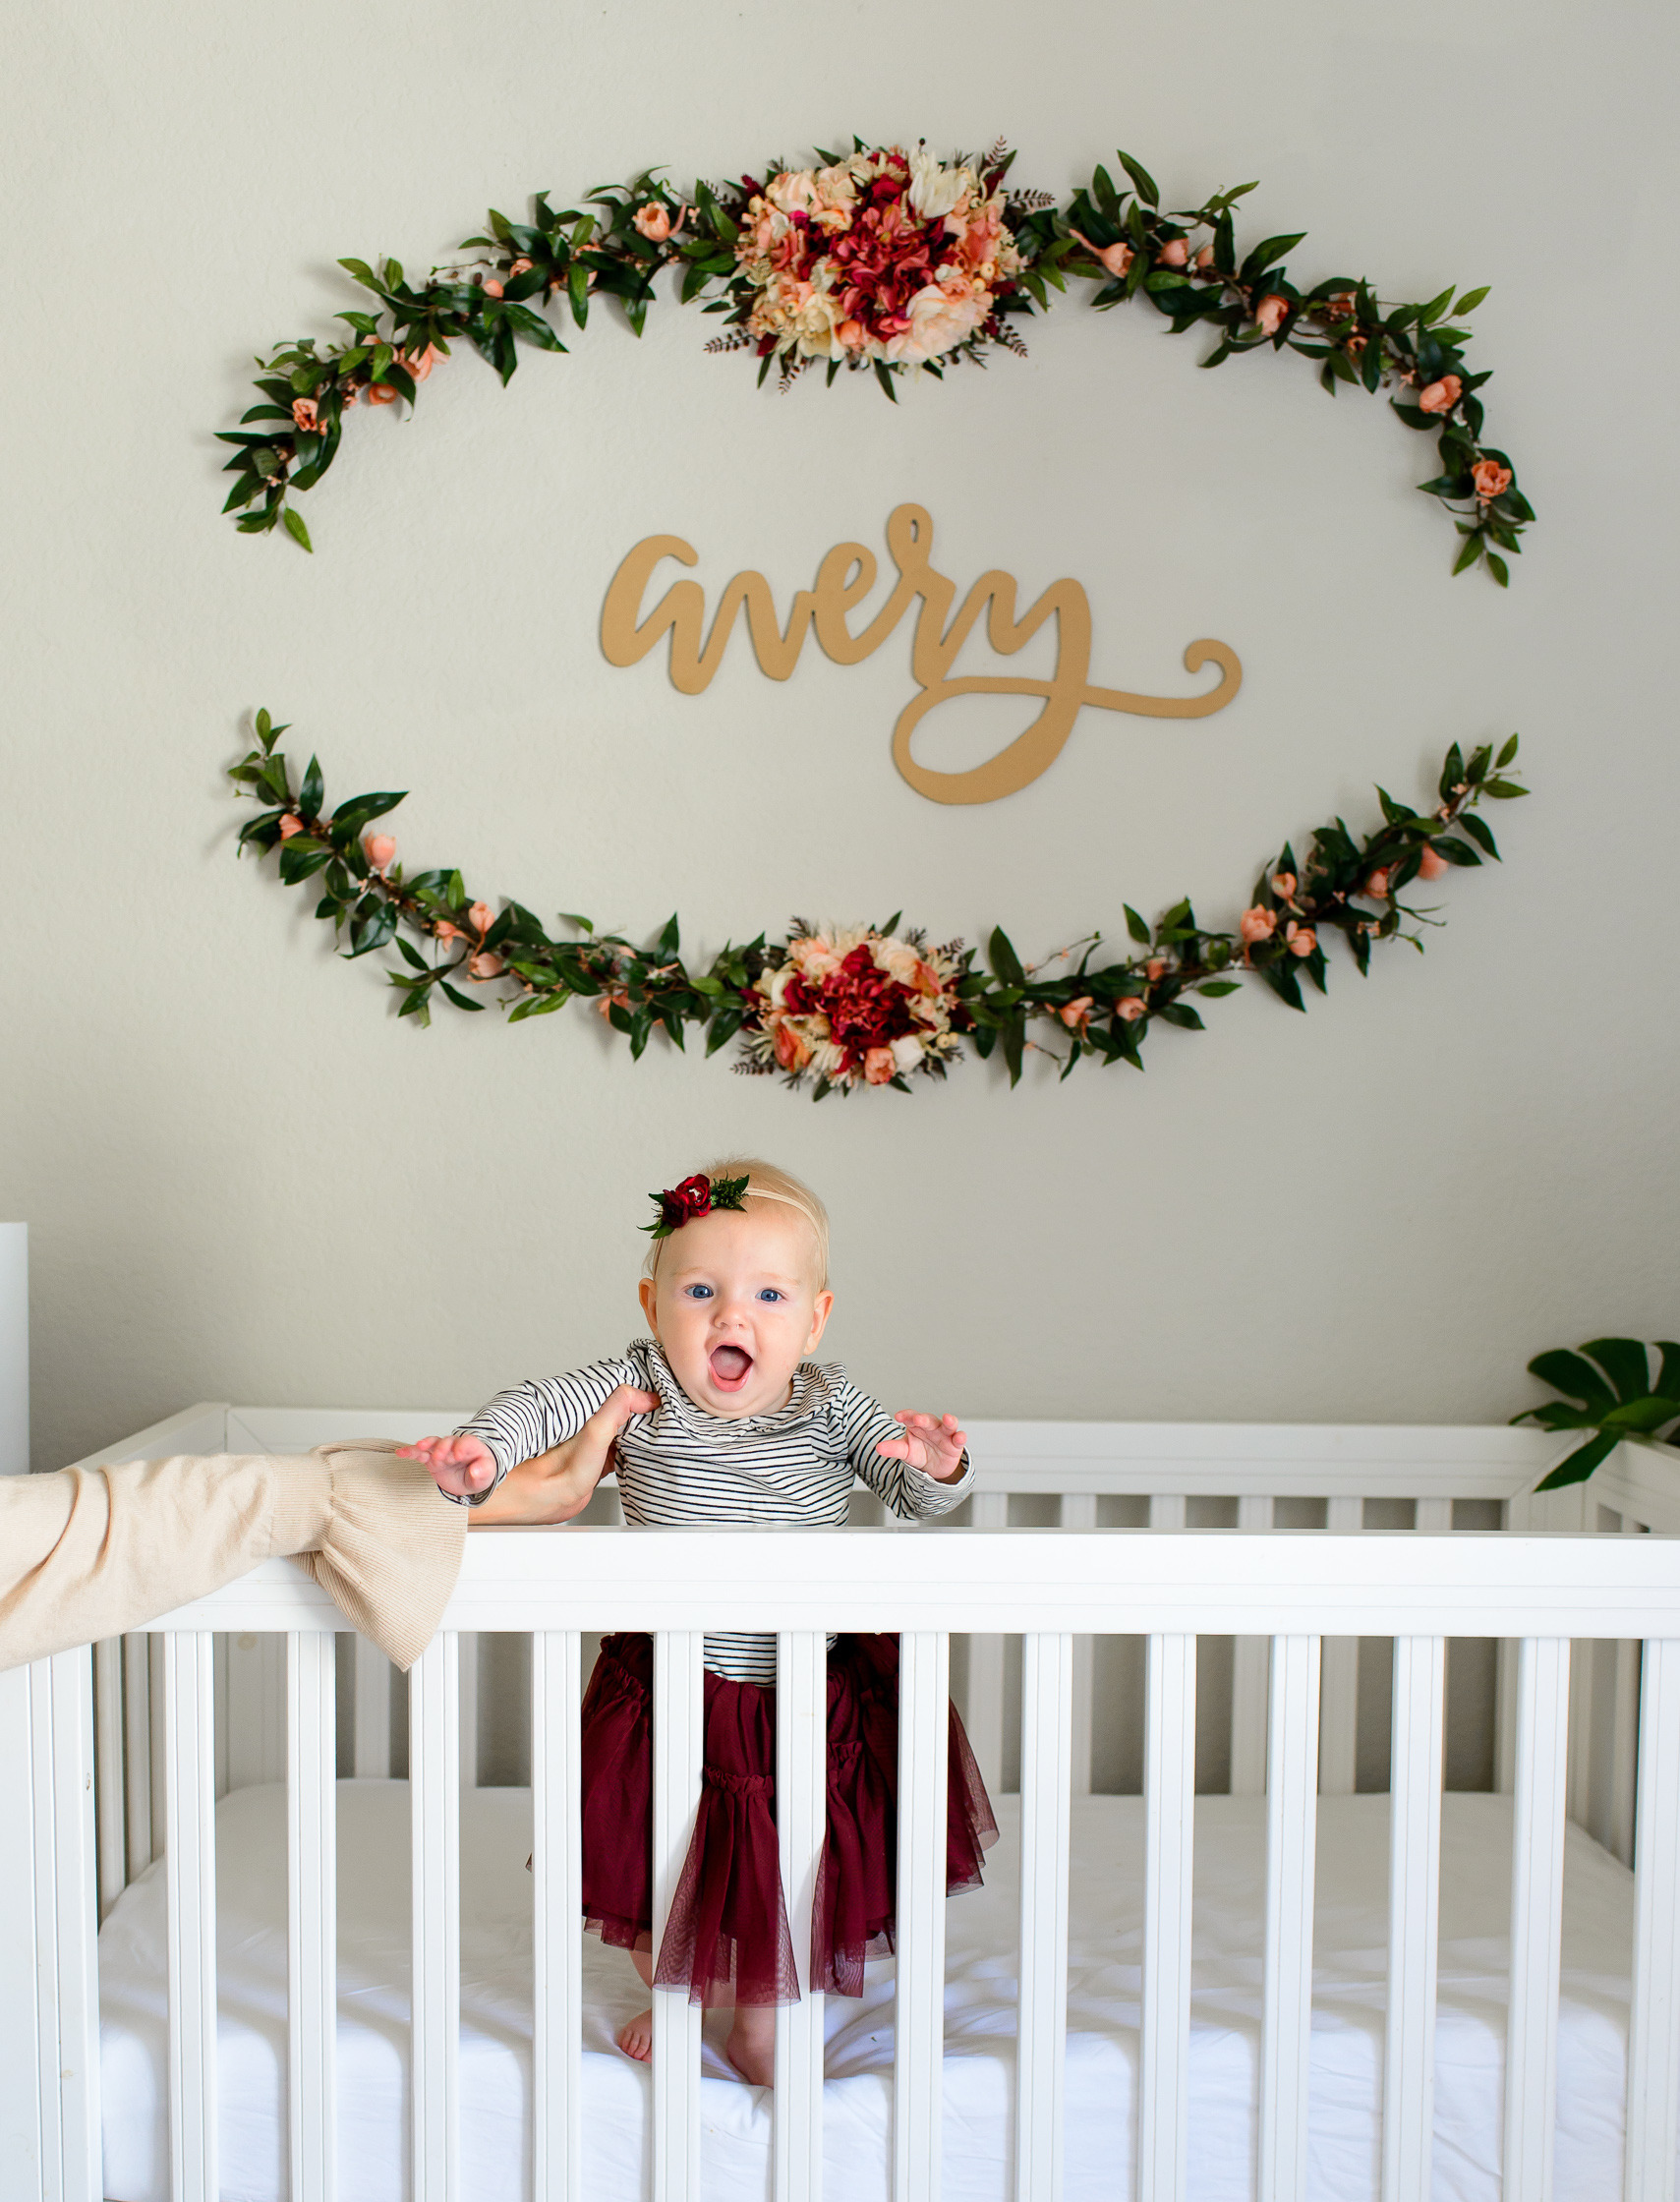 (And if only you could hear us squealing to draw Avery’s eyes to the camera)
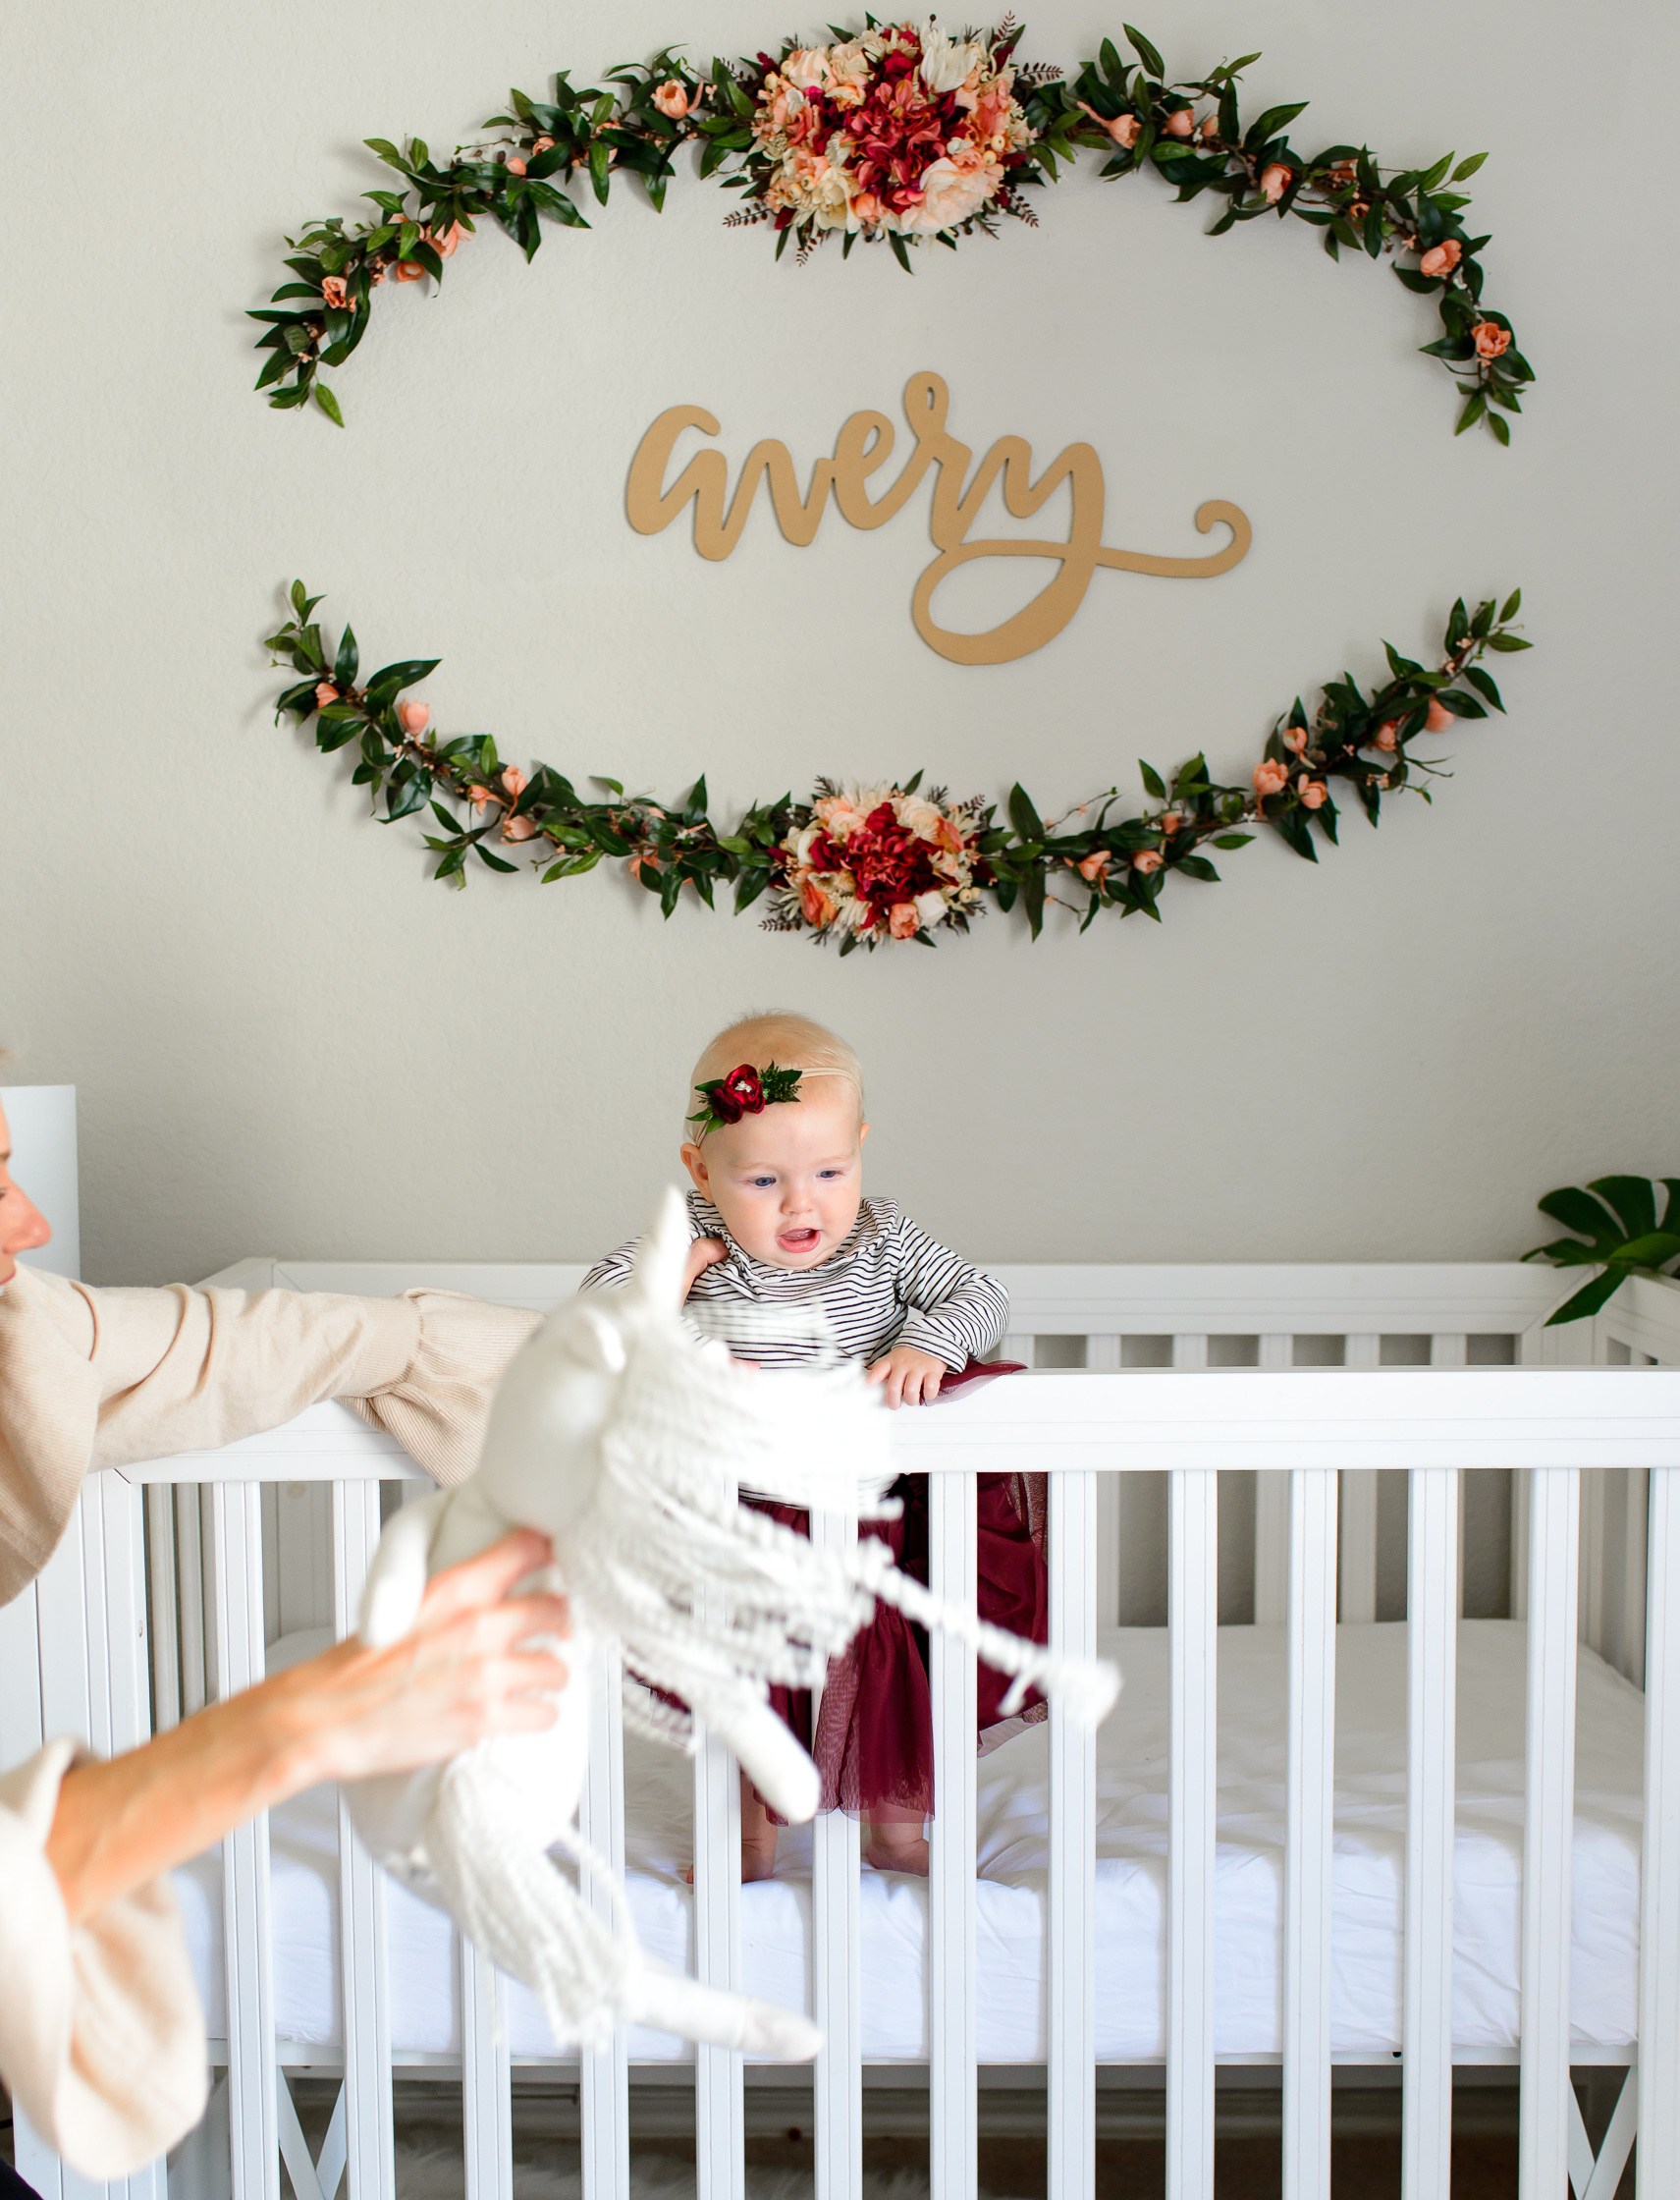

I am so excited that you shared this tutorial! I was planning on making one inspired by yours for our baby girl’s room, but this tutorial will make it so much easier!! I will tag you in a photo as soon as we have it up in her nursery. Thank you!!!
I LOOOOVE that!! Can’t wait to see!
Can you please tell me the font used to make the name? Or where the name was purchased at?
Just saw your comment, Marci!!! But it’s from the Handcrafted Brunette on Etsy! xo
Looks so nice. Very creative diy idea .
Thank you so much for this tutorial! I just read your instructions really carefully to see if I can handle this bc this is exactly what I want to do with my girl’s nursery. I am going to buy the items next week. However, I have a question about the size of name sign you think I should order. I saw that for Avery you chose 24 inches. My daughter’s name will be a little longer (Holland) 7 letters. I still don’t want it to be huge, but curious what size you think would work best to still keep it smaller and centered in the floral piece. Any suggestions? THANKS!
Awesome designs made by using flowers! I think there is no one in the world who says no to flowers